
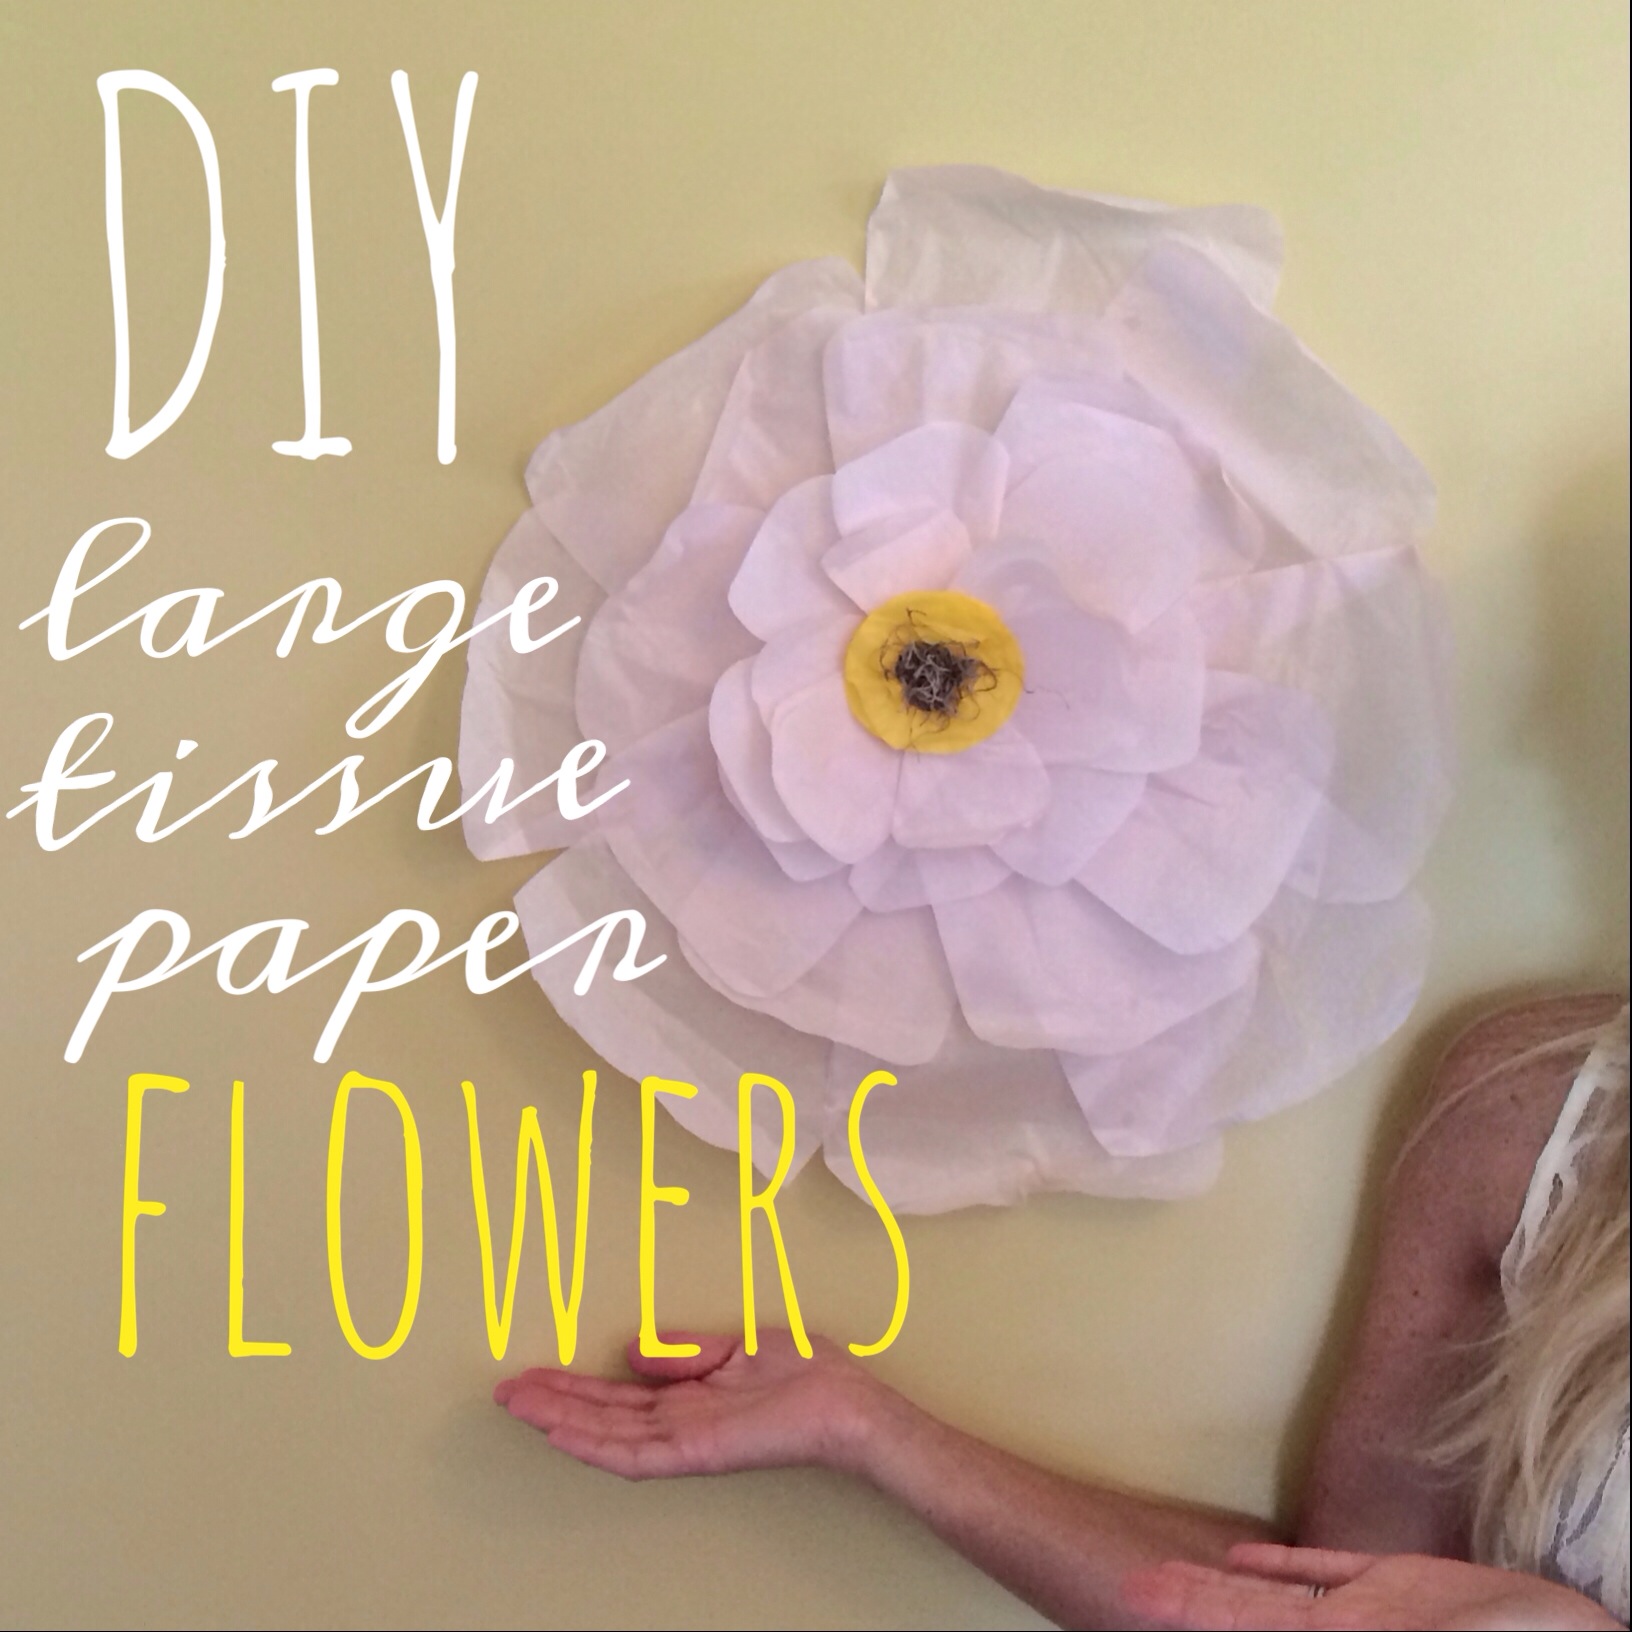
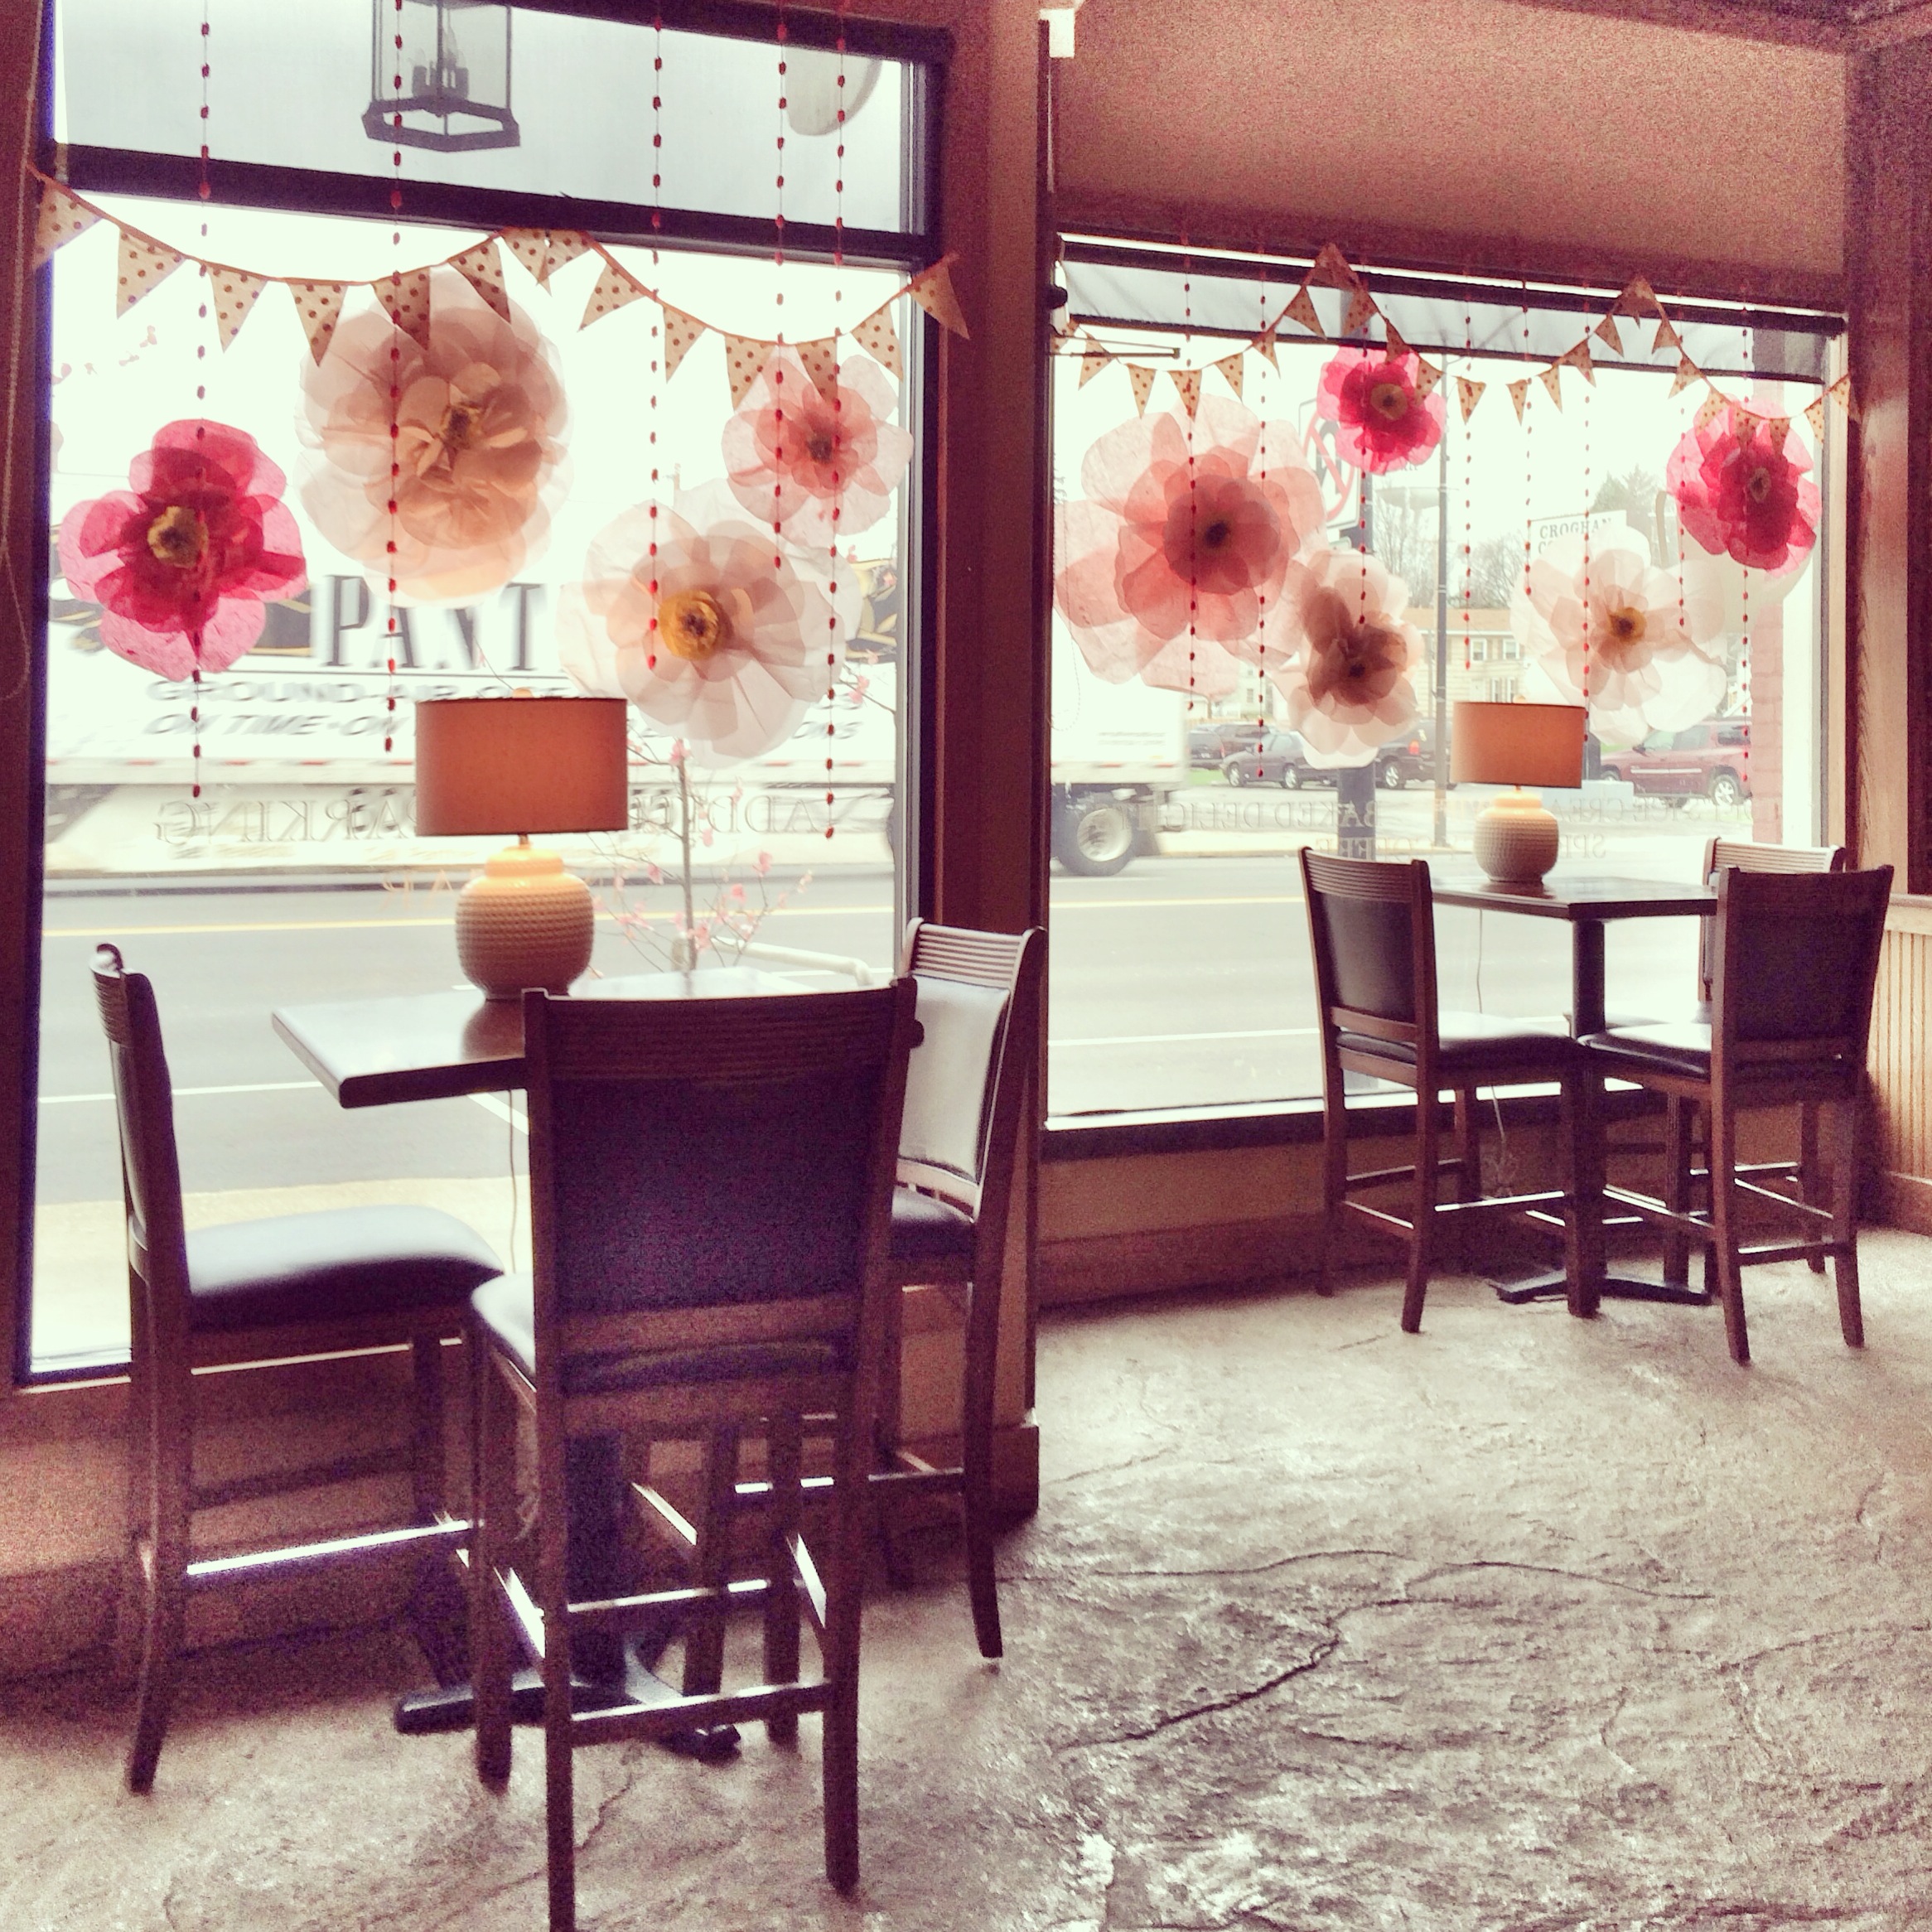
Hi friends! Gah! Sorry it has taken me soooo long to get this post up. I made these flowers for LM’s store front windows over a month ago and I’m SO happy that so many of you enjoy their beauty. Steph and I adore dreaming up little projects and ideas, and creating things for our shop- it’s the little things in life that we truly believe can brighten someone’s day!
Okay so this is what I did to create these beauts. I ended up creating my own pattern and technique because I couldn’t find anything elsewhere that worked. The pattern/technique in this tutorial is for a MEDUIM tissue paper flower. If you want to make larger or smaller flowers you are going to do the exact same thing but obviously on a larger or smaller scale. In the shop we have small, medium and large sizes hanging in the windows.
MATERIALS:
 Glue gun
pencil, ruler, scissors
tissue paper for PETALS (one package of 8 sheets will make 2 MEDUIM flowers)
tissue paper for CENTER (yellow is the best color for this)
brown grass (you can find this at any craft store)
*As I mentioned above, one package (of 8 sheets) tissue paper will make 2 MEDUIM sized flowers.
DIRECTIONS:
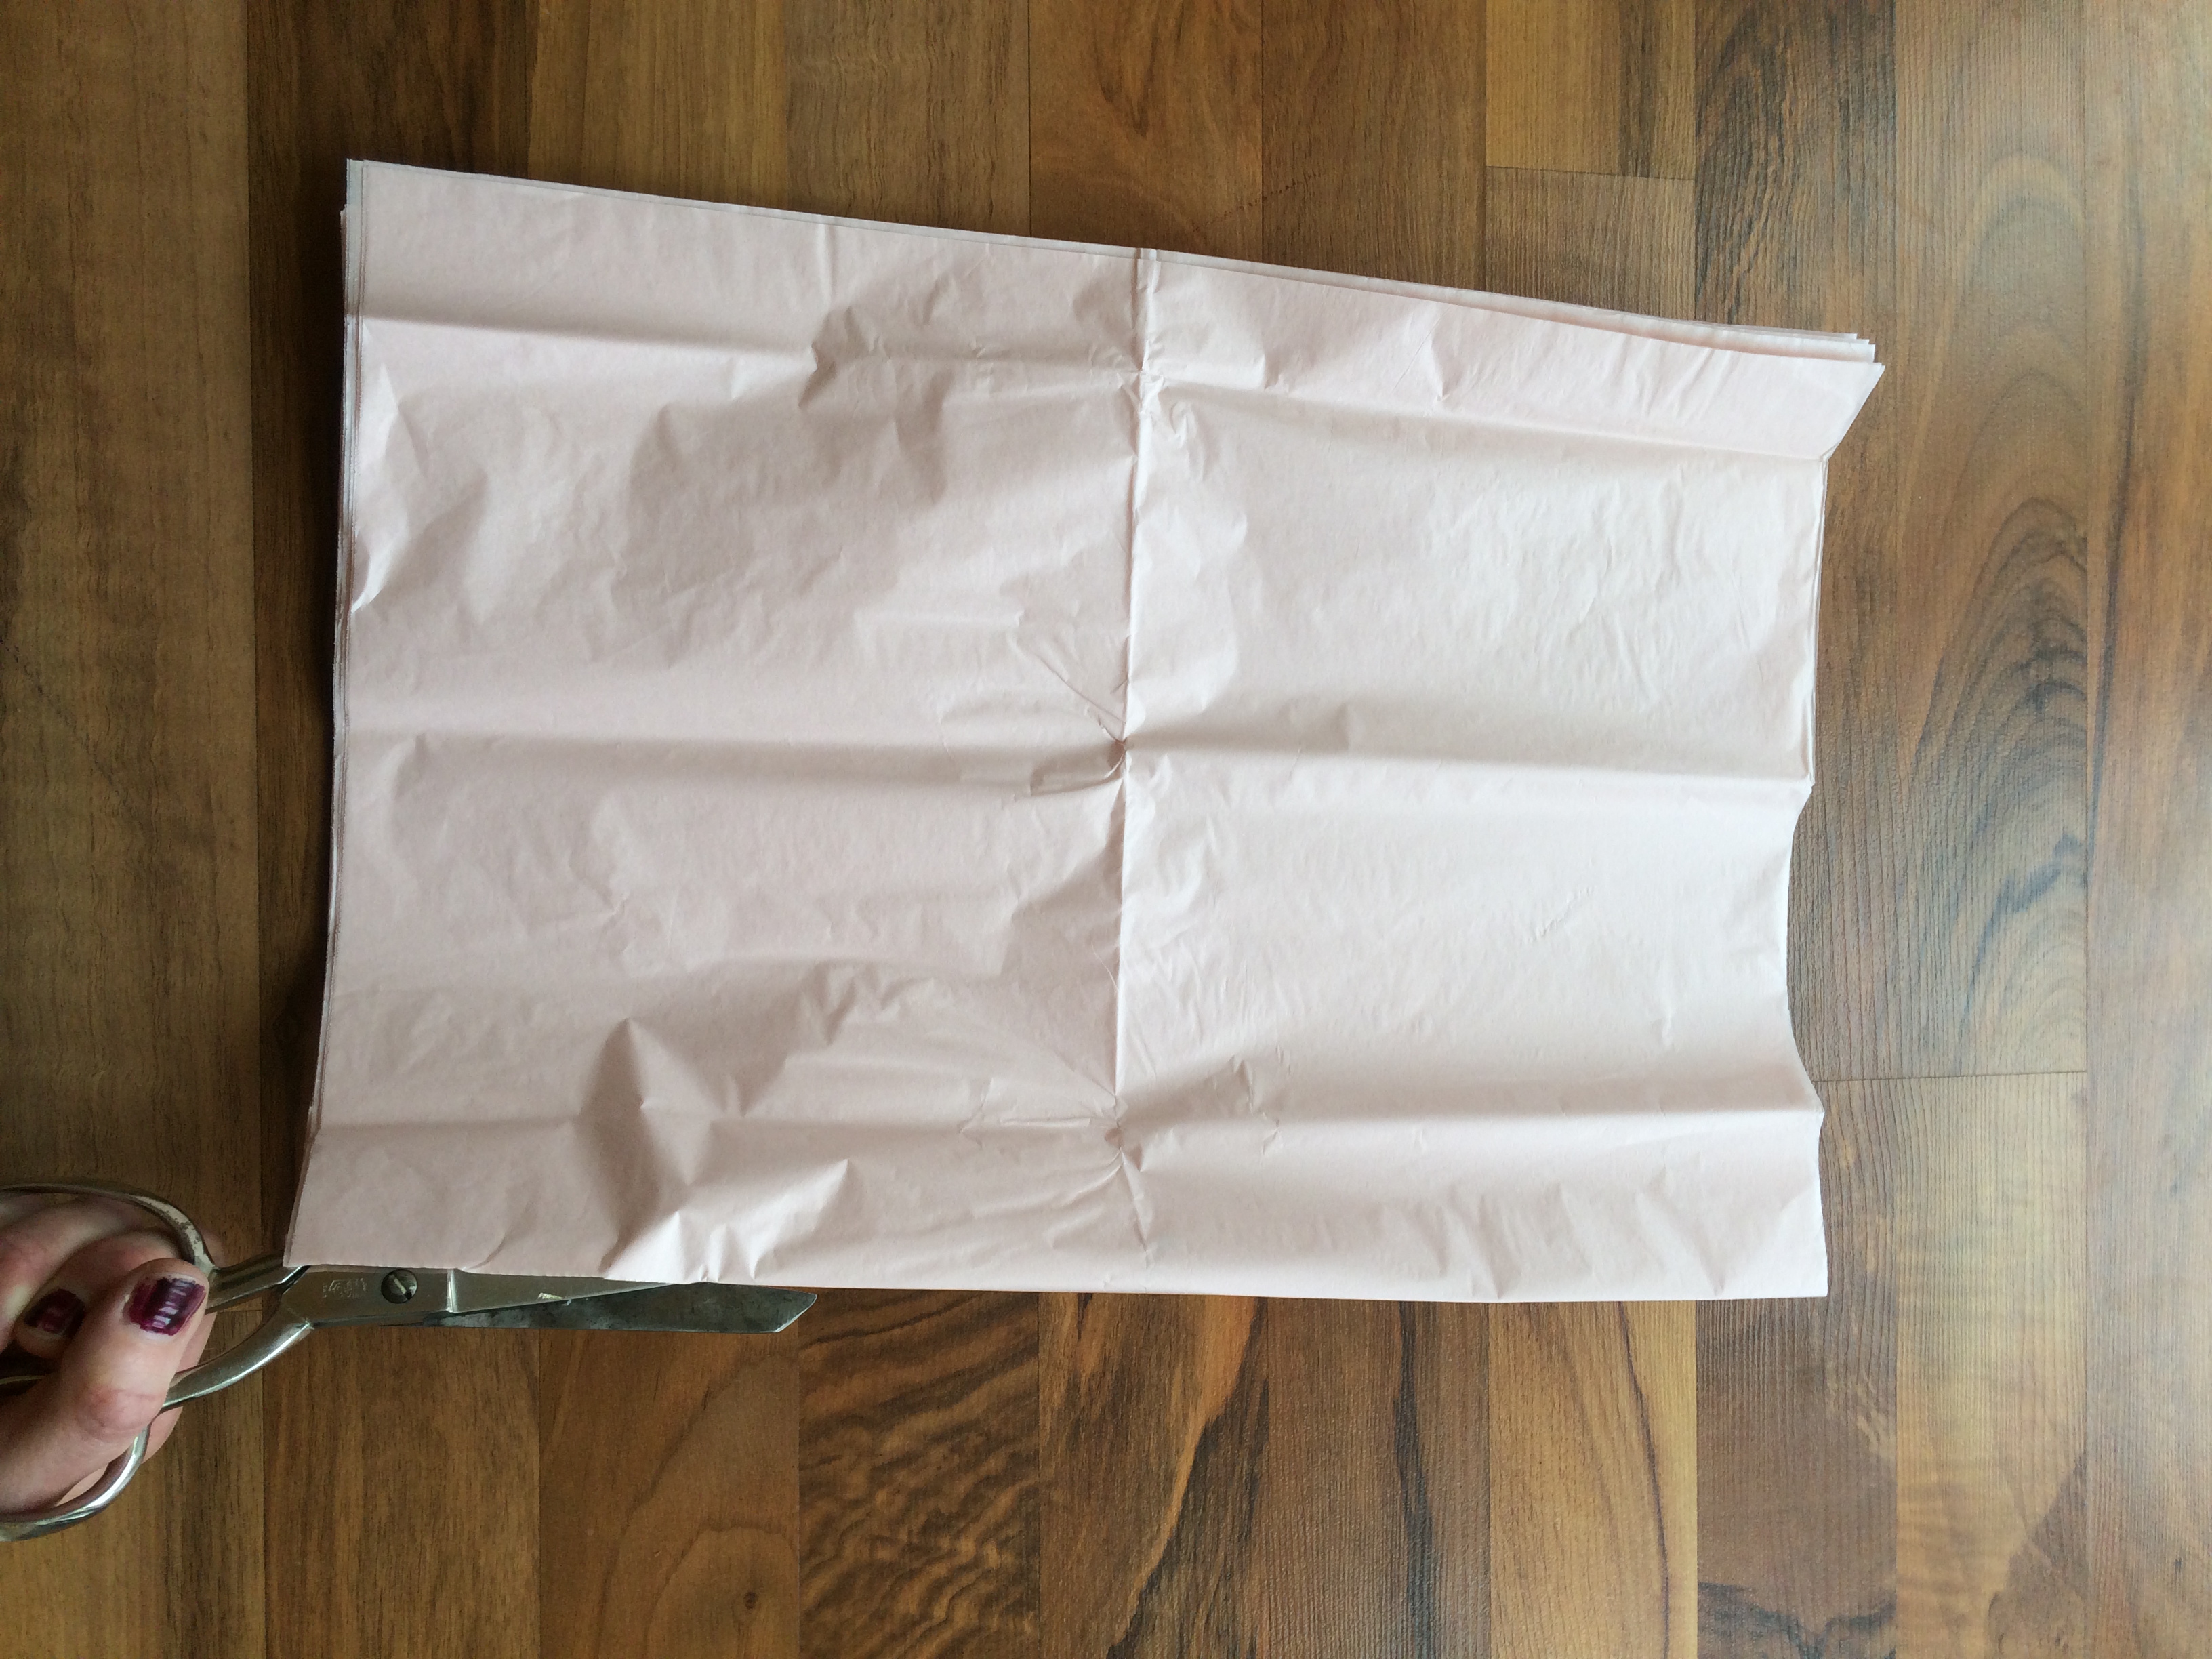
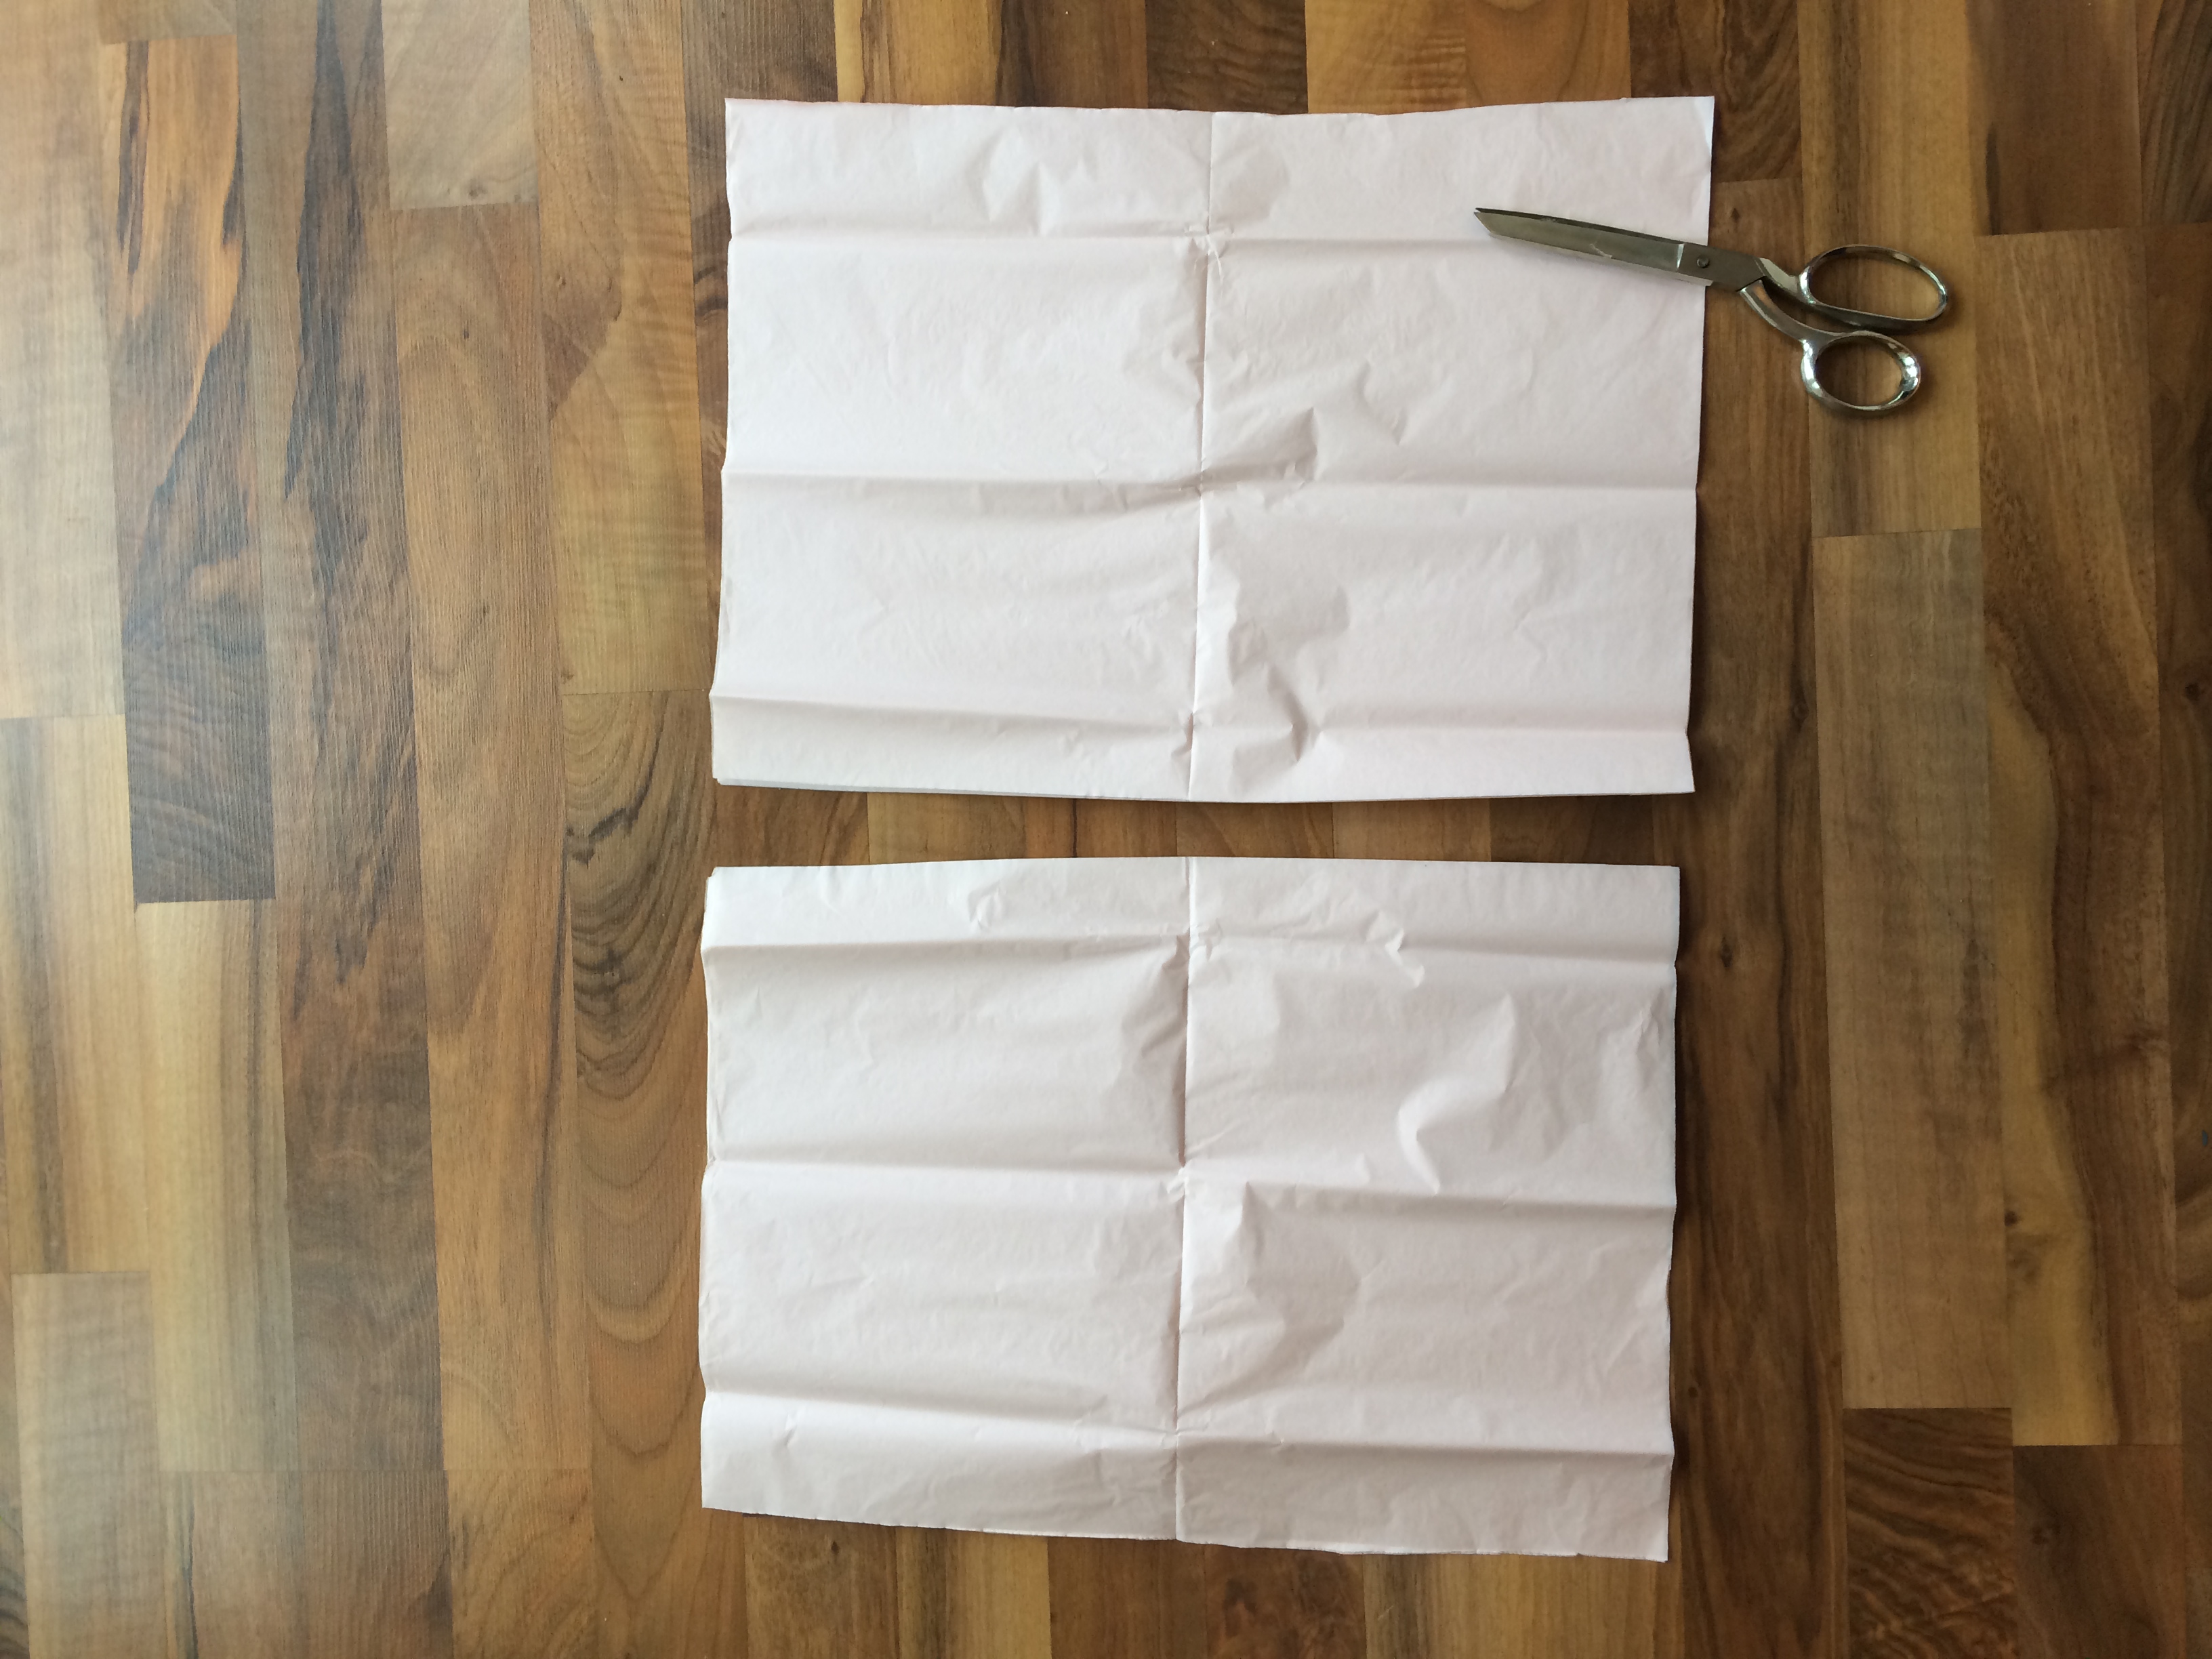
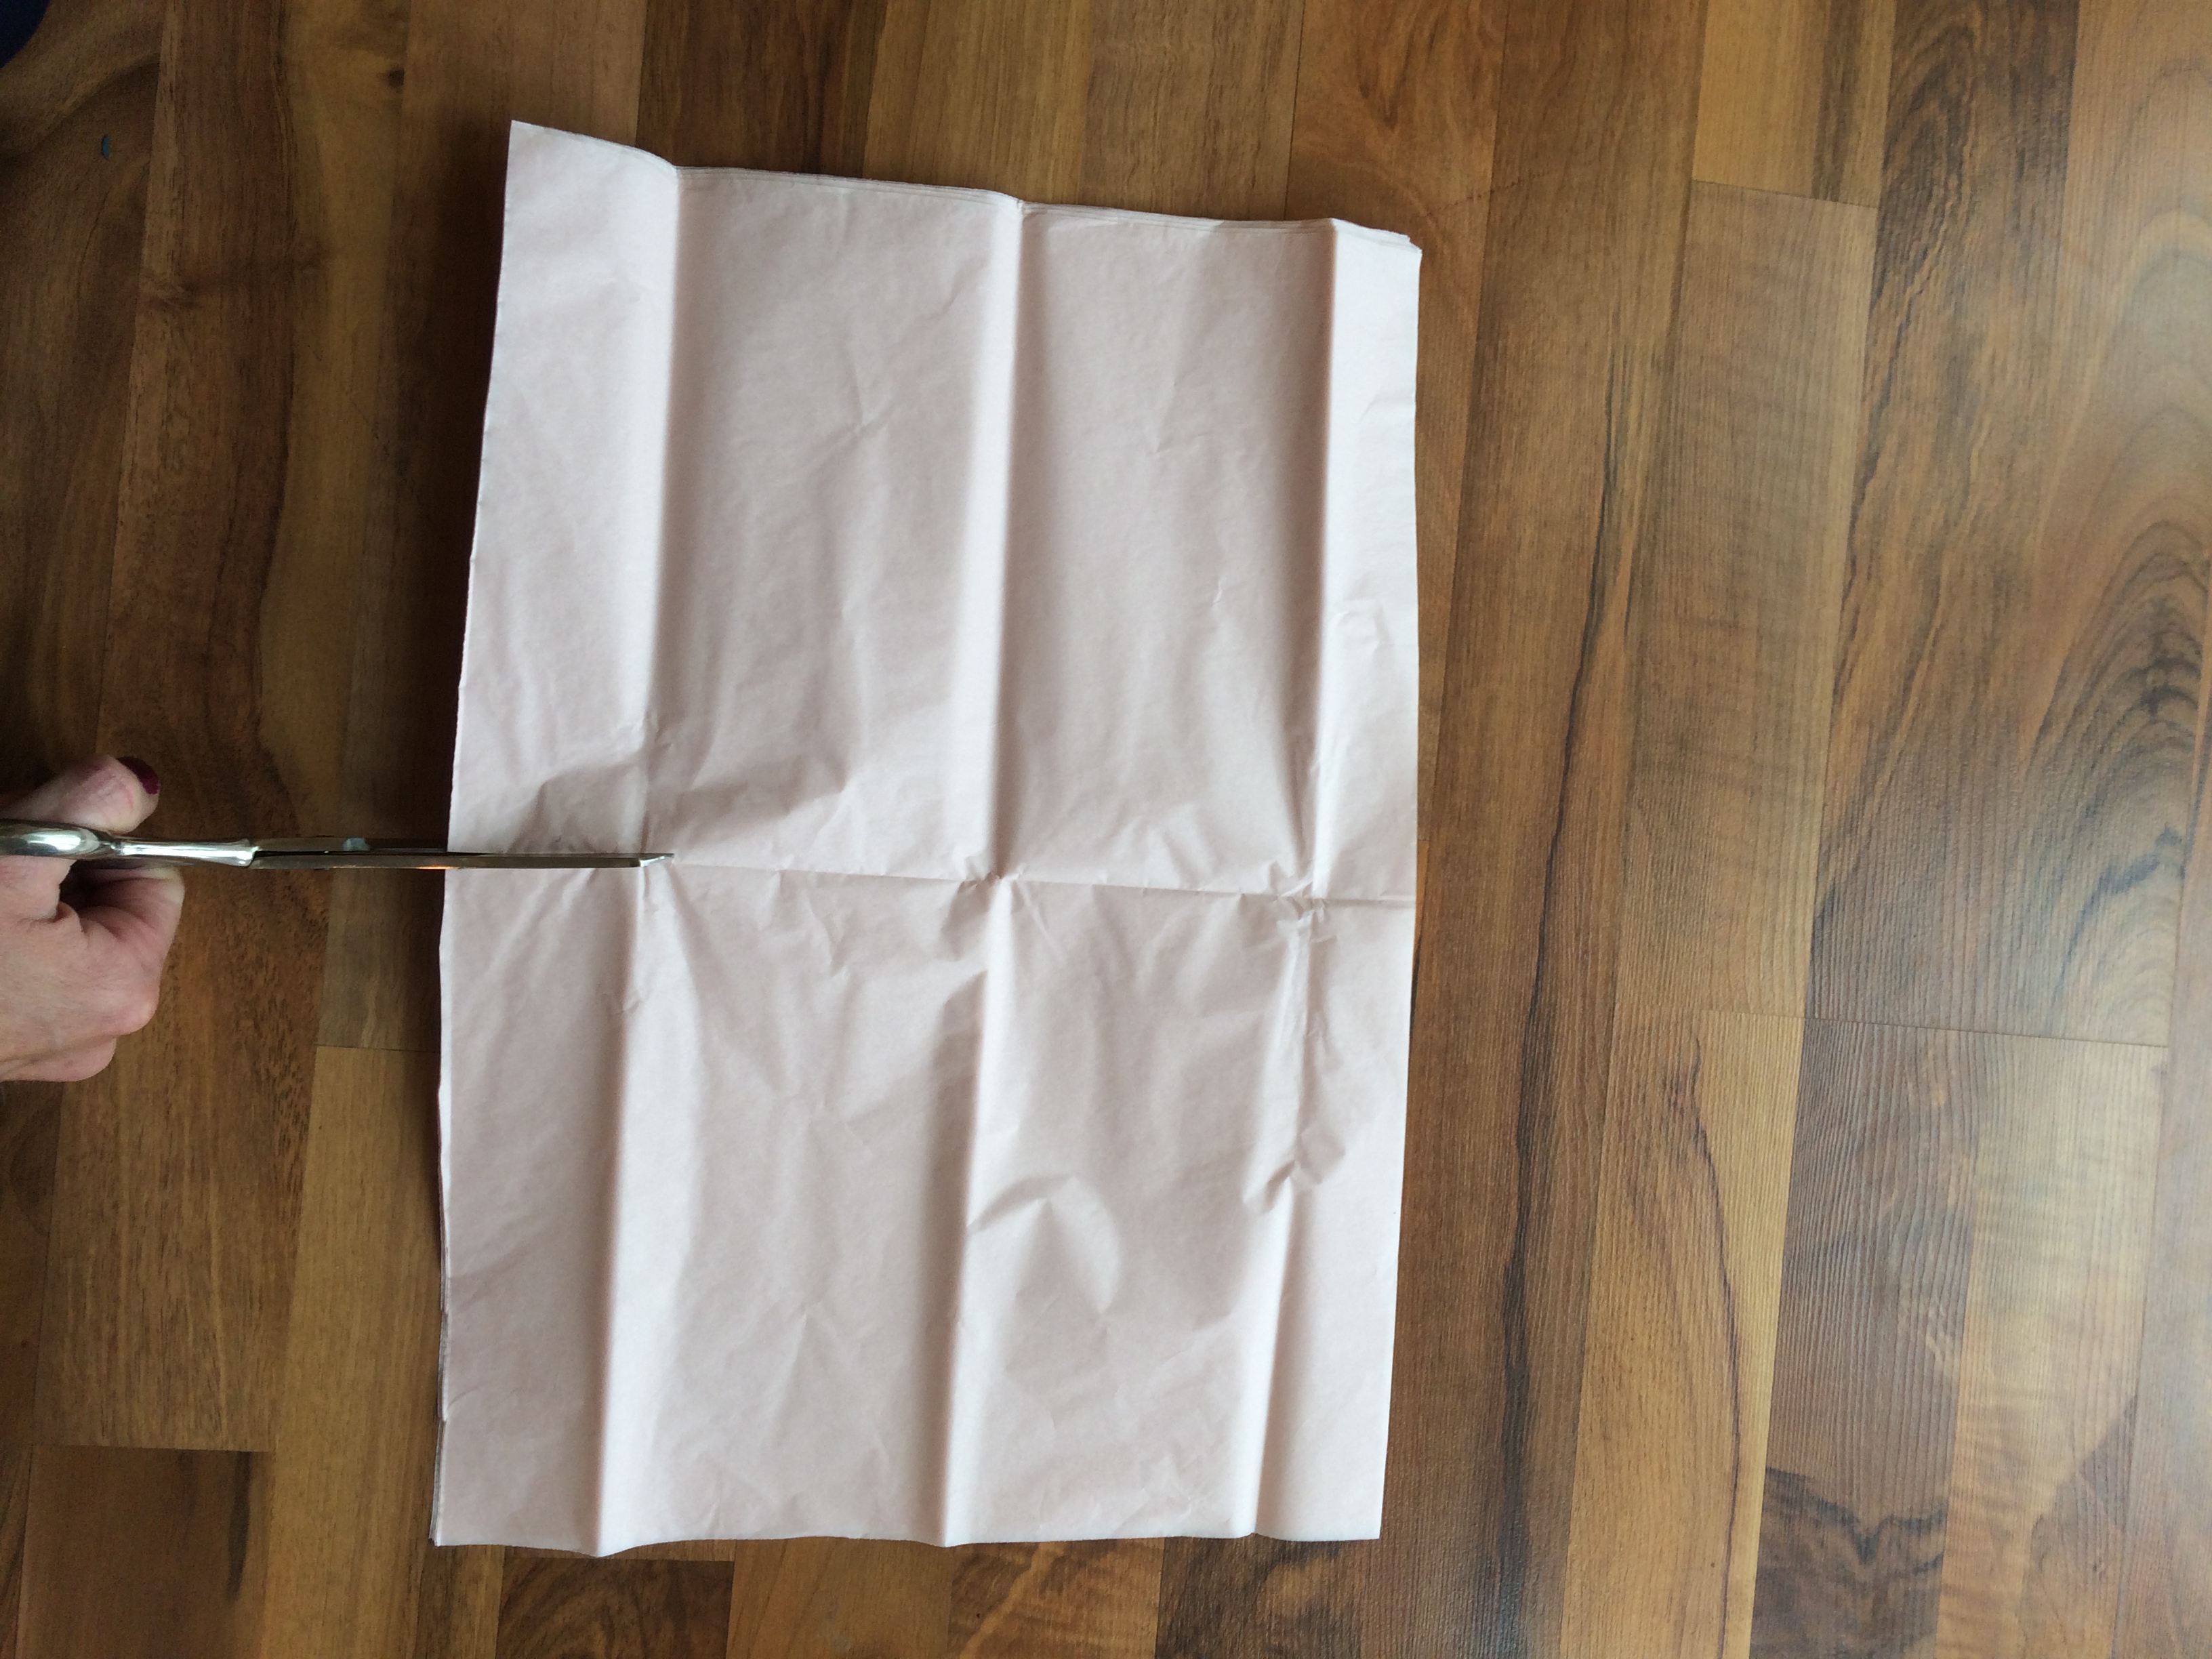
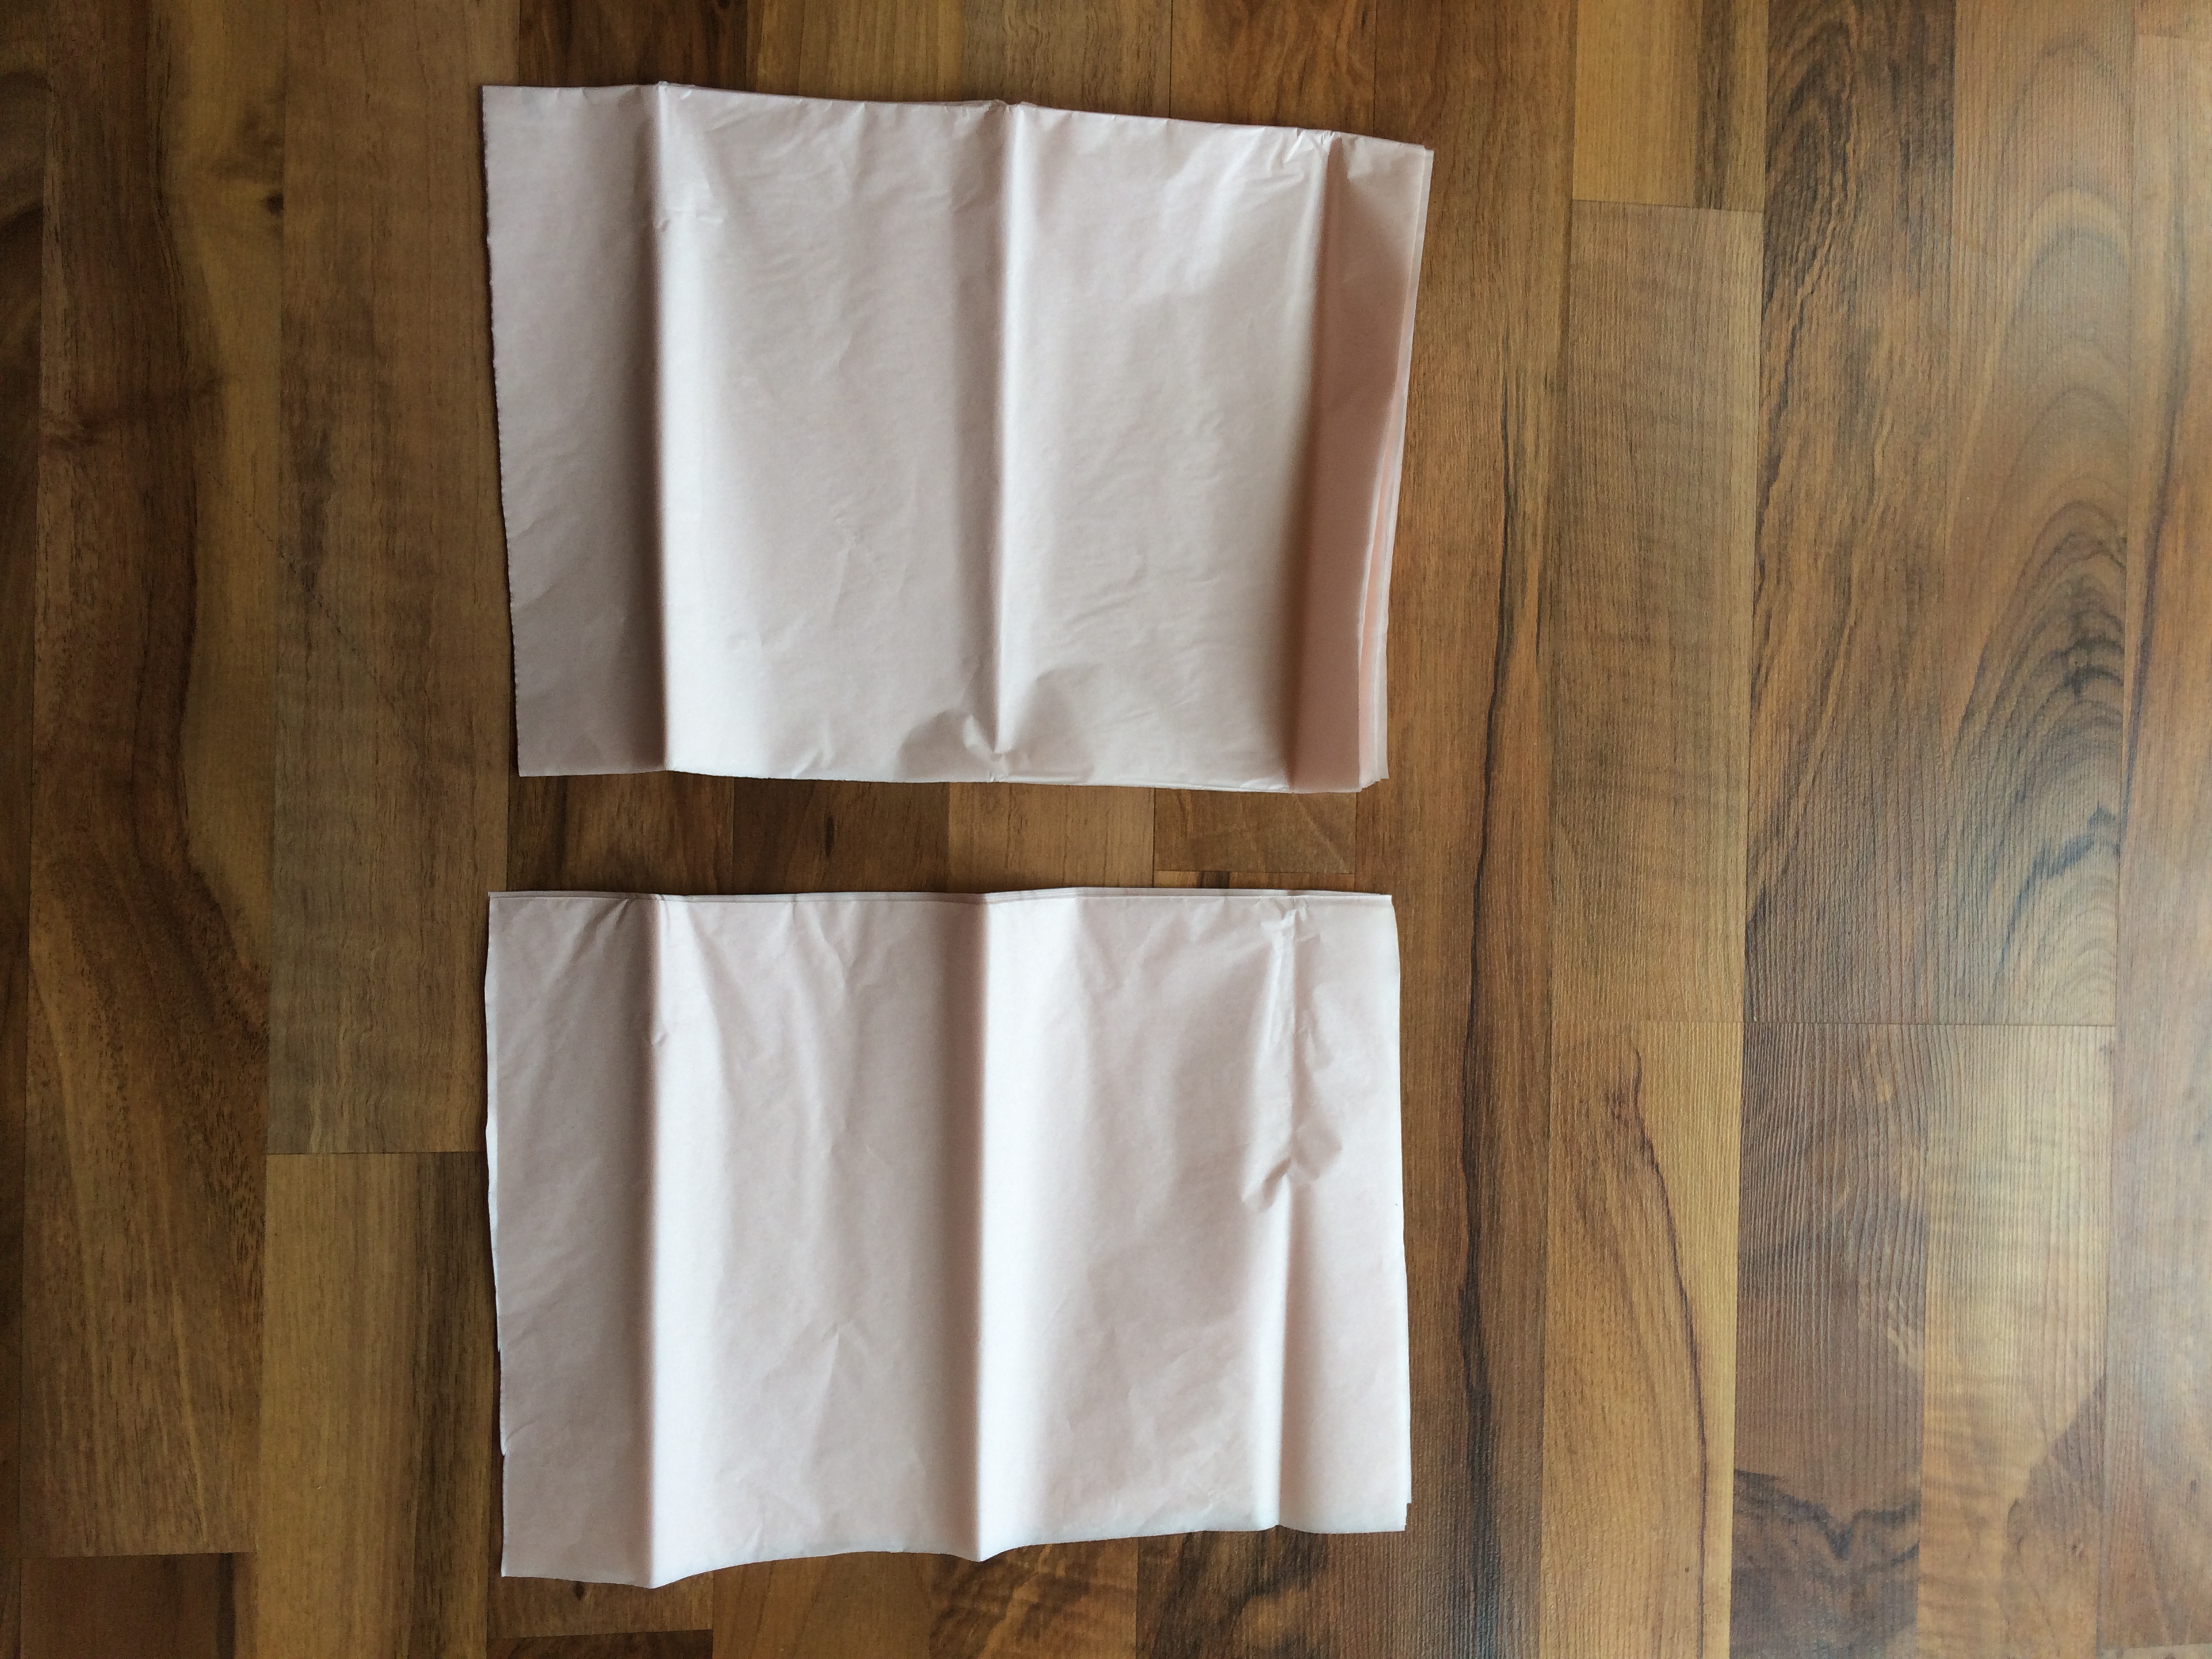
First, unfold all 8 sheets of tissue paper and lay flat. Fold the stack in half and cut the sheets in half all at once. Now you have two even stacks of 8 sheets of tissue paper. Each of these stacks will make one MEDIUM flower. You only need one of these two stacks for this tutorial (so set the other one aside- you wont need it until you’re ready to repeat this whole tutorial and make another flower)

MAKING THE PETALS:
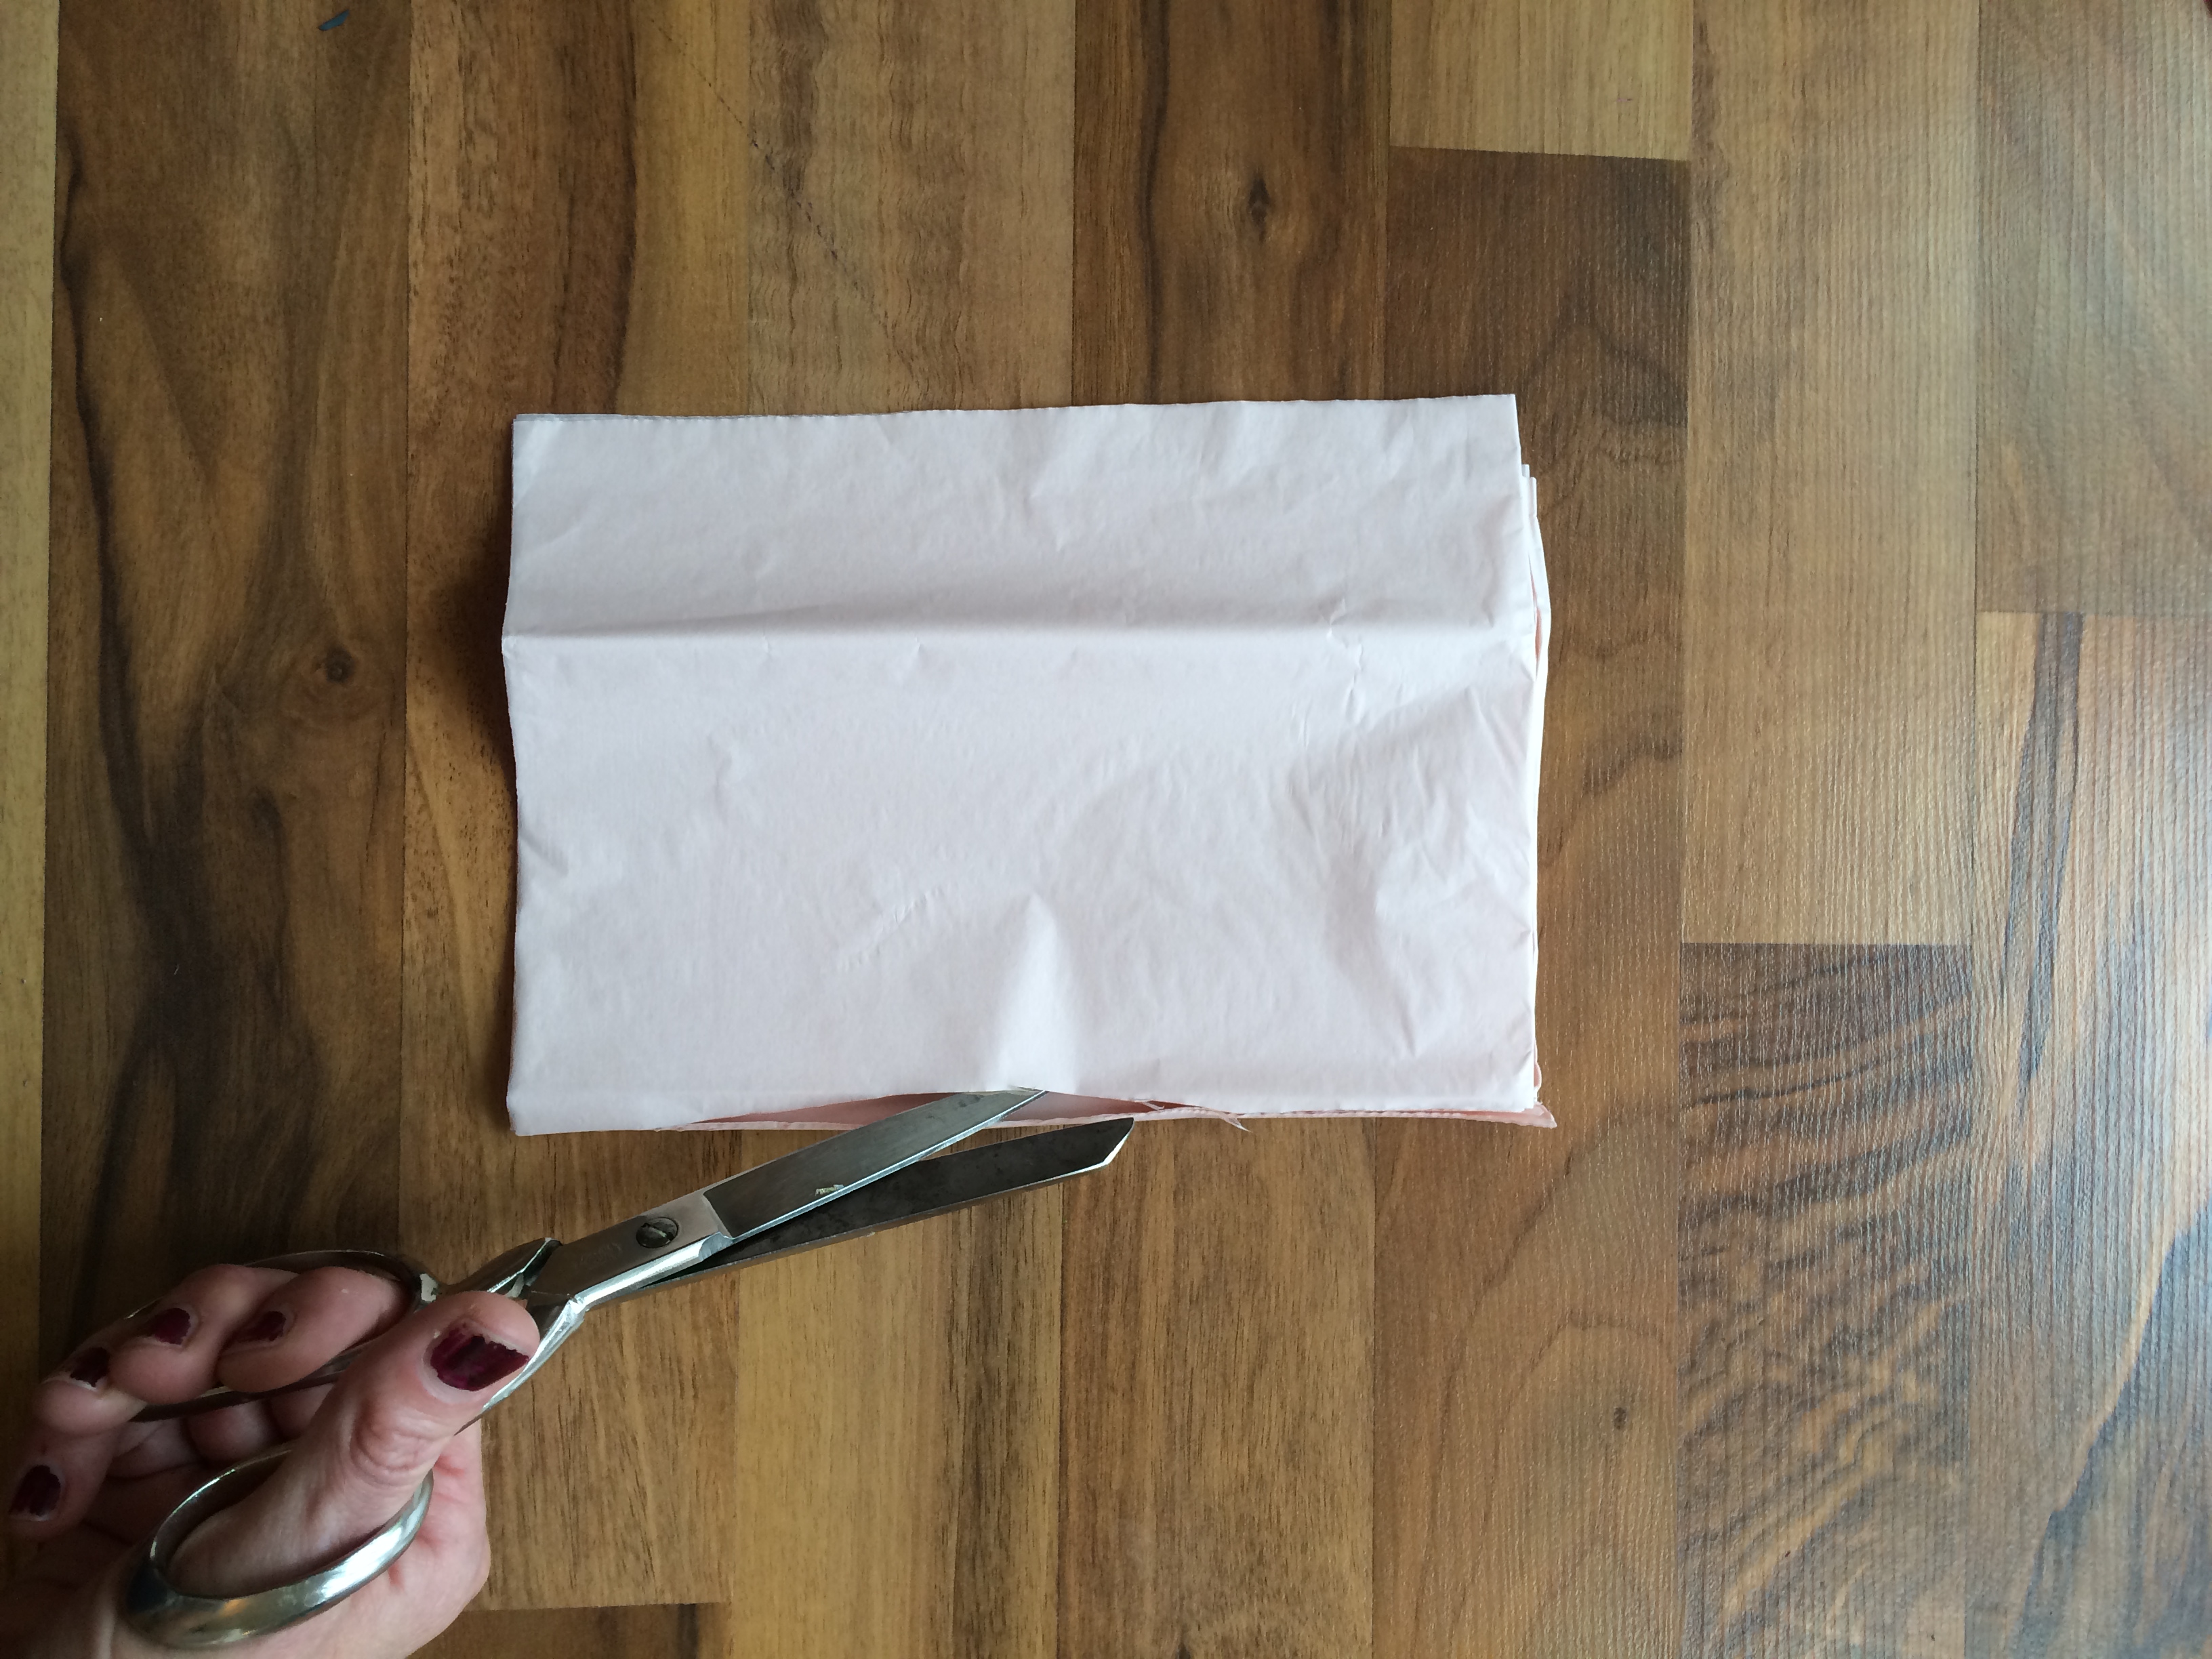
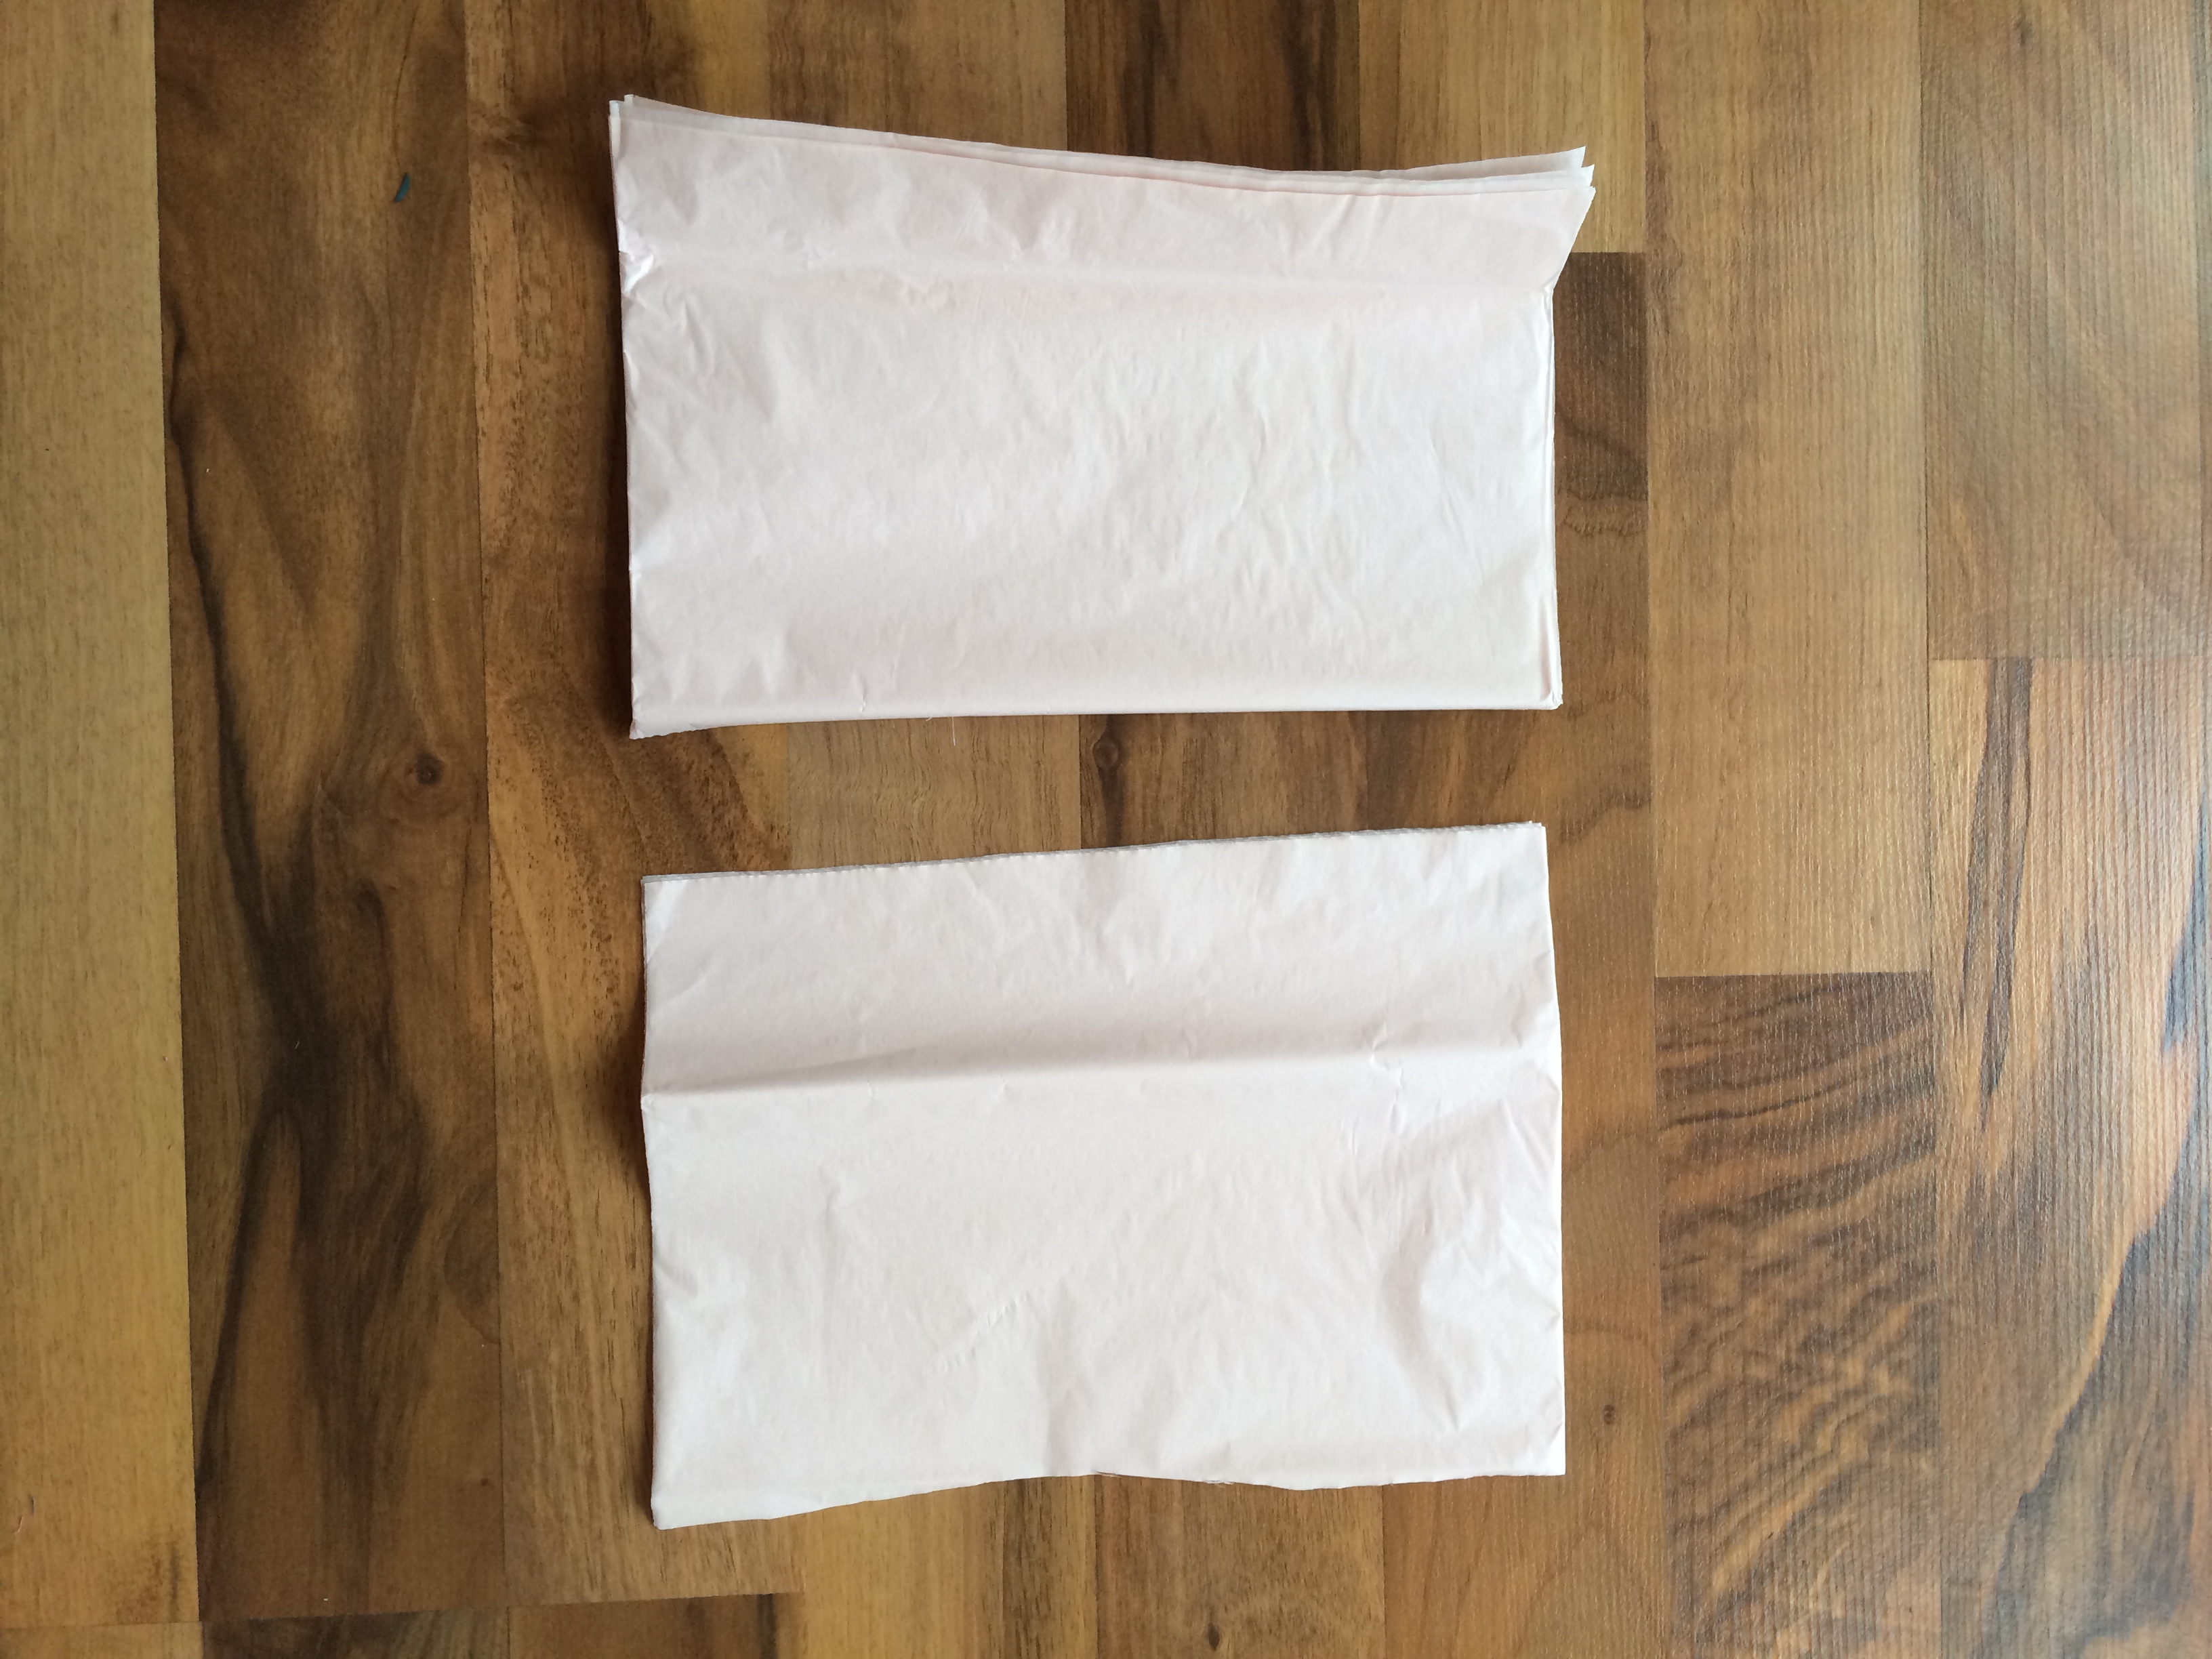
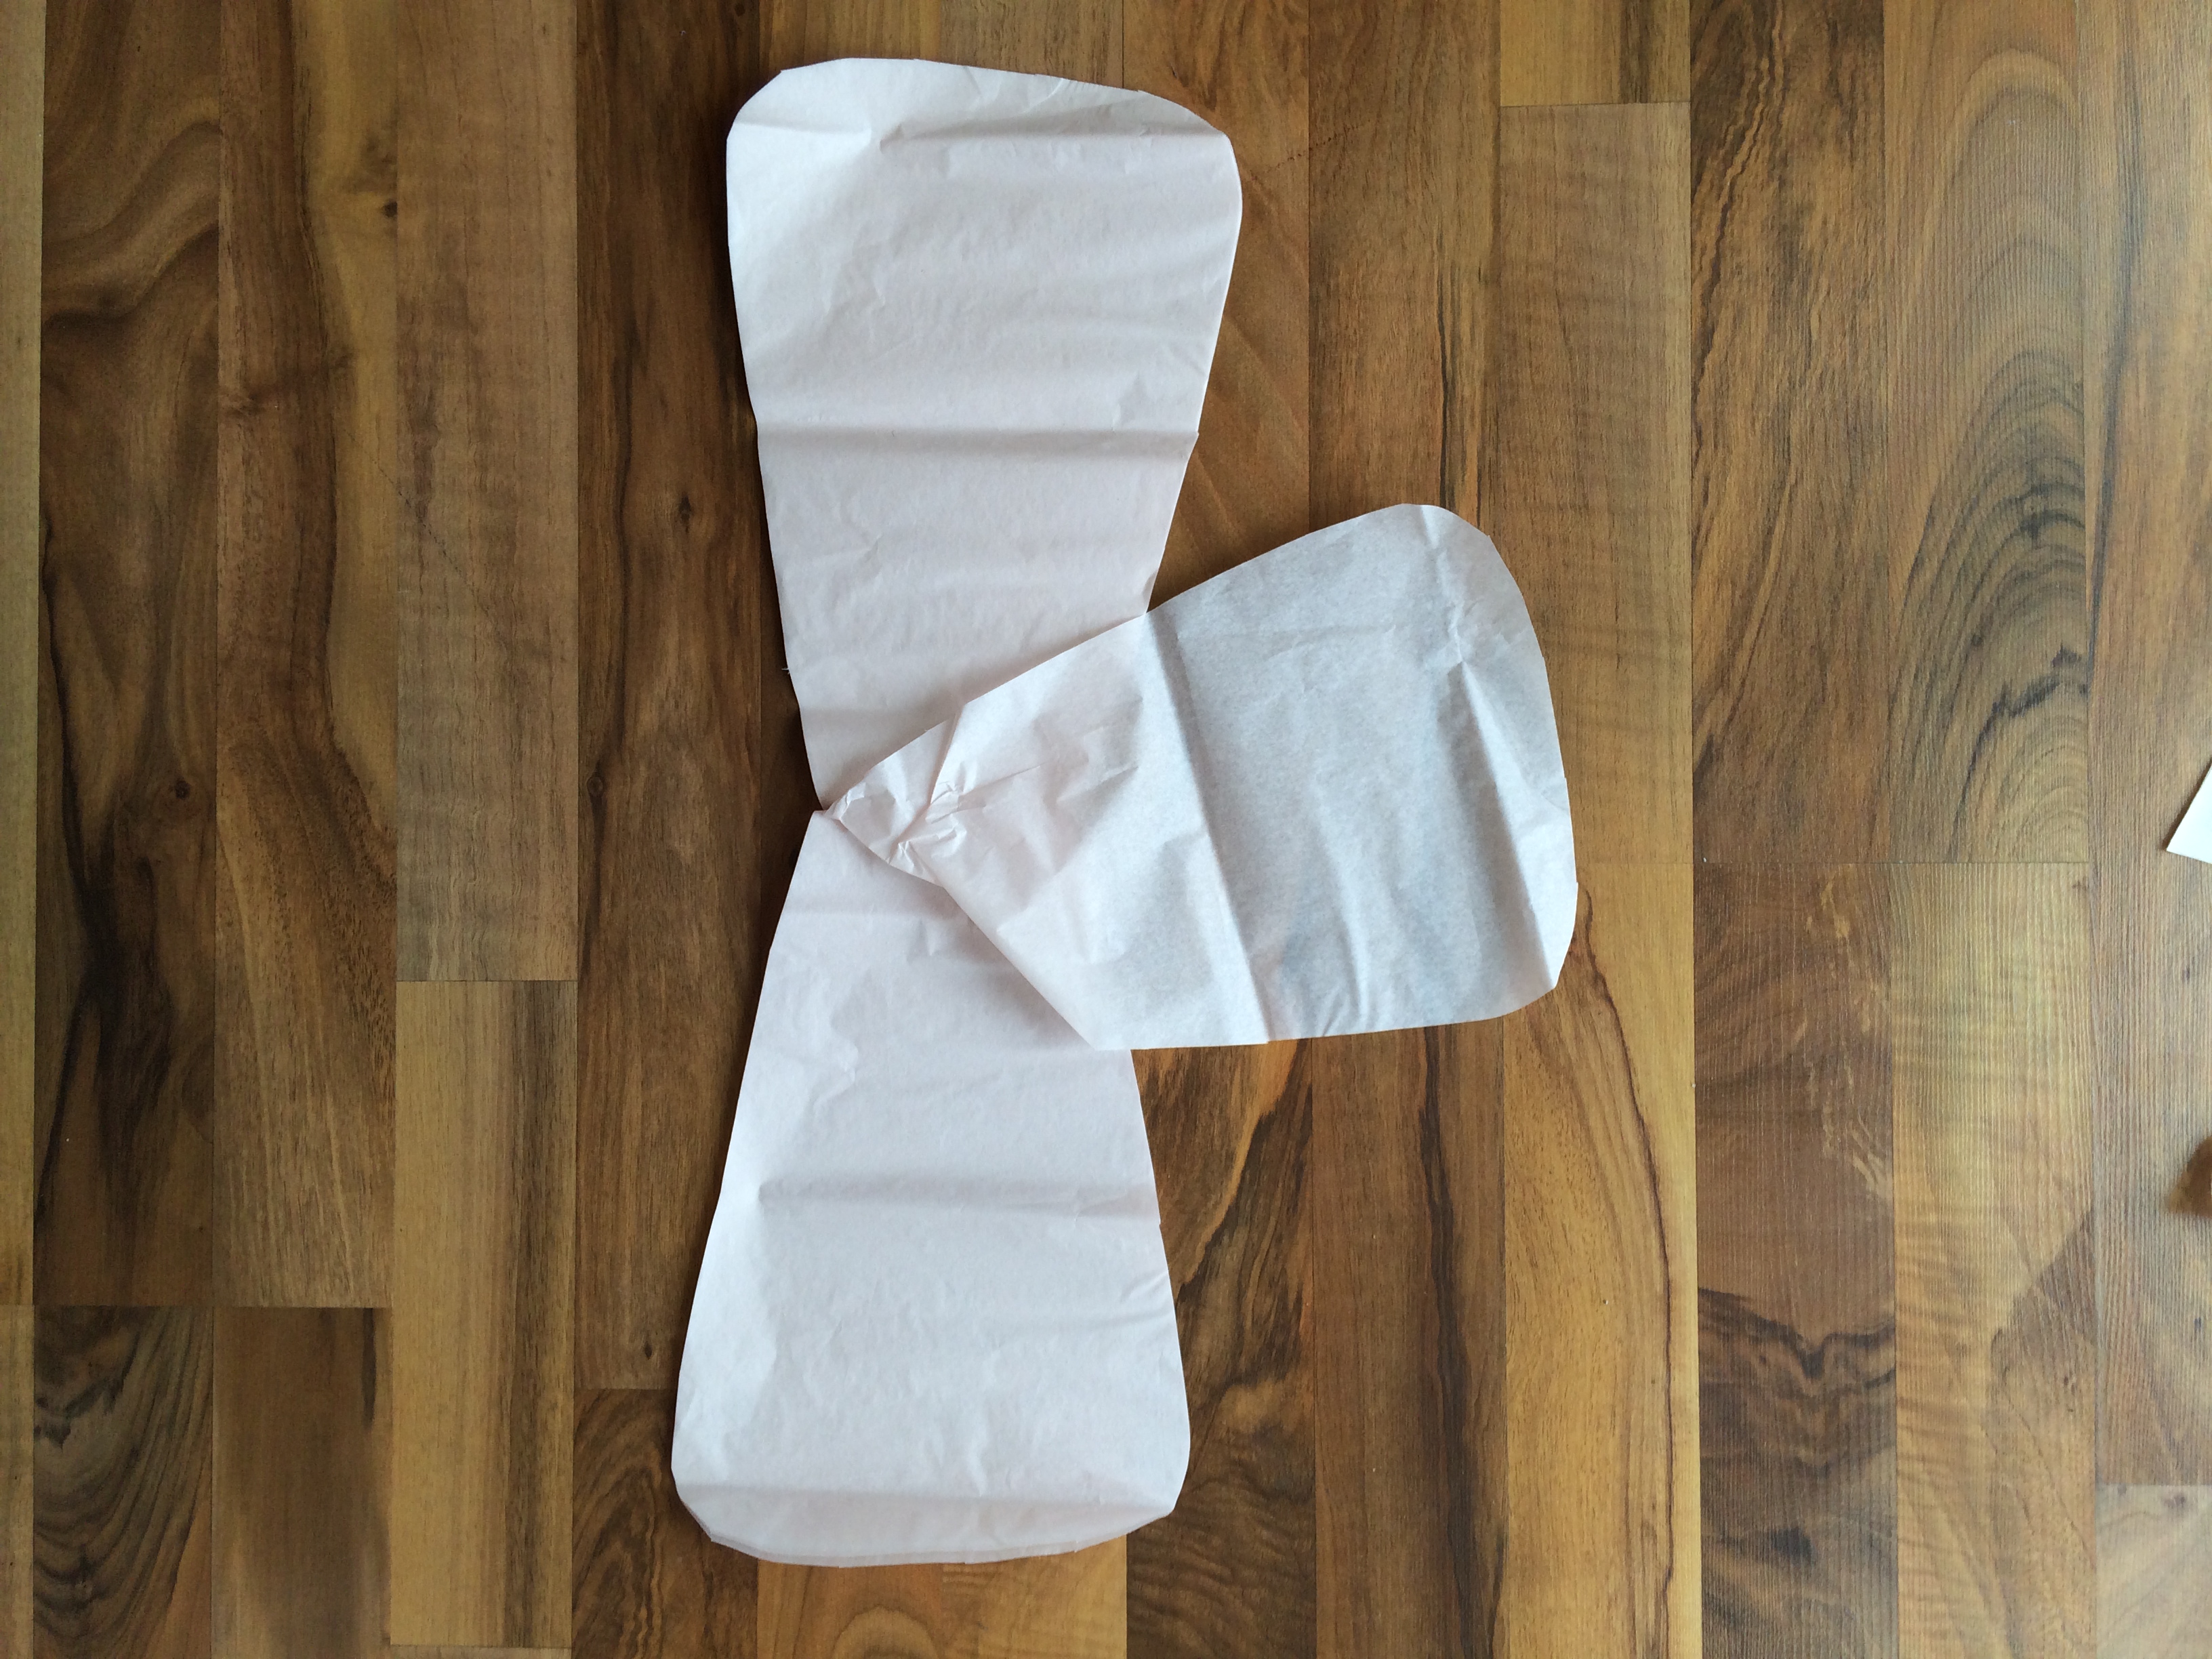
Take the stack of tissue paper you are going to use for your flower and cut in half again like this. We will use these two stacks of tissue paper to make large, medium, small, and tiny size flower petals.
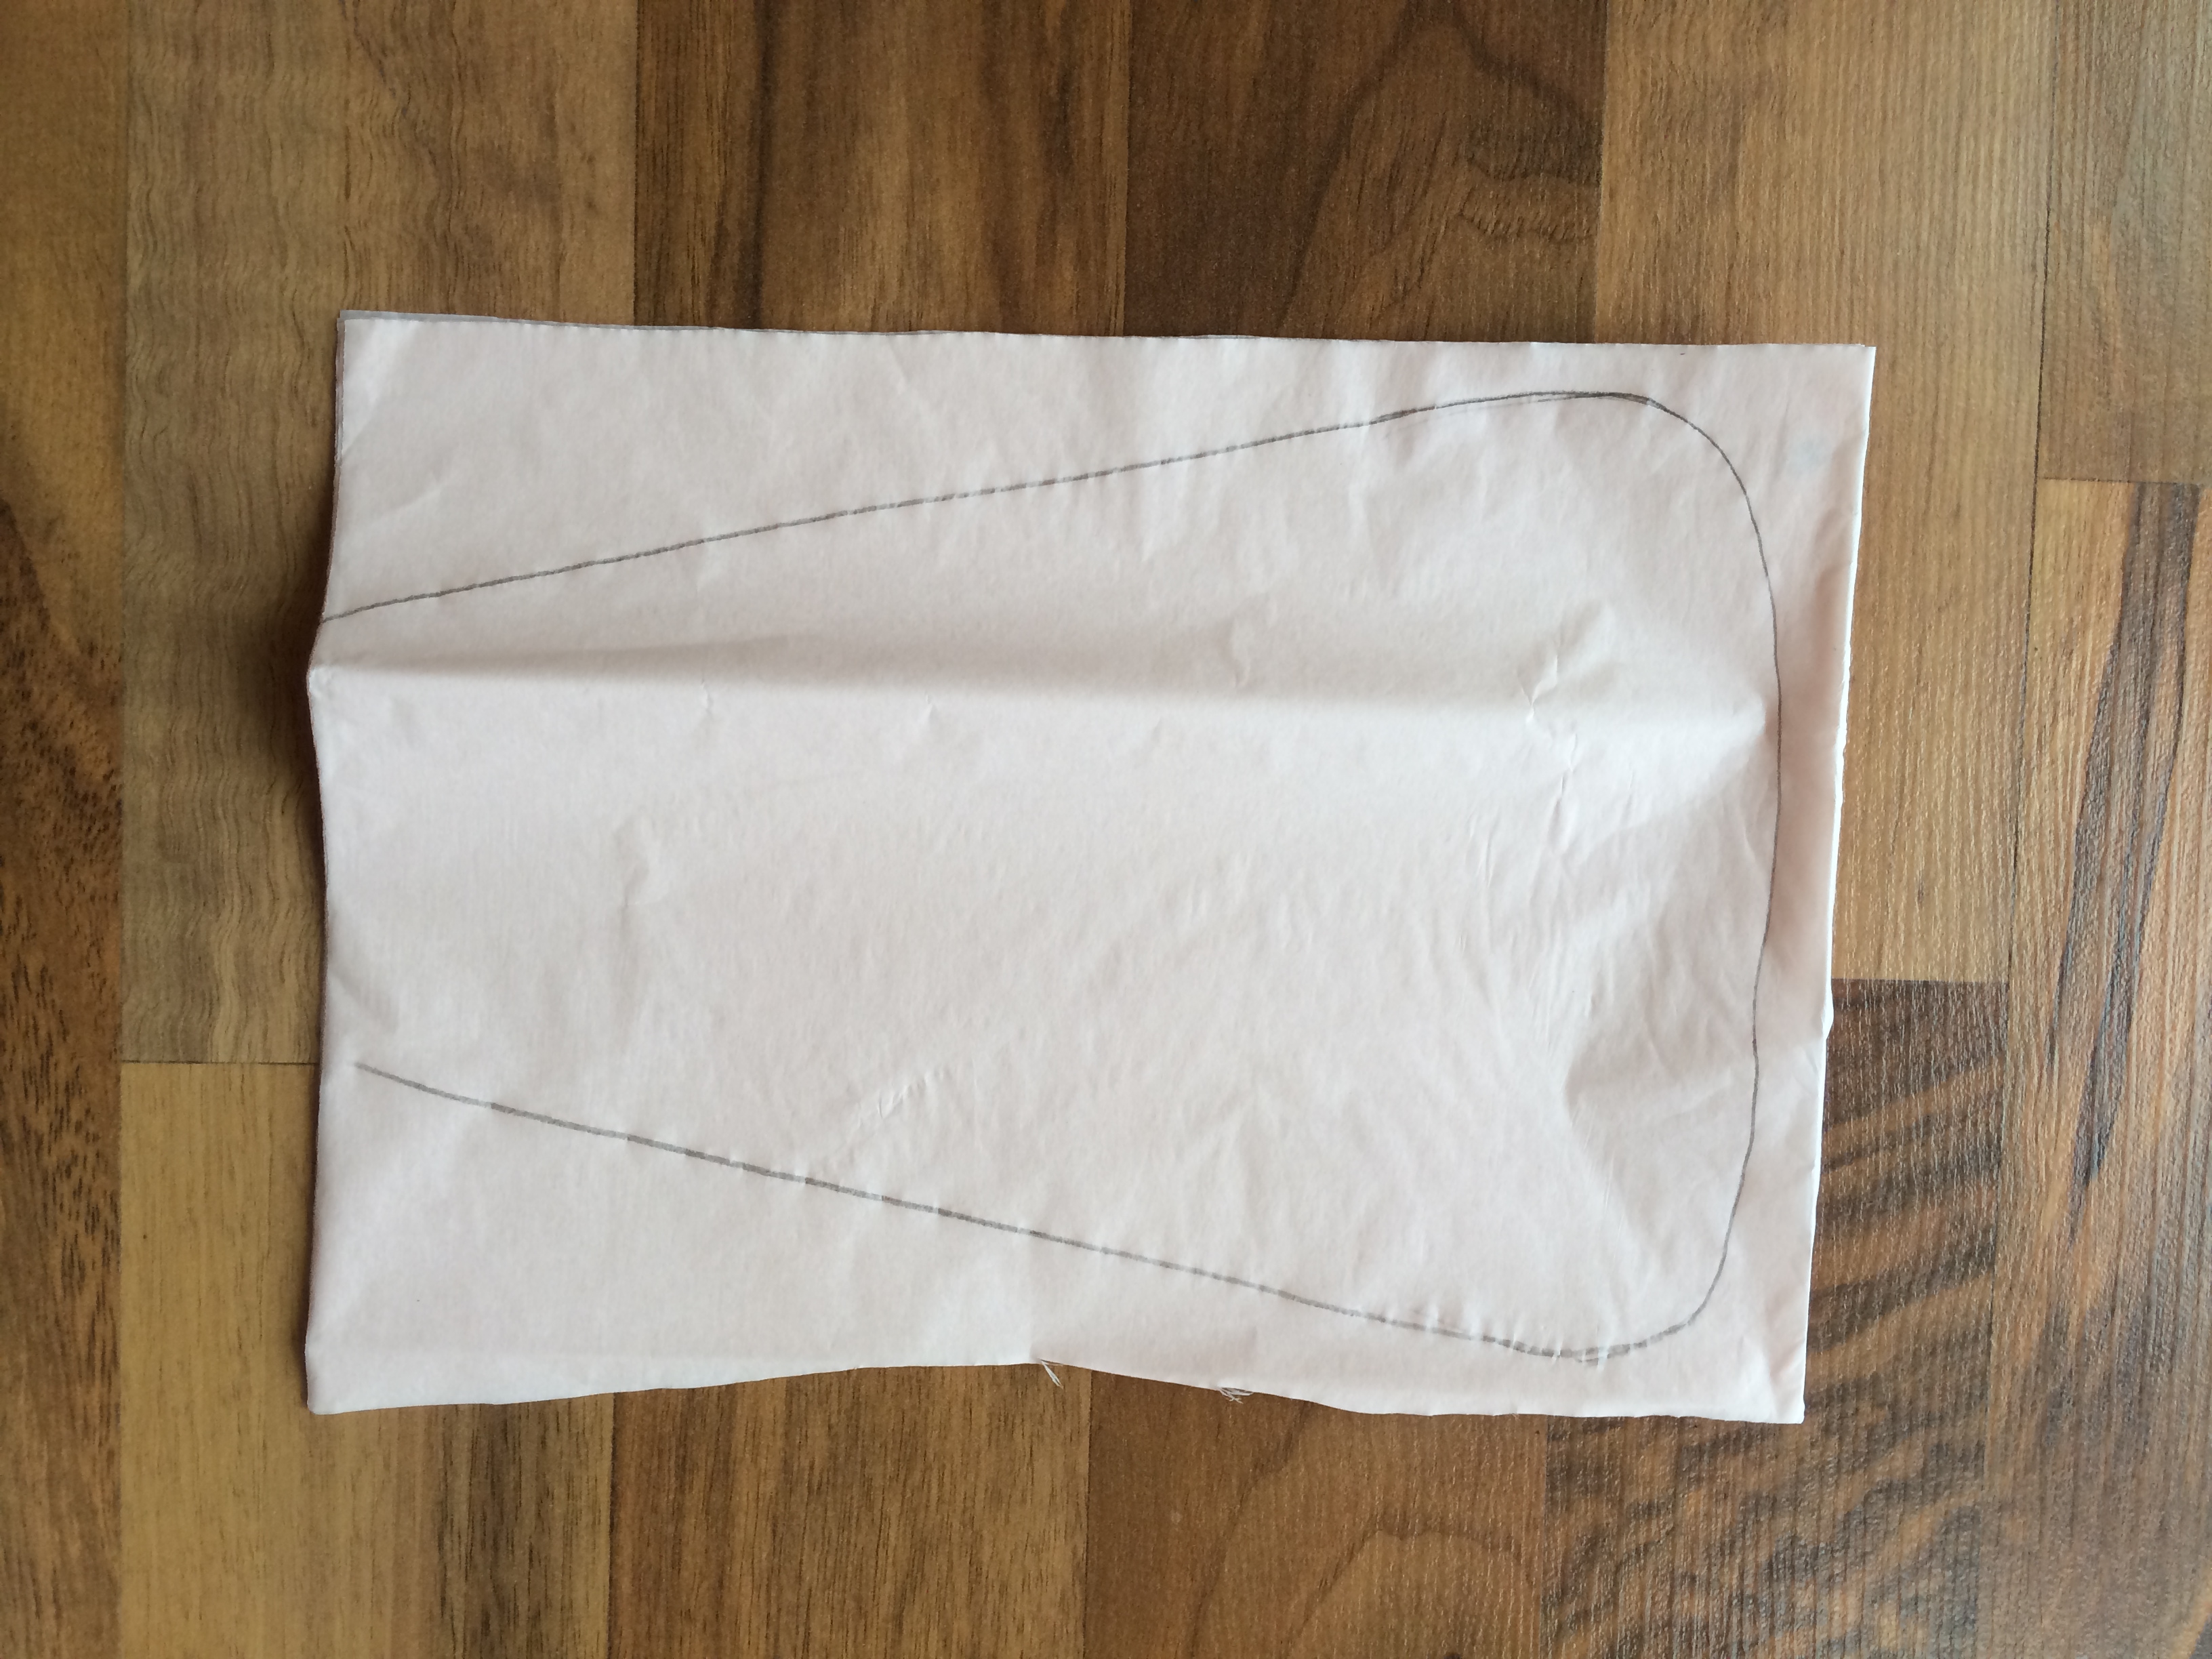
Next we will draw the largest size petal on the top sheet of one of the two stacks. You don’t need a template for this, I promise! Just use your best judgment and use as much of the space on the tissue paper as possible. You can do it!! I started by drawing the widest portion of the flower petal first at the top. Then, I simply narrowed the lines down to complete the petal. (Again, you’re drawing this on the top sheet of the stack so that way when you cut them out all at once you will have 8 total)


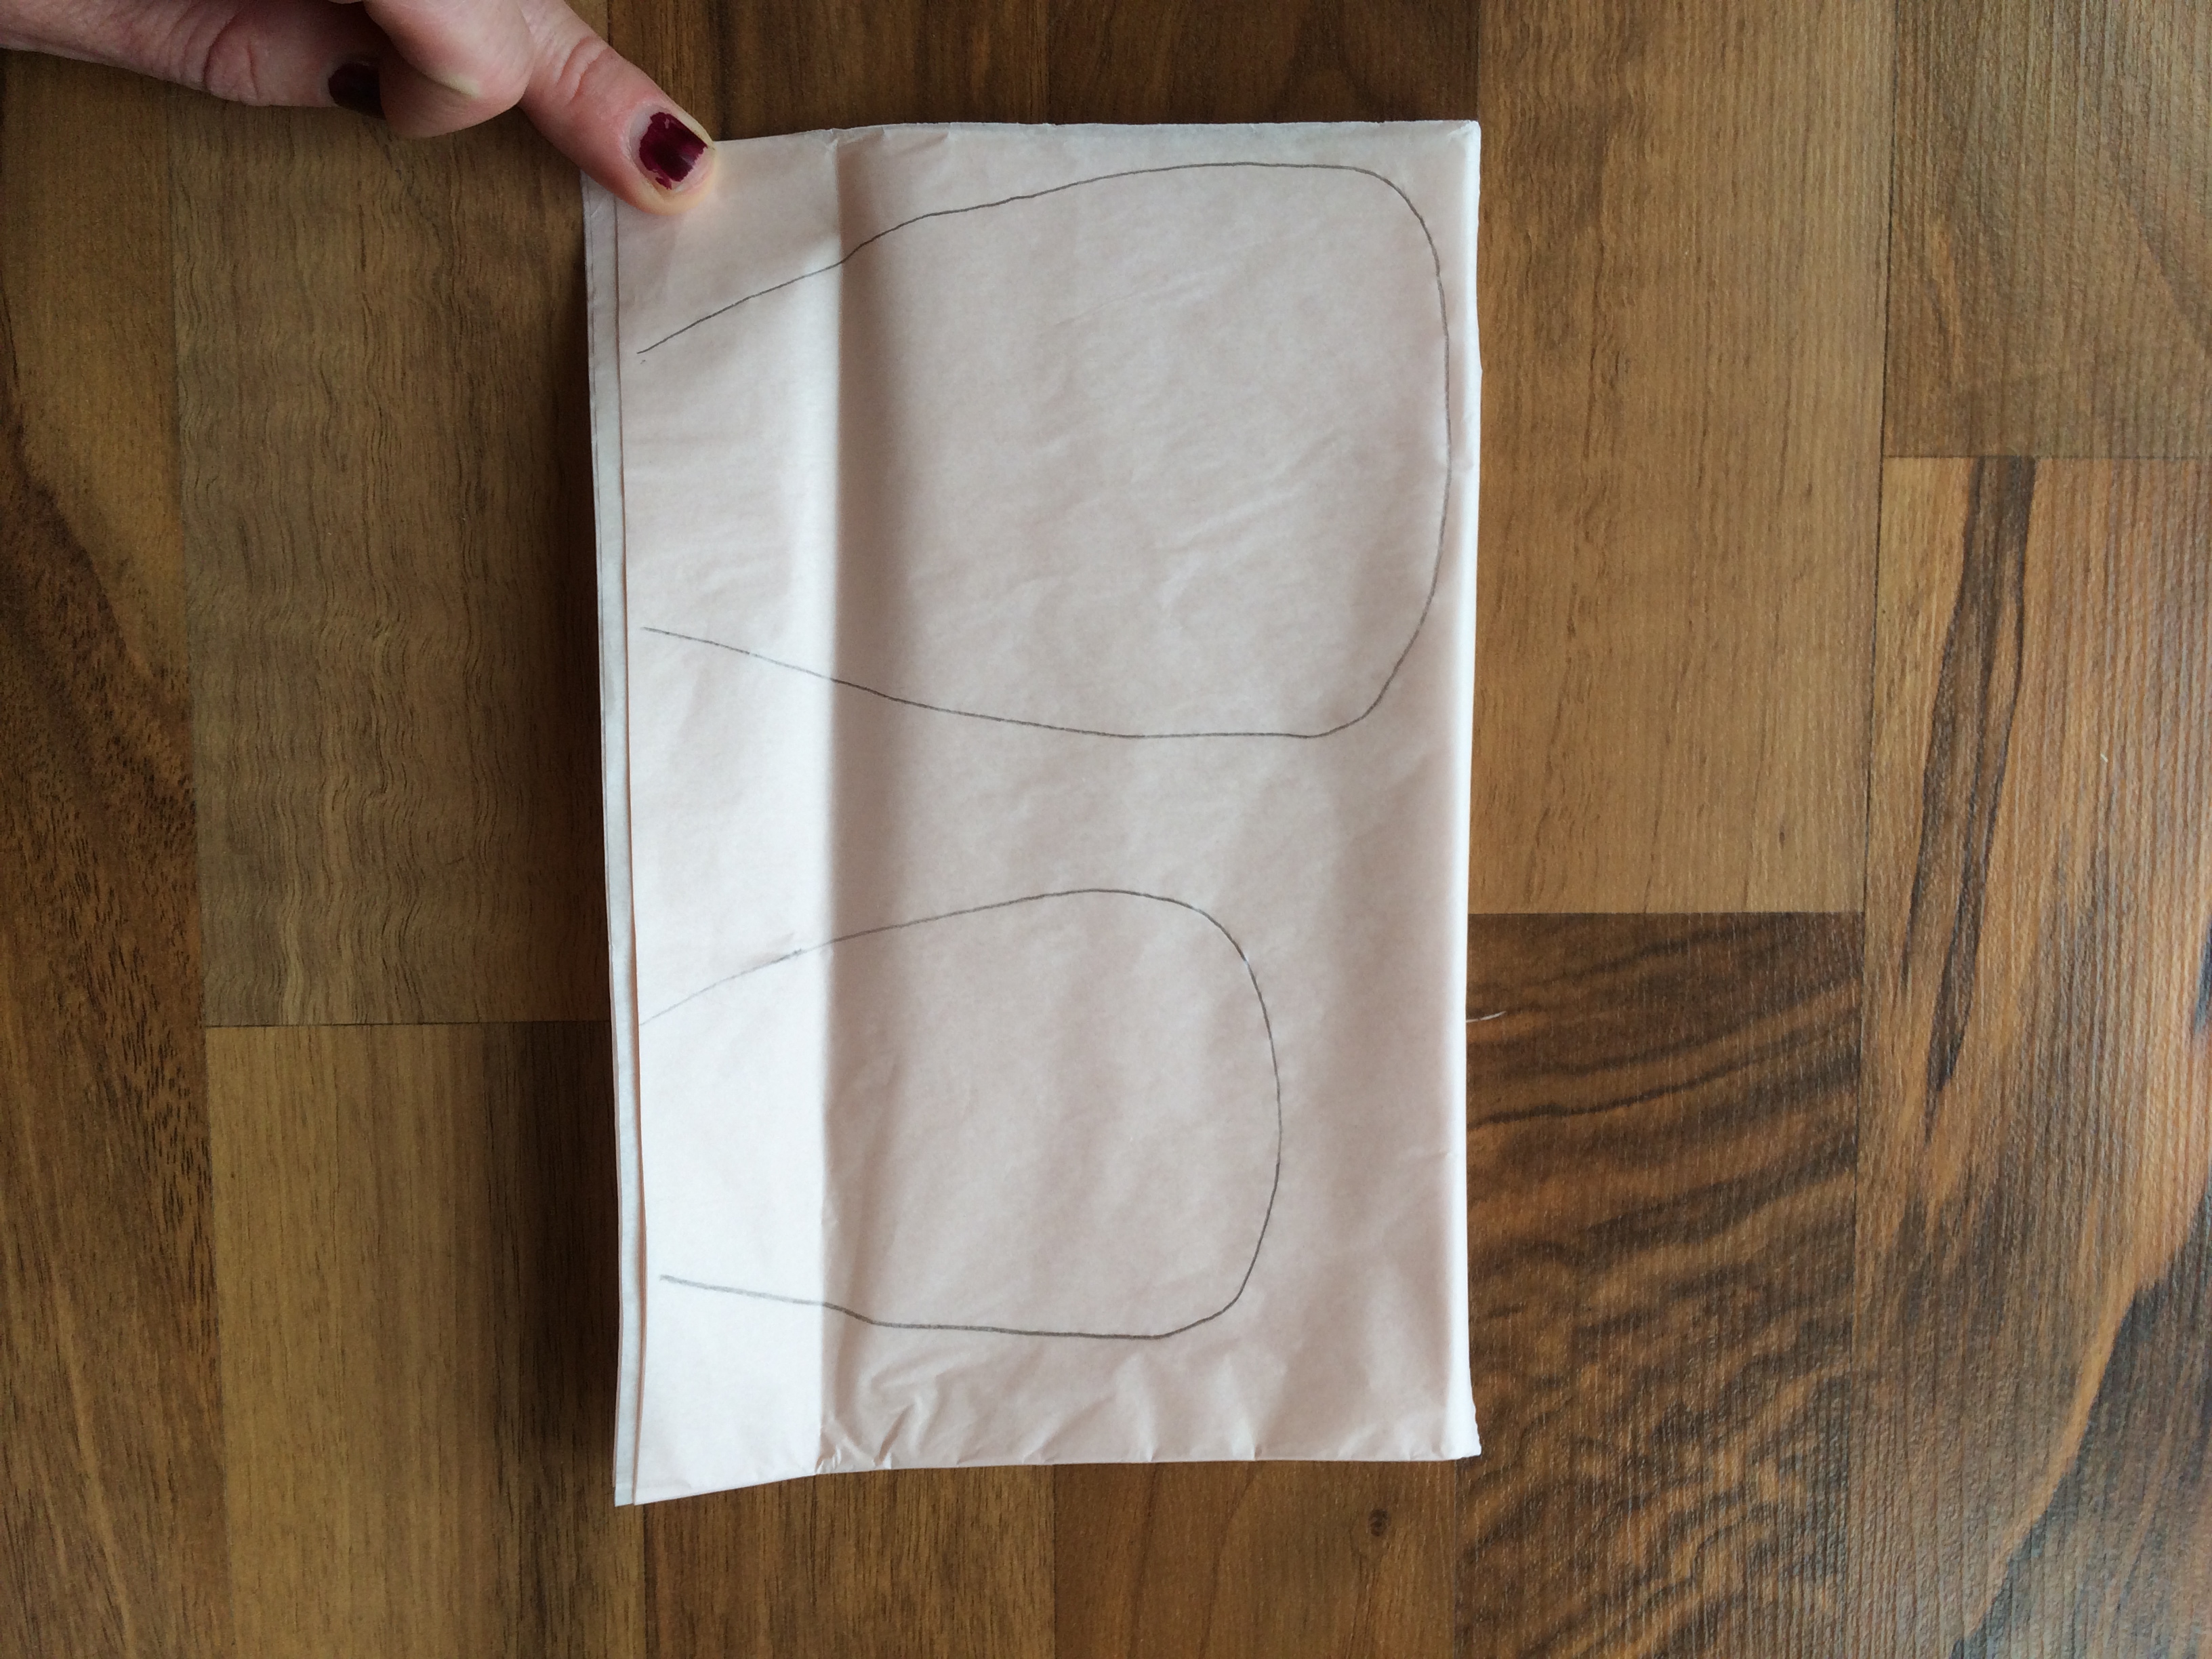
Take your other stack of tissue paper and cut in half again. Draw your medium sized petals on one of the stacks, and then both the small size petals and tiny petals on the other stack (again, you don’t need a template to draw these petals, they don’t have to be perfect)!
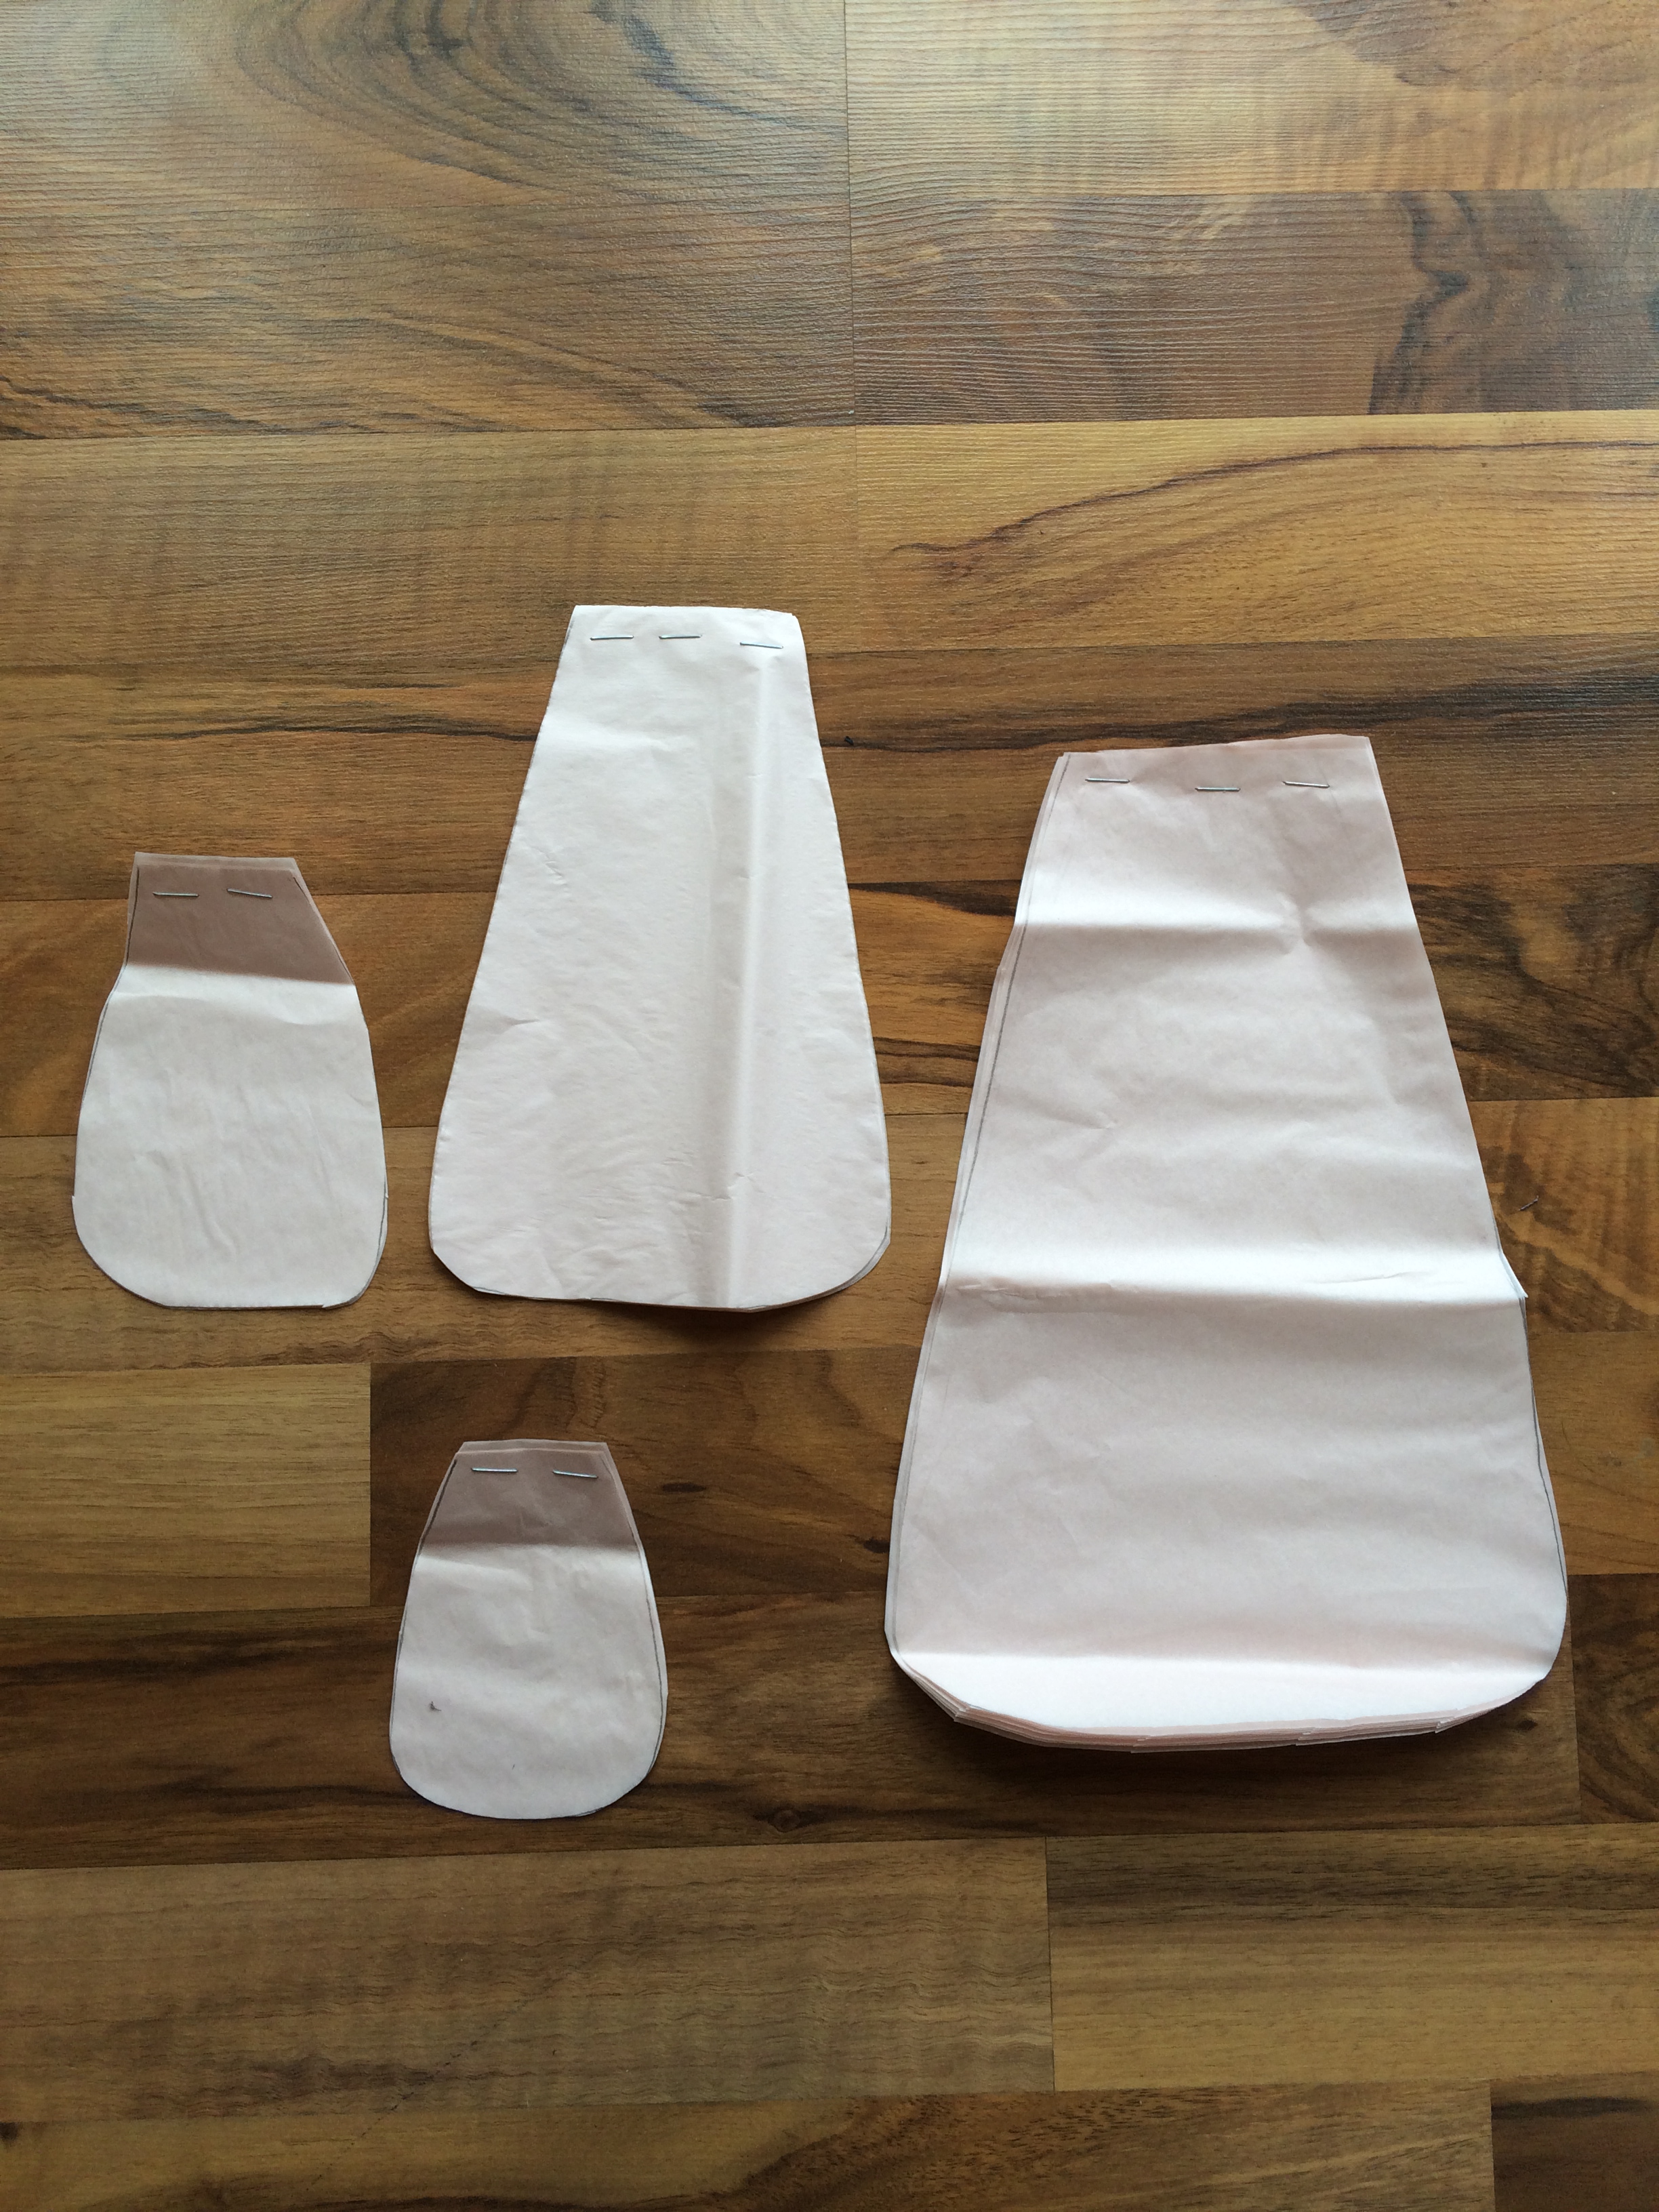
After you cut out all of the petals, staple each stack together (each stack should contain 8 petals) at the narrow end. Now we have our large, medium, small and tiny flower petals to make our flower.
ASSEMBLING THE FLOWER:
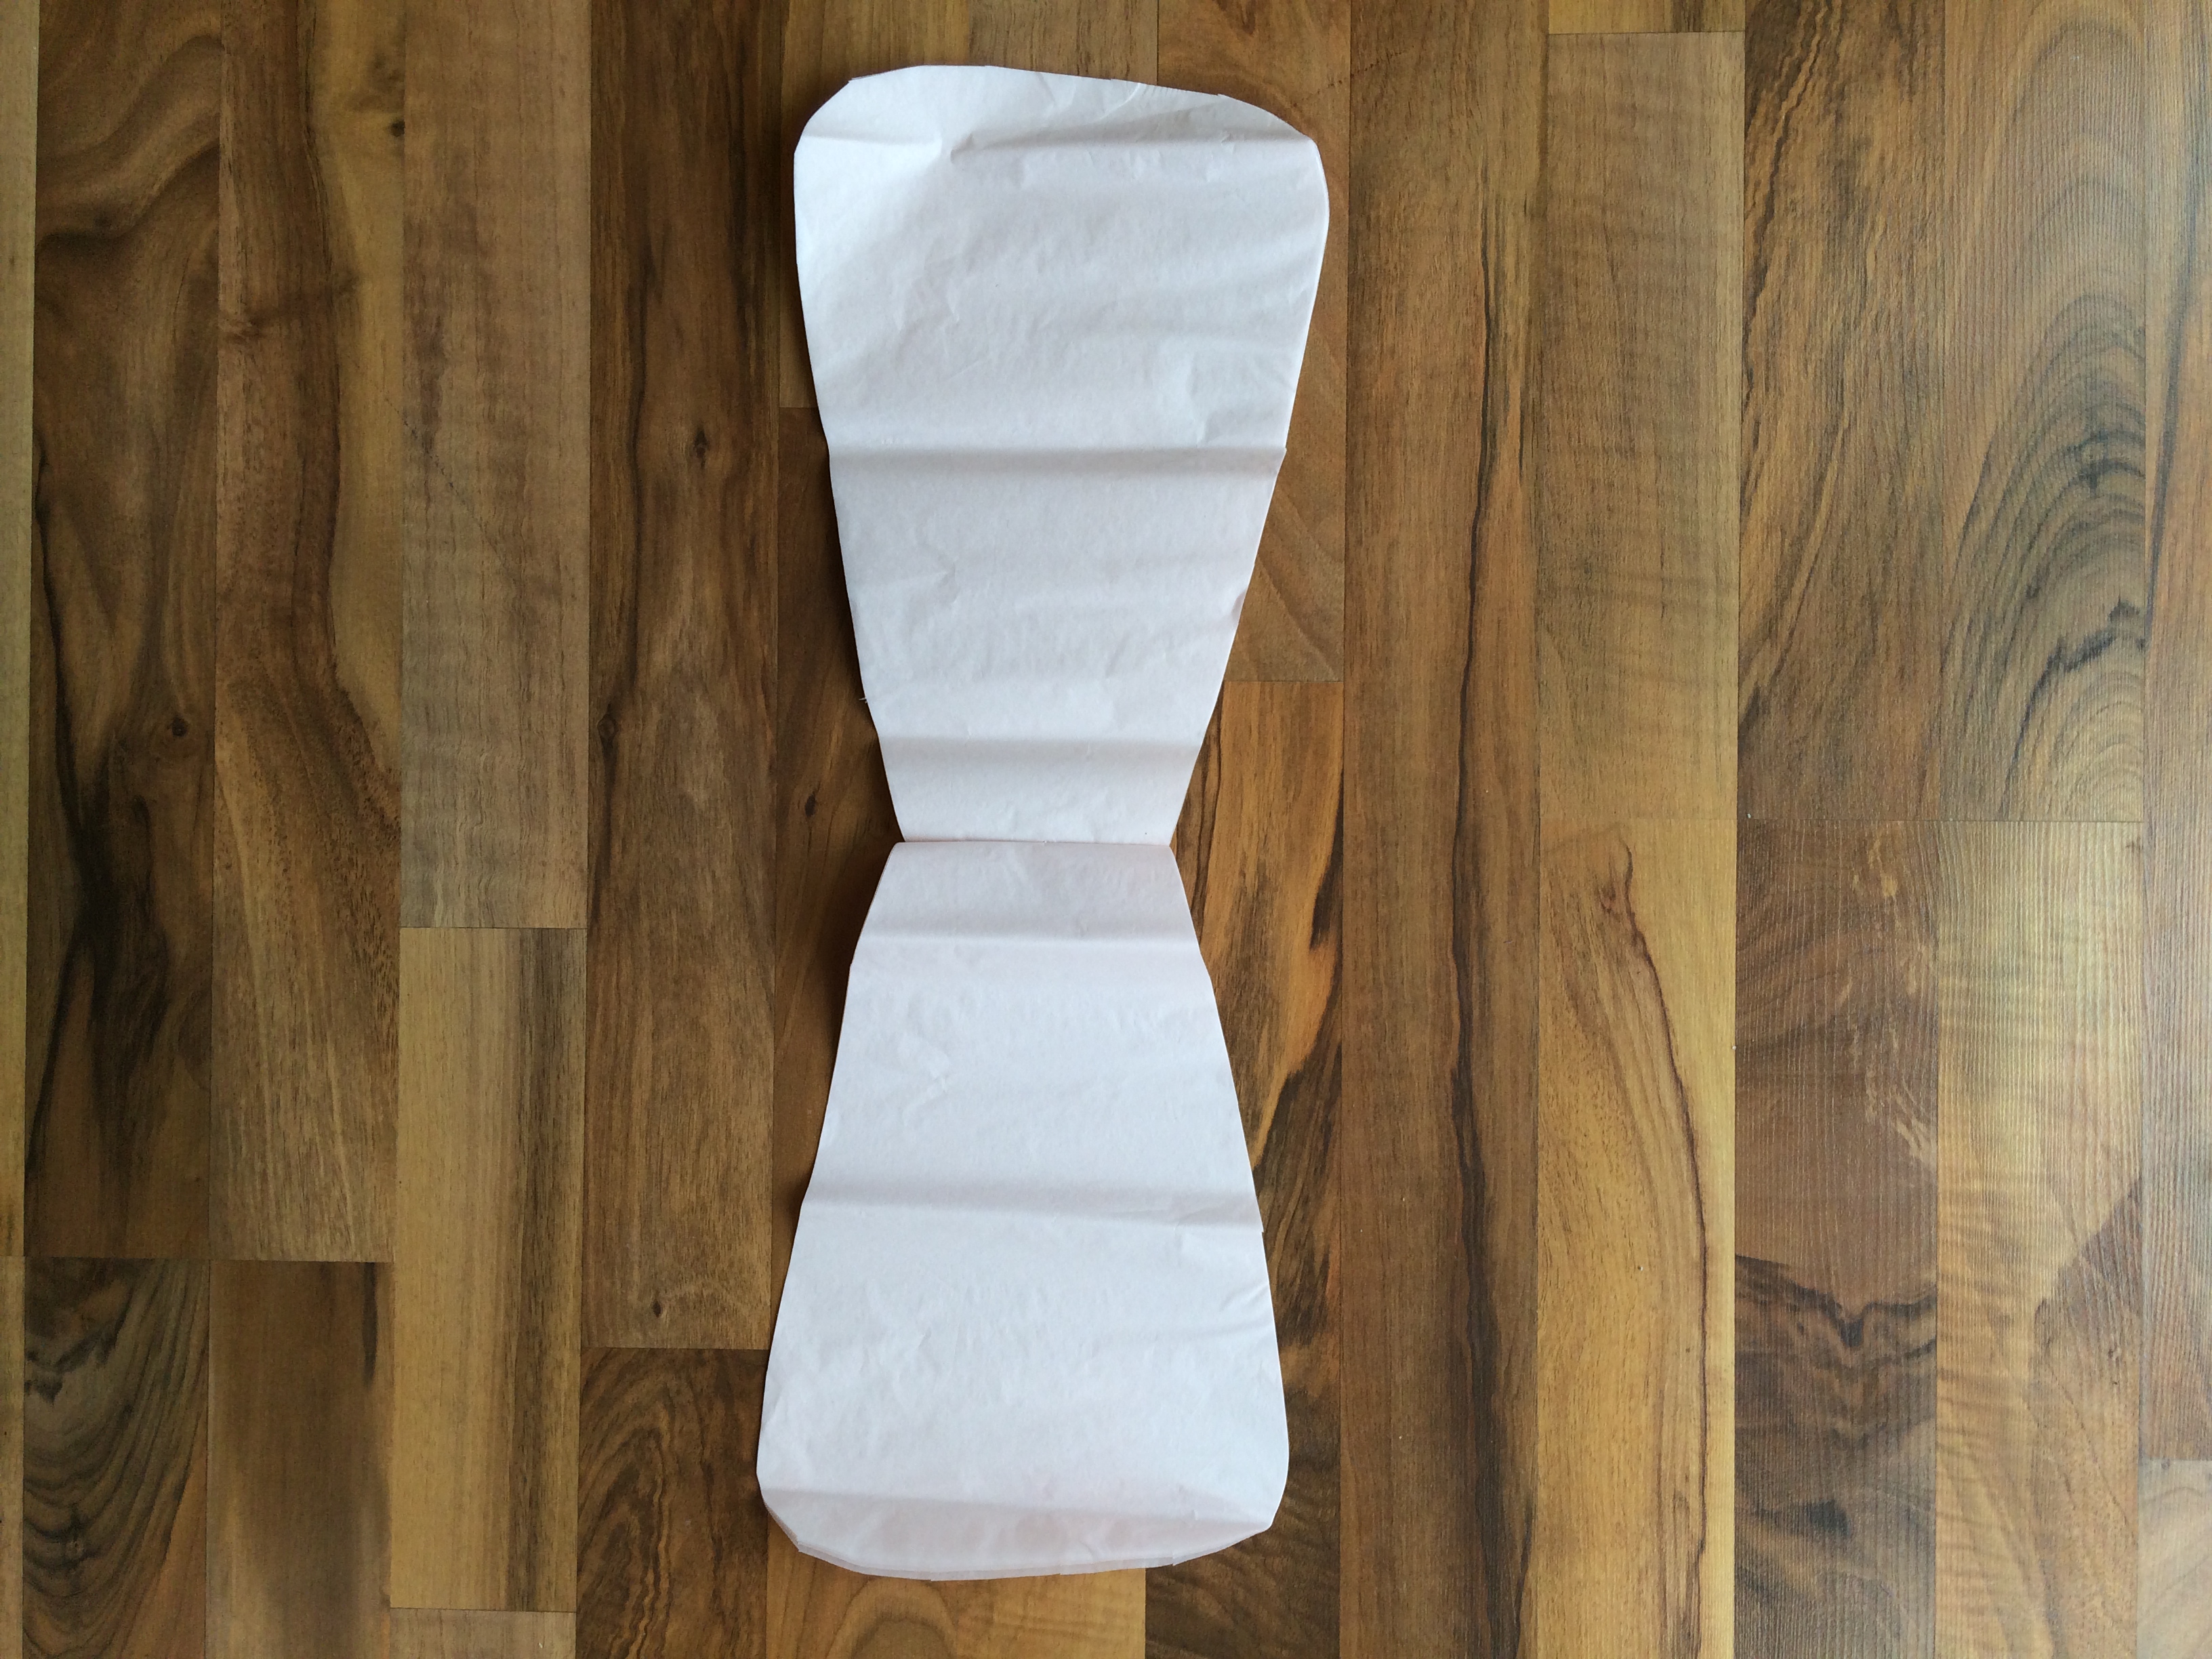
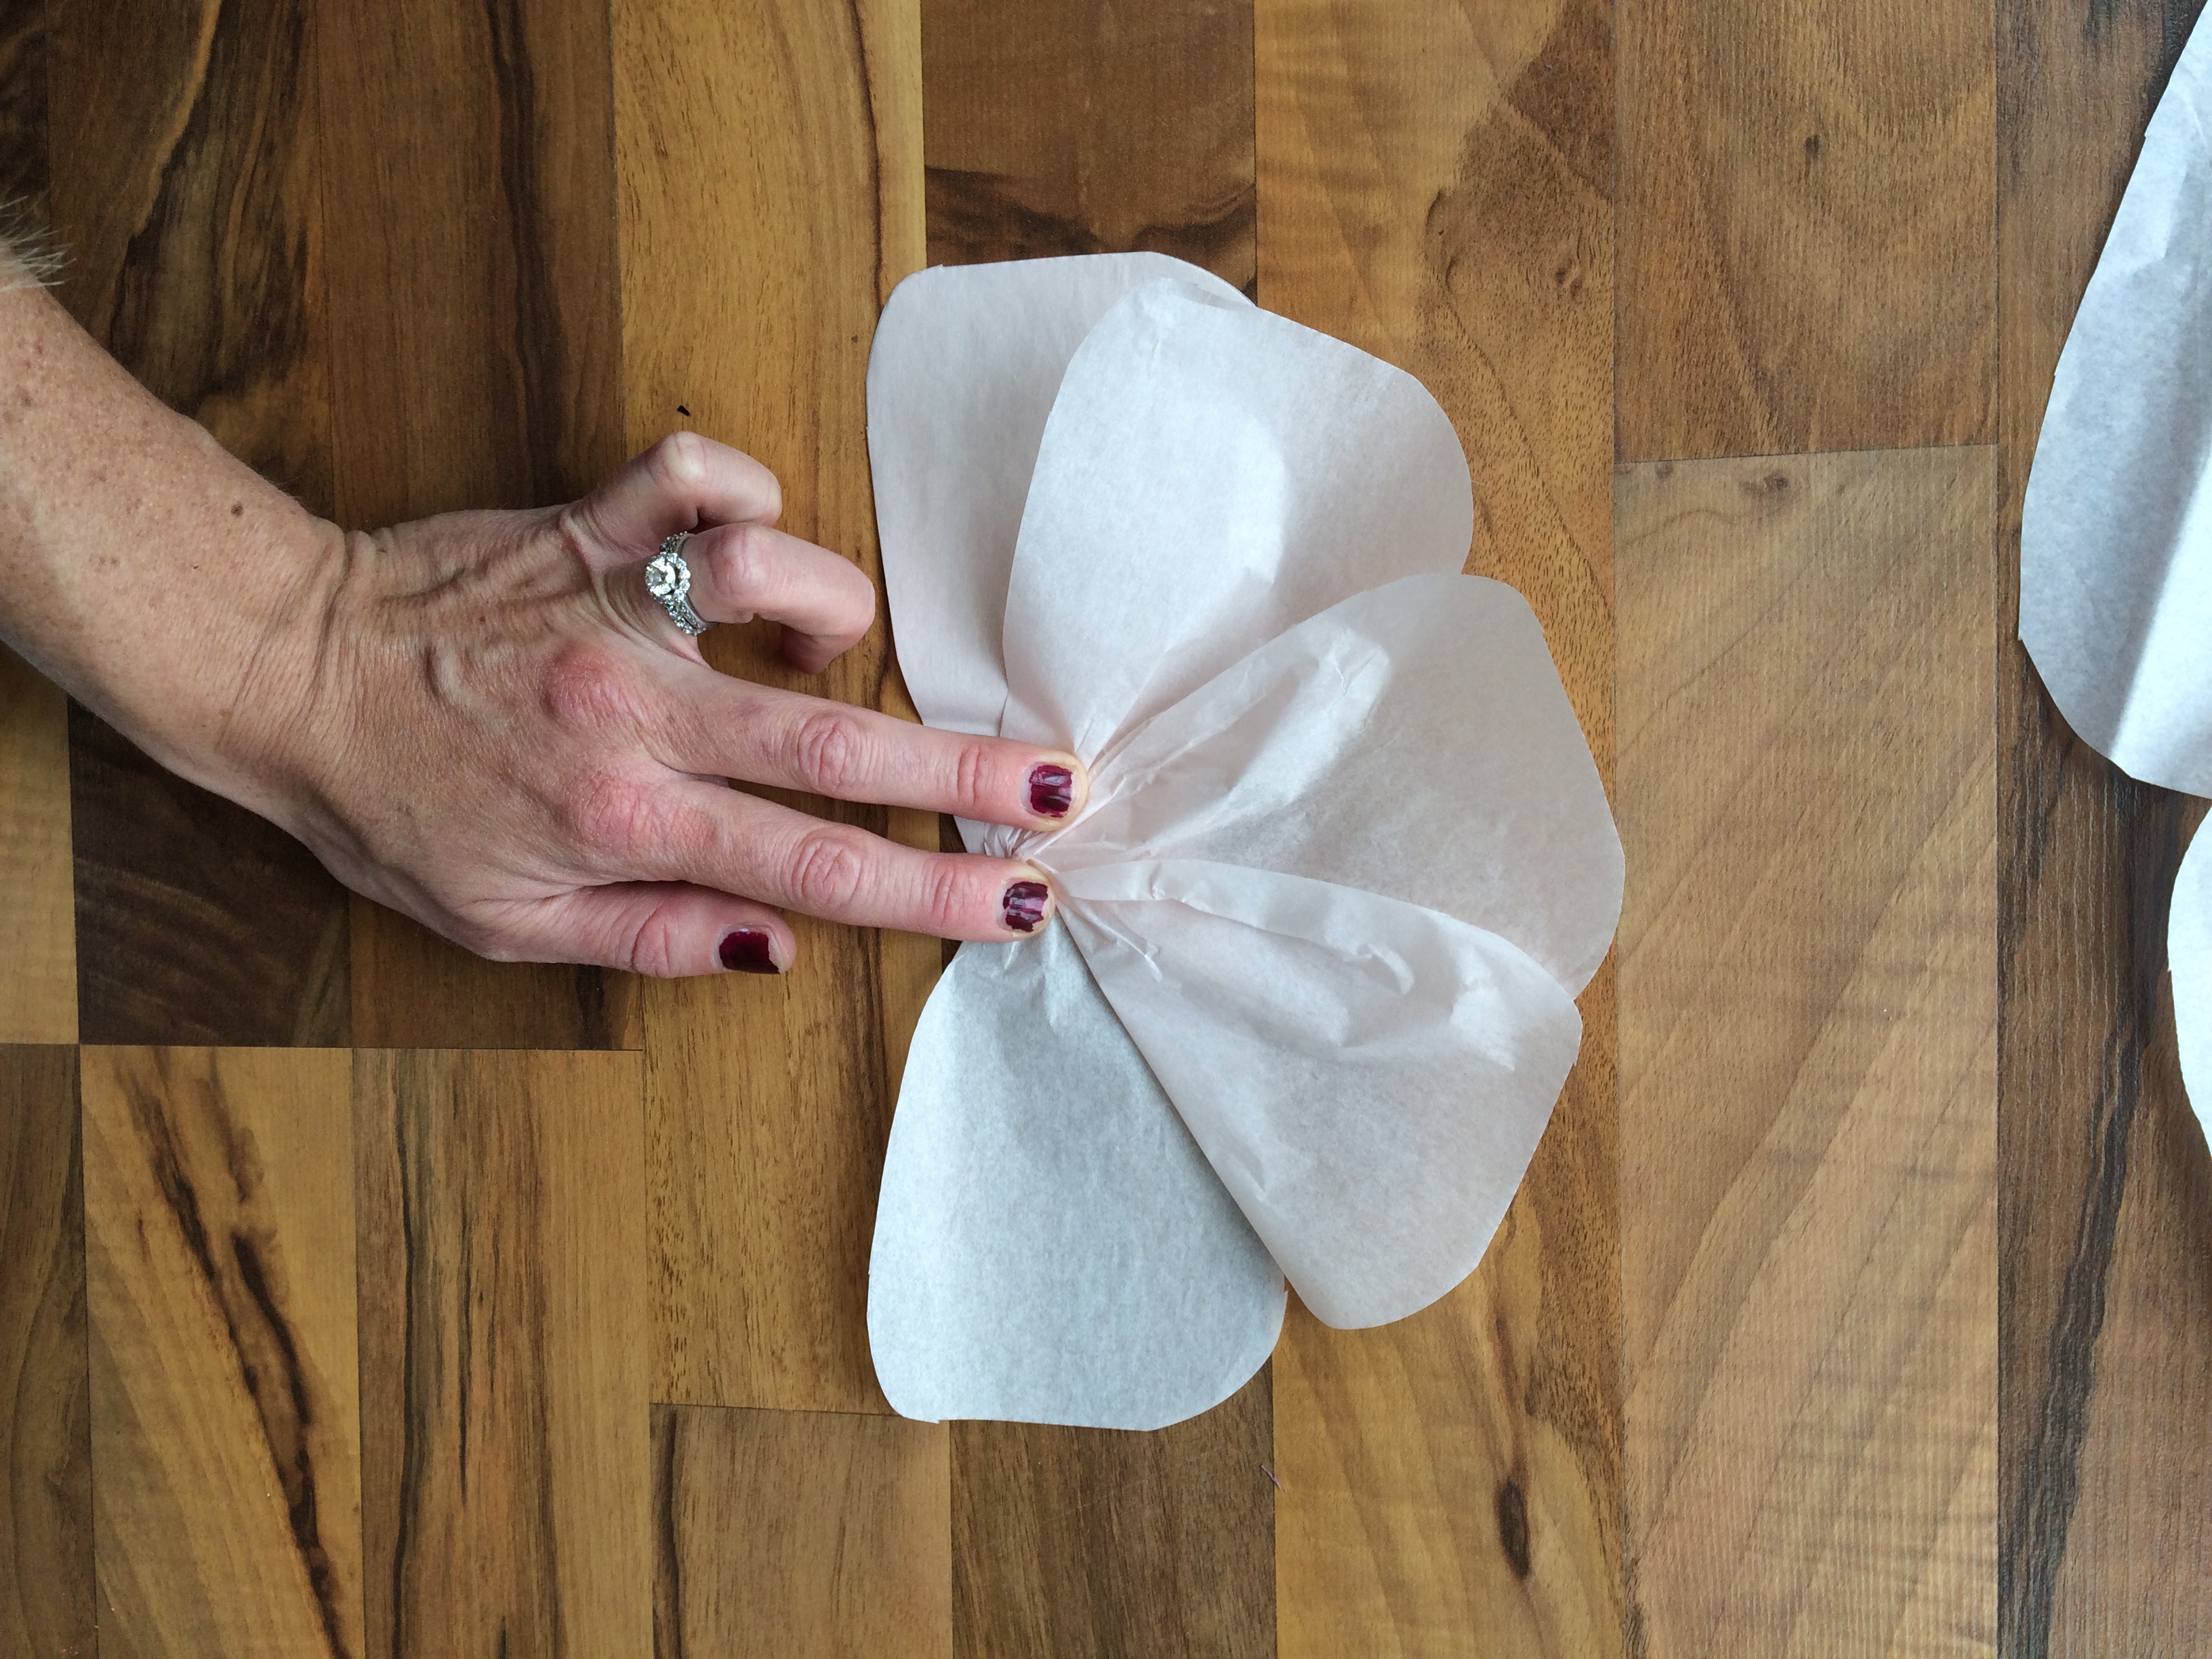
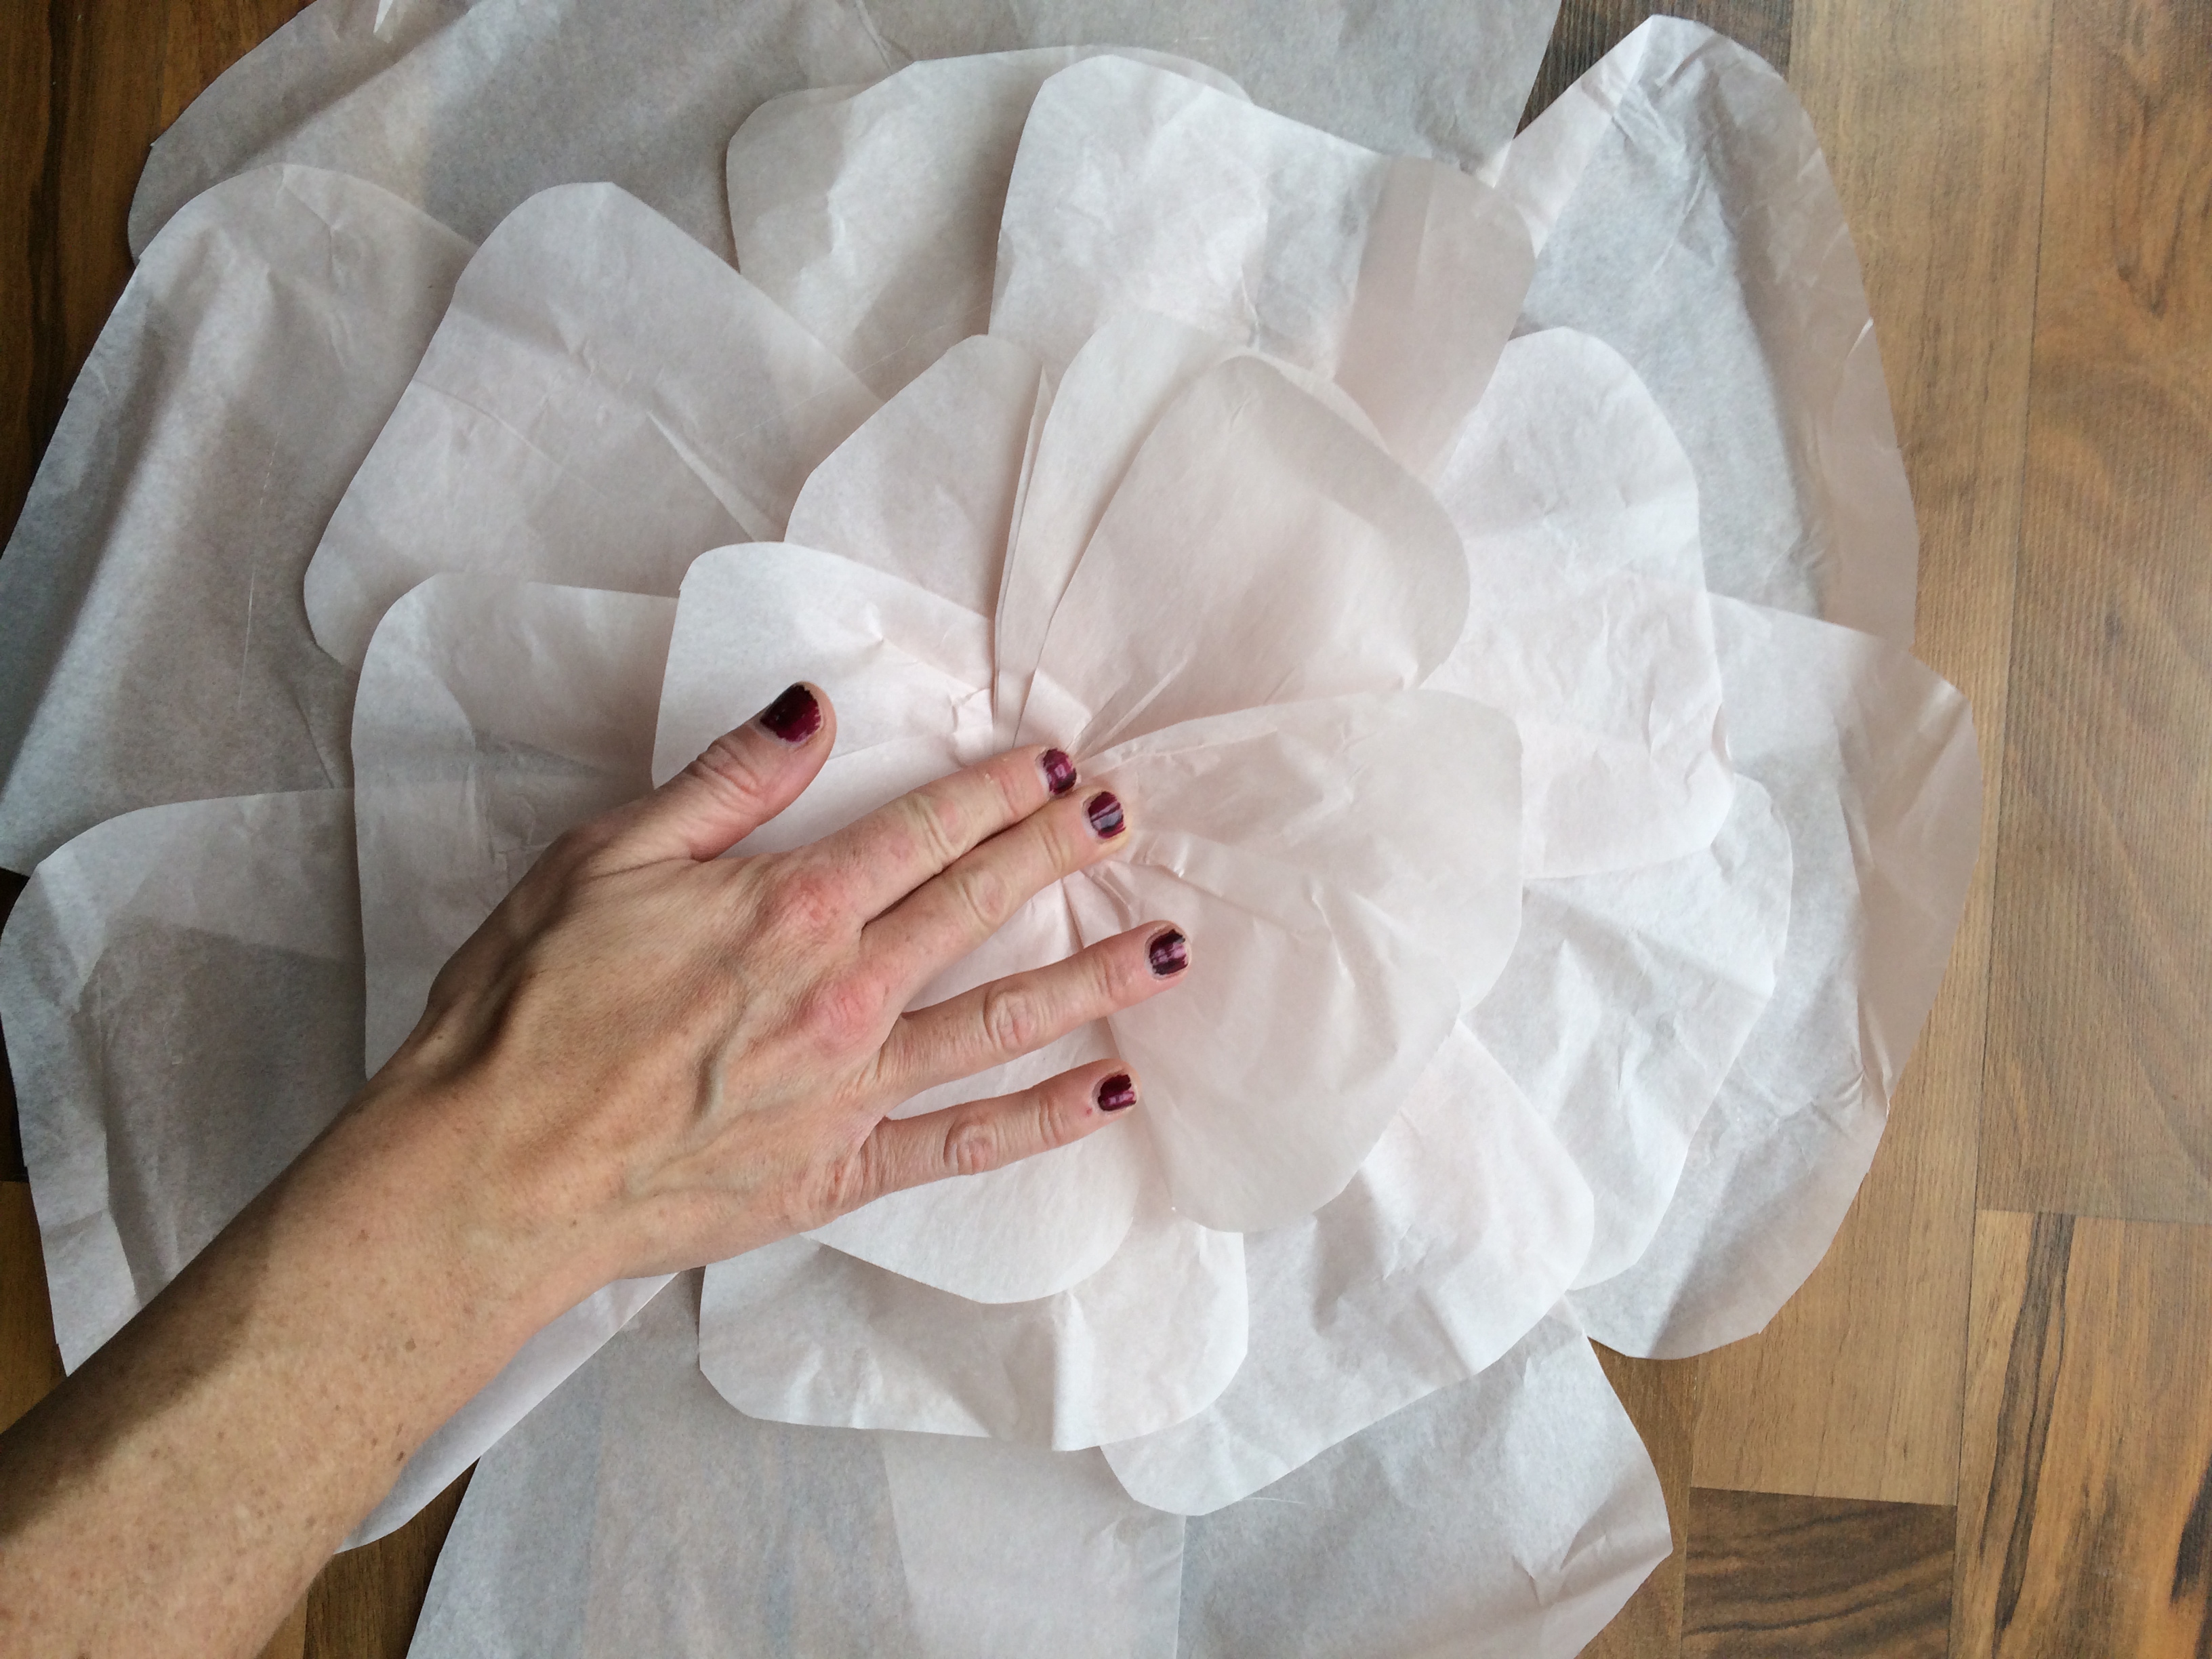
First, take the large flower petal stack and open it up- make sure you do this evenly so that there are 4 petals on each side.
Next we are going to fan and separate the petals. Start by taking the first petal on the right side and fold up. Do the same for the second and third petals, and leave the bottom petal where it is.
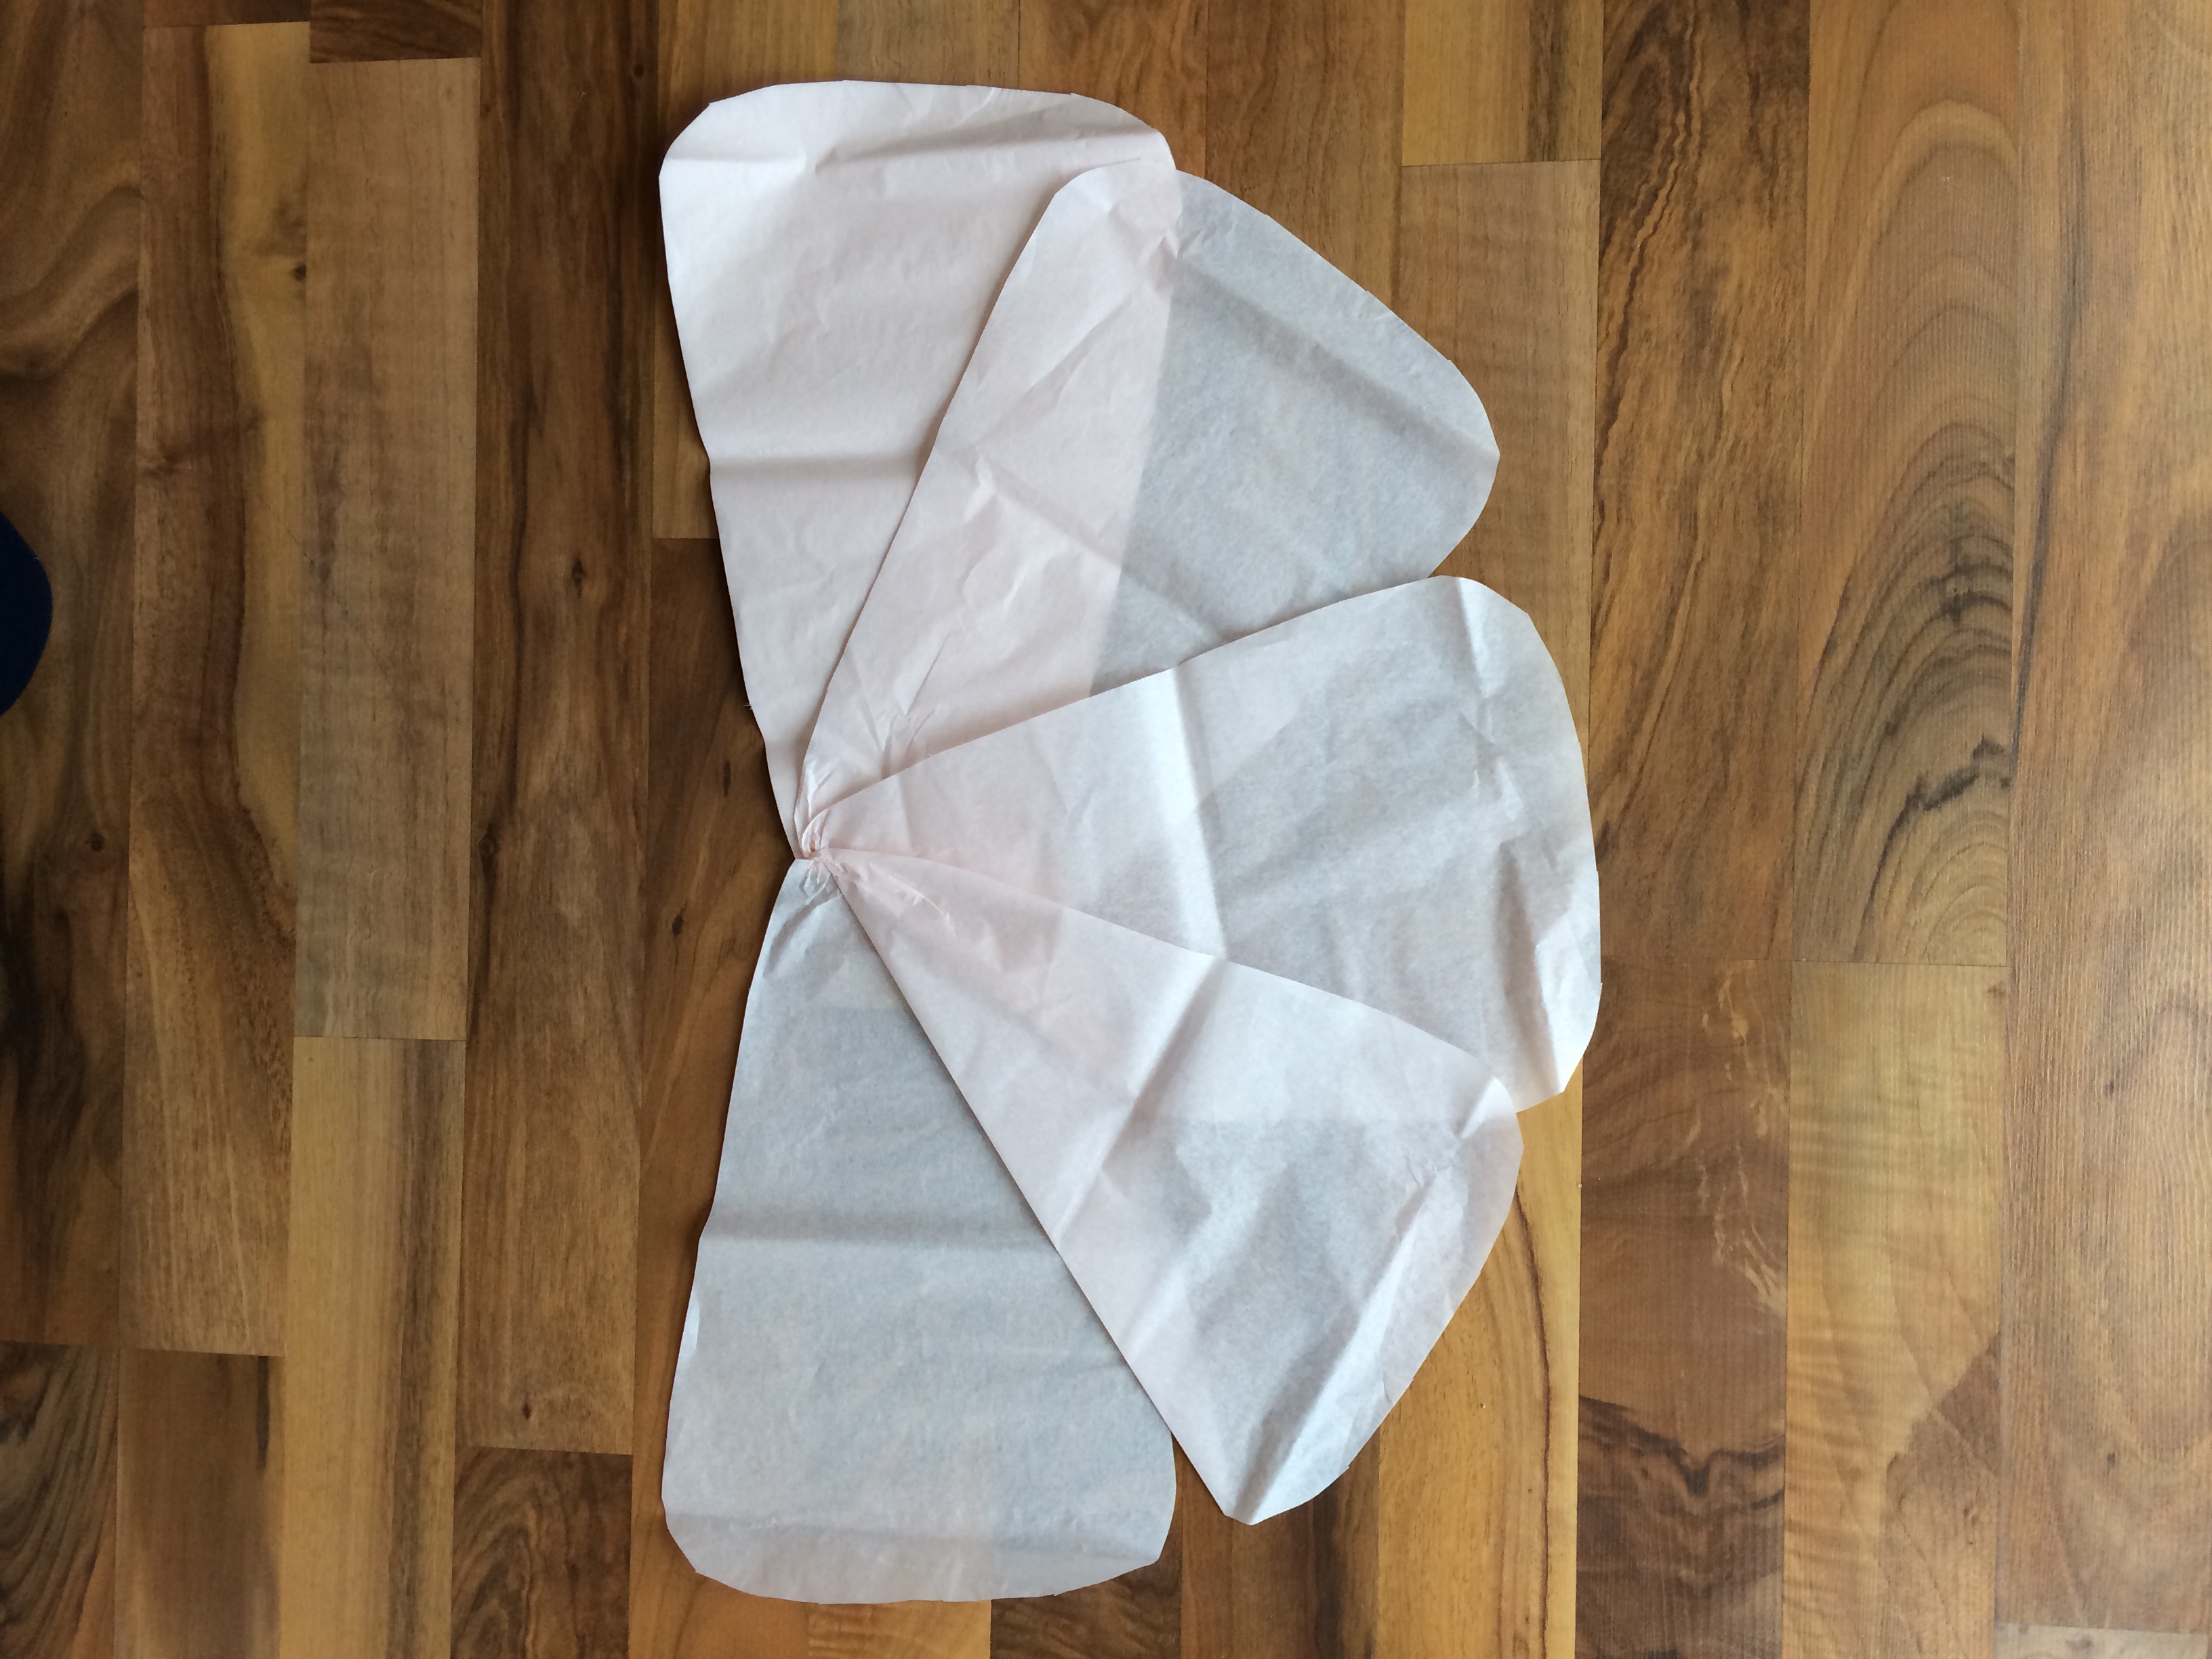
Turn your flower over and do the same for the other side. Fan out the petals by starting with the top petal and folding up. Do the same for the second and third petals, again leaving the bottom petal where it is.
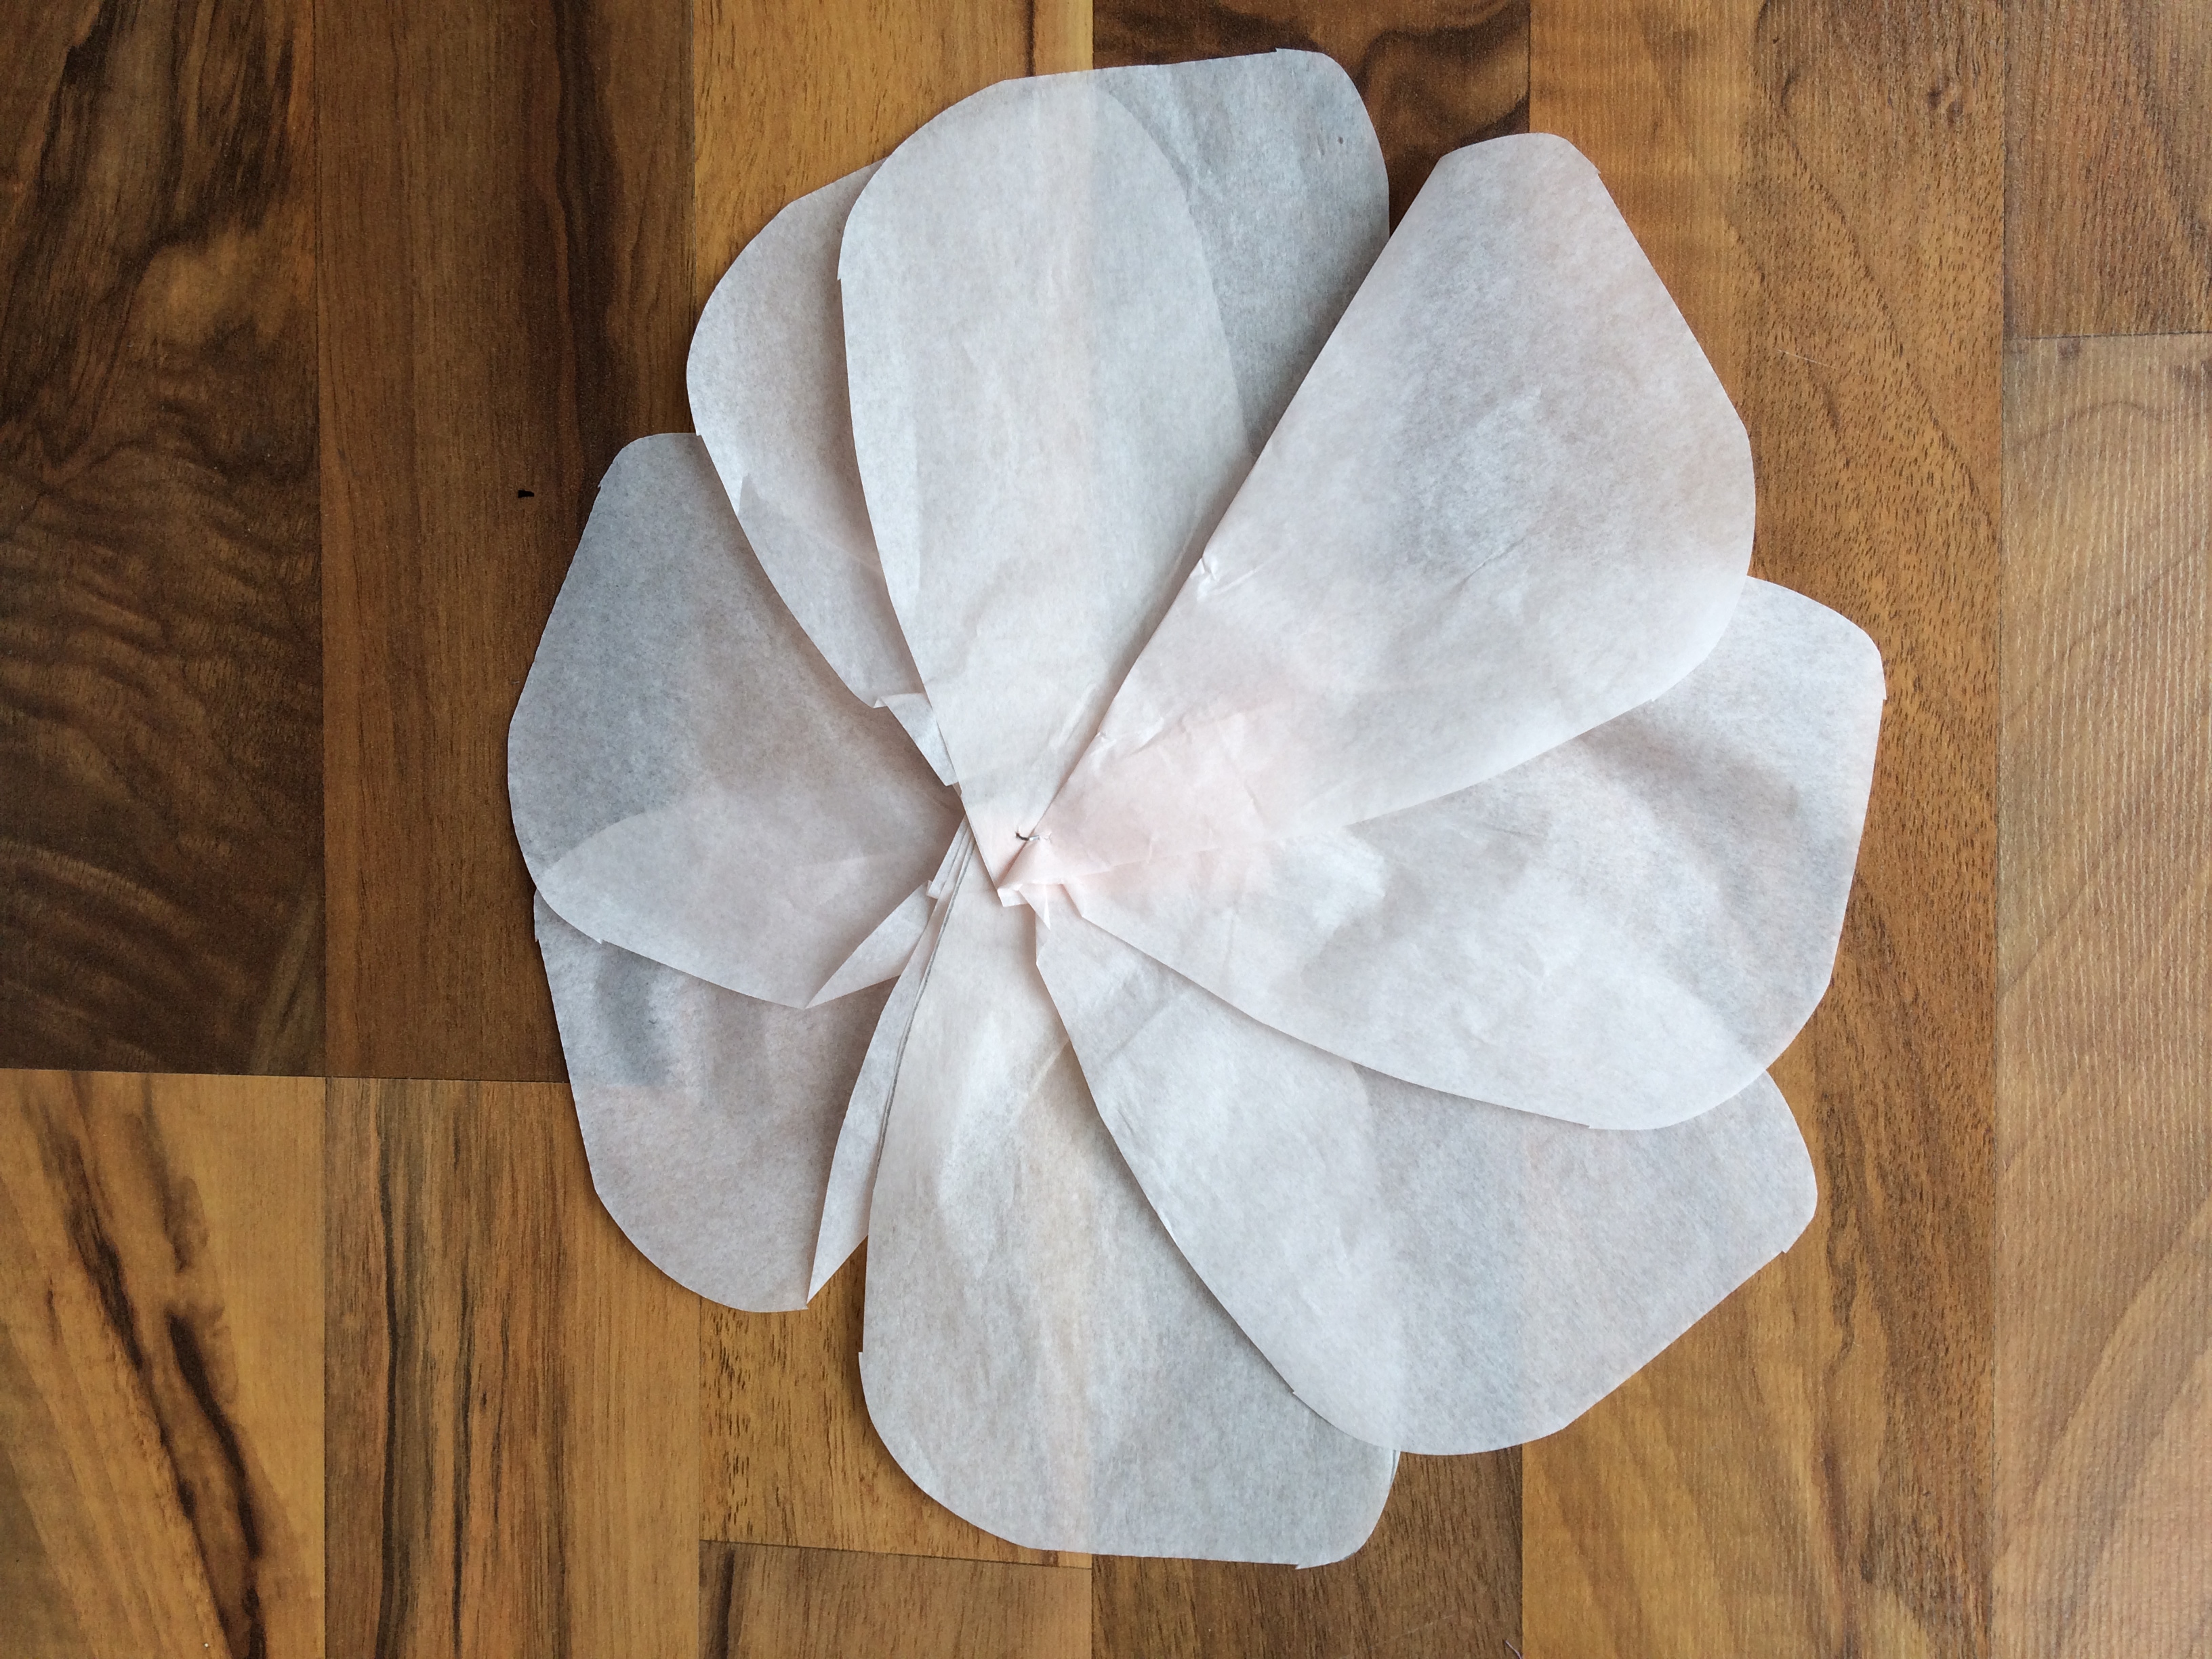
Your flower should now look like this:

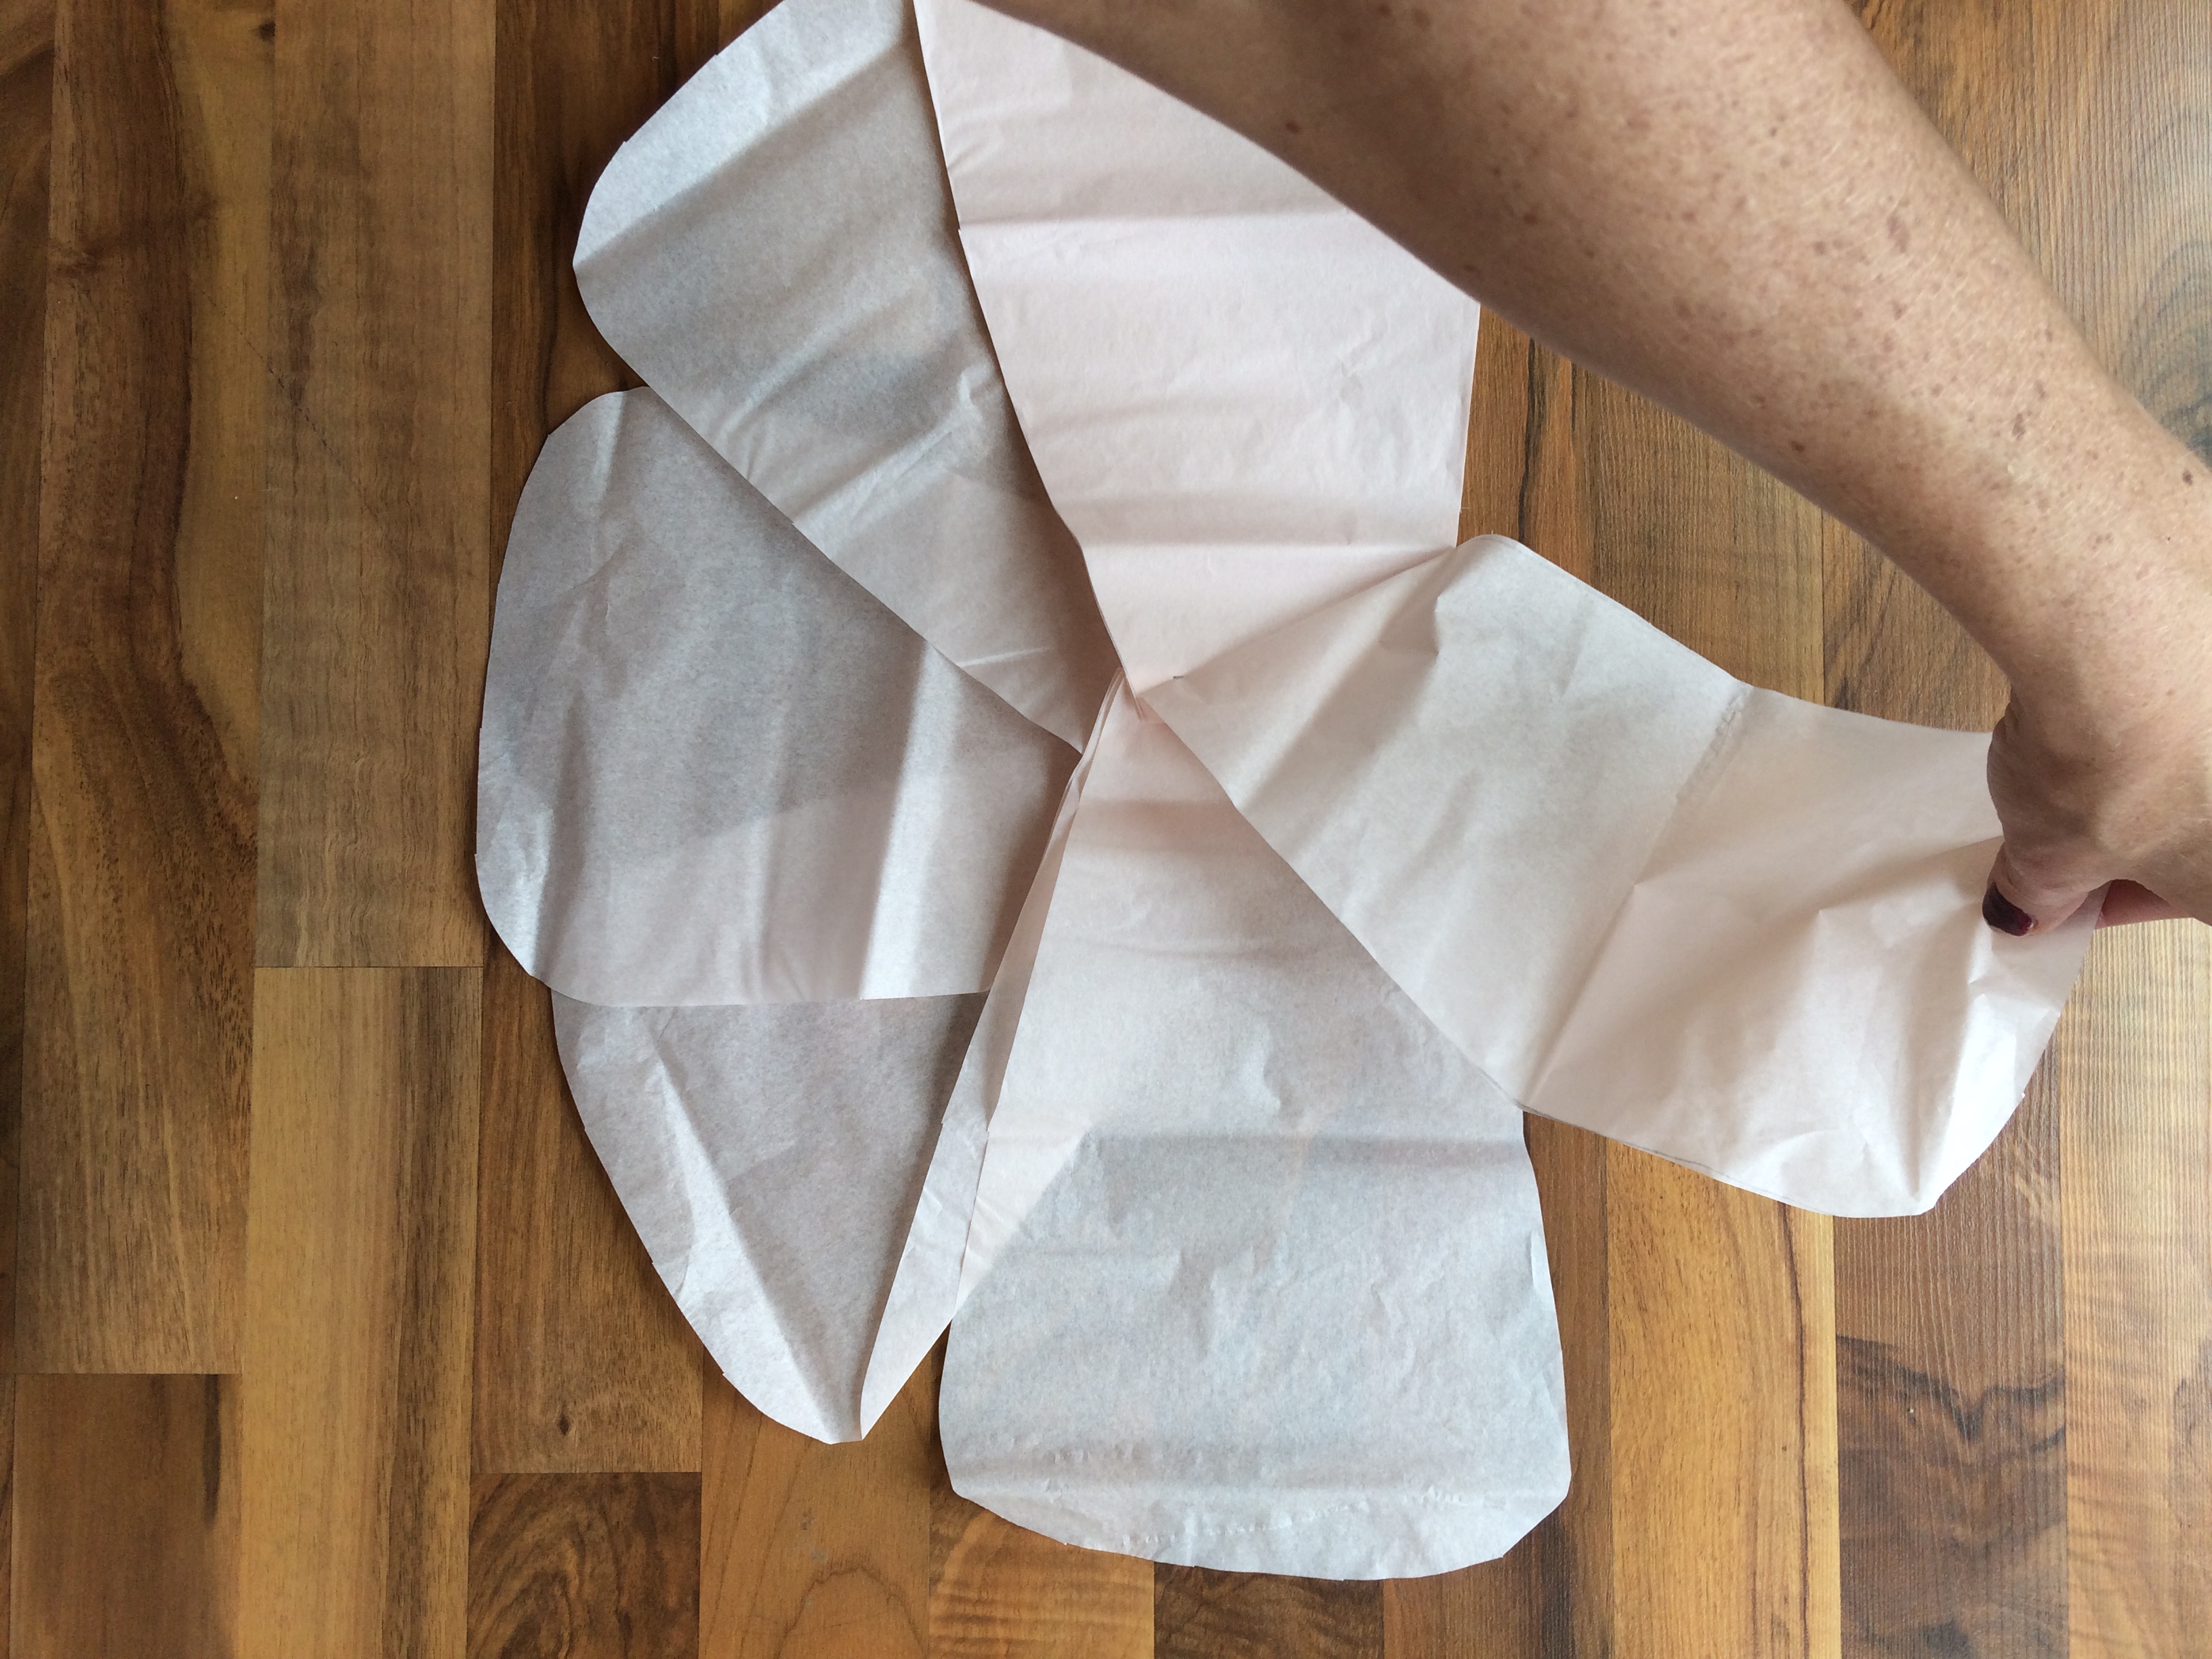

Next we are going to repeat the above steps for the medium, small, and tiny flower petals.
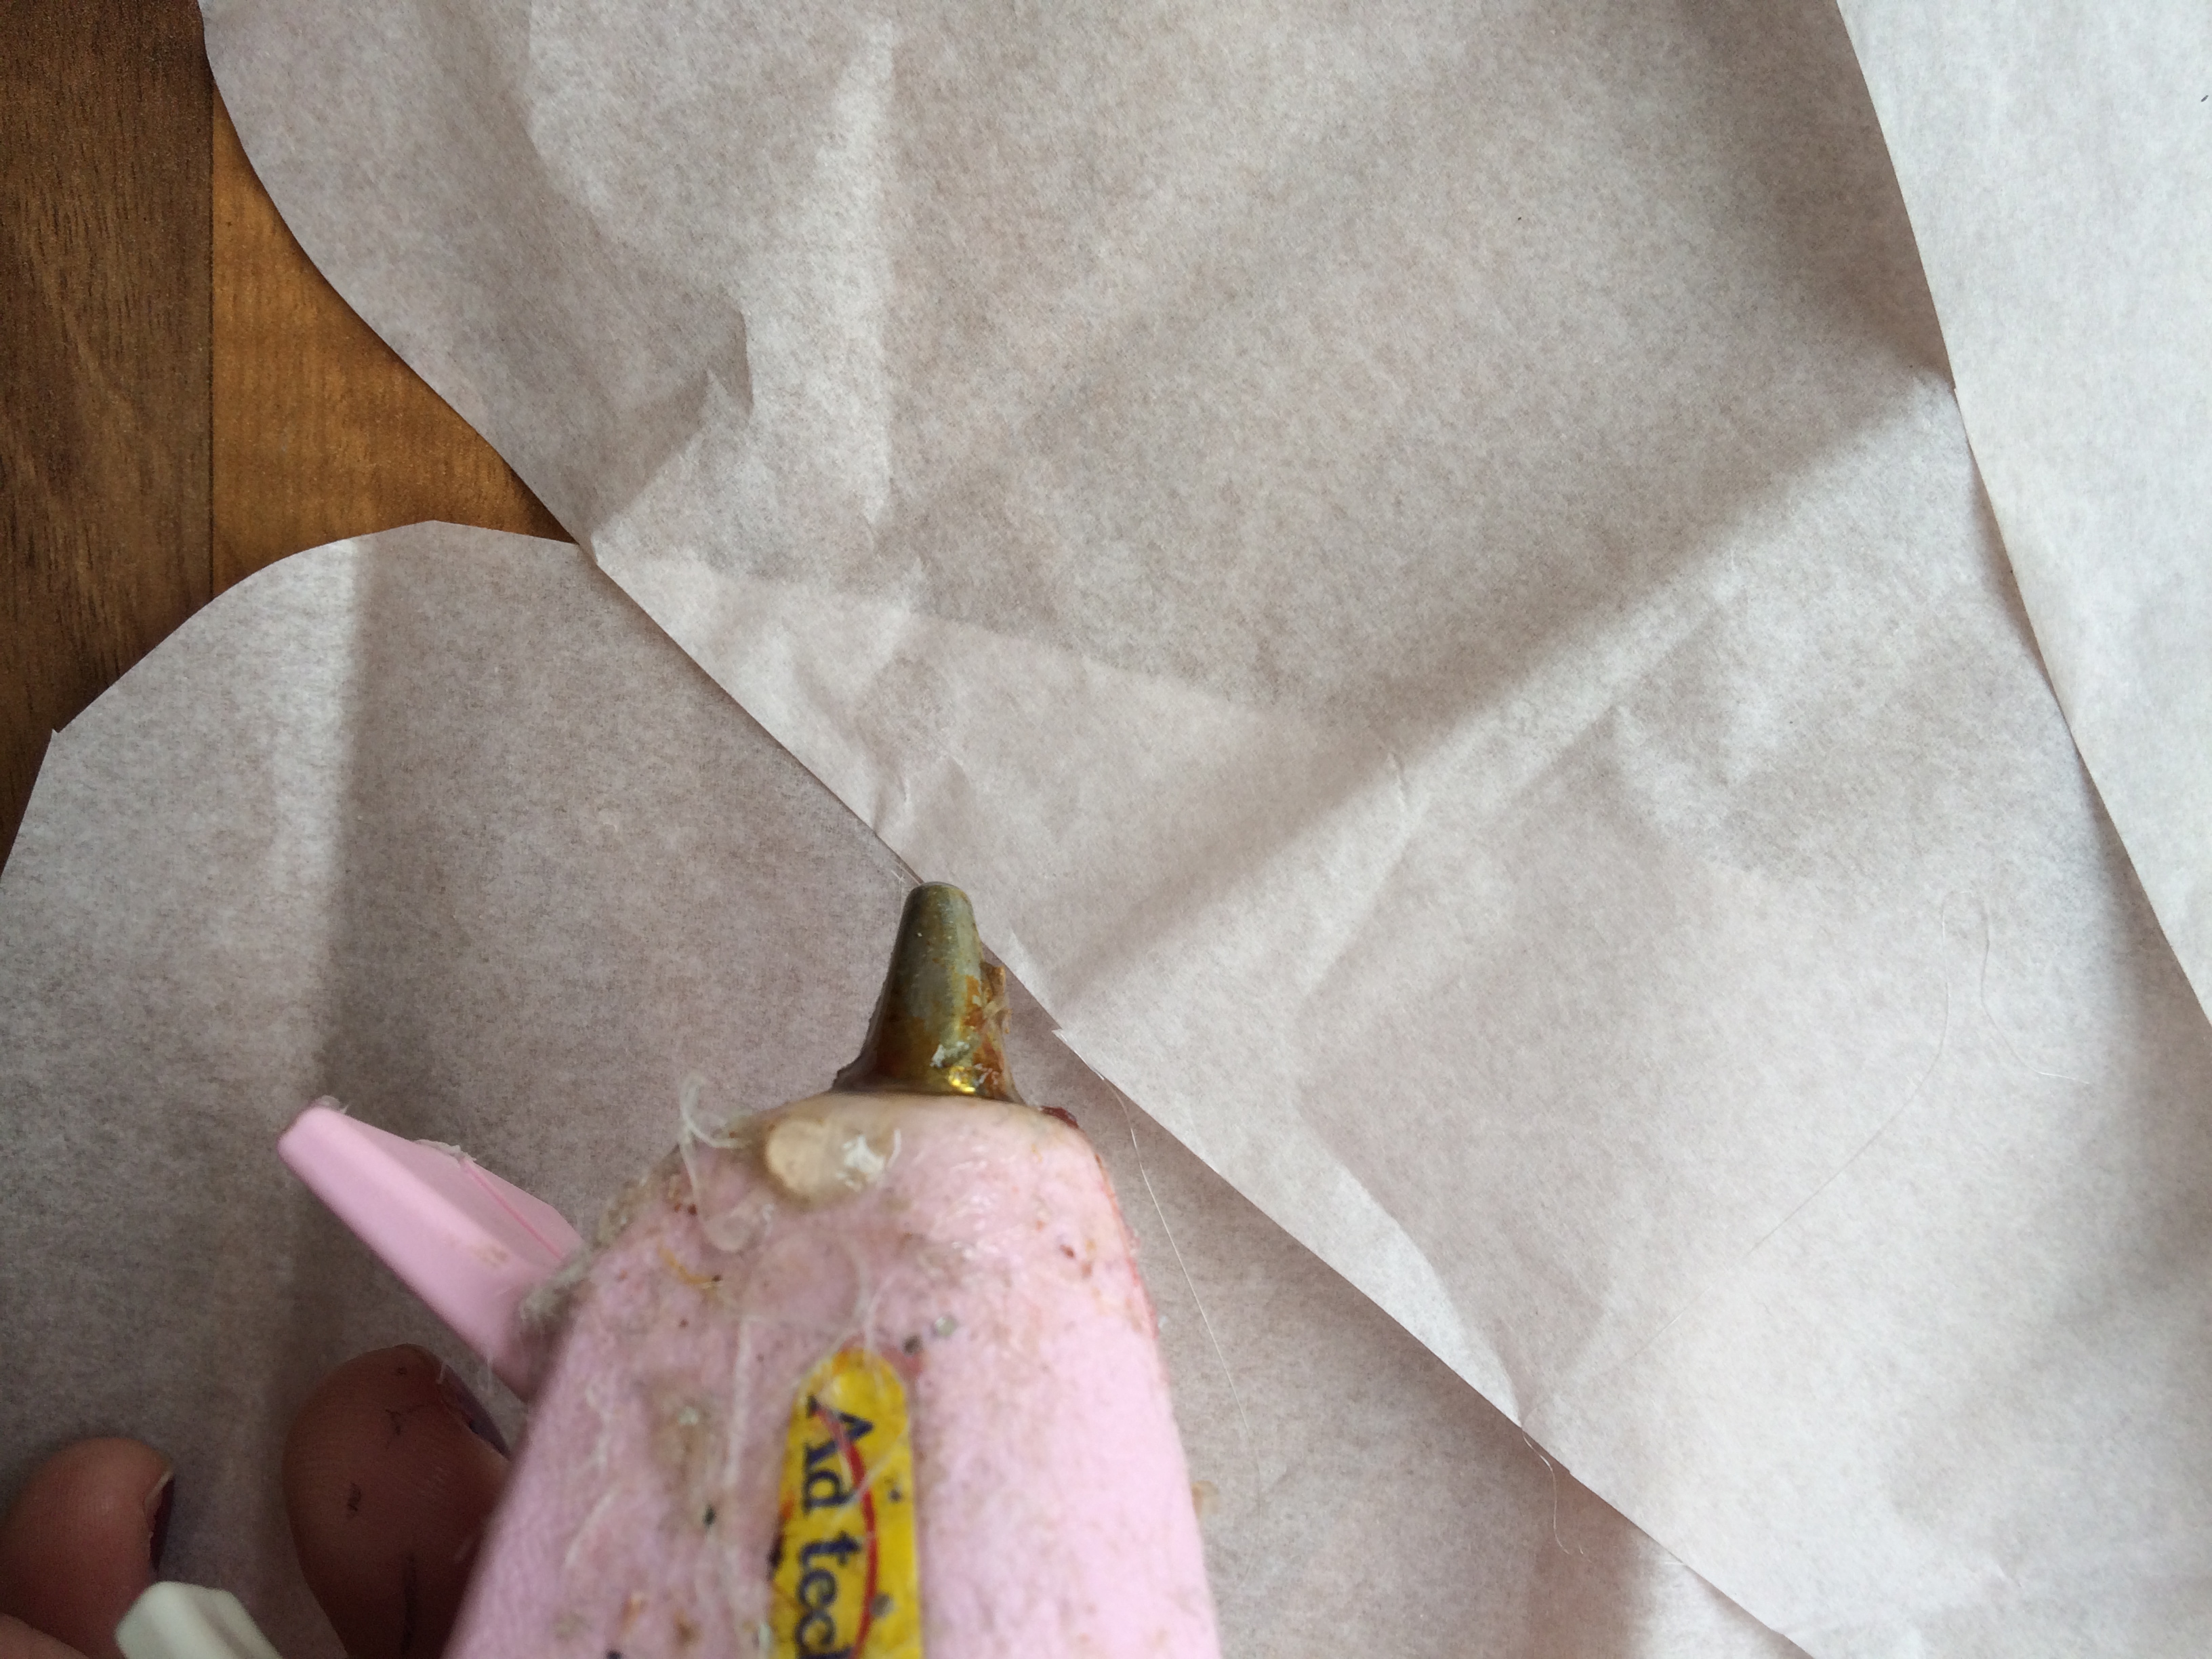
After you have the large, medium, small and tiny flower petals separated and fanned out, we will hot glue them all together. We will use the large petals as our “base” and start by hot gluing the medium petals to the large petal base. After than glue the small petals to the medium, and finally the tiny to the small.
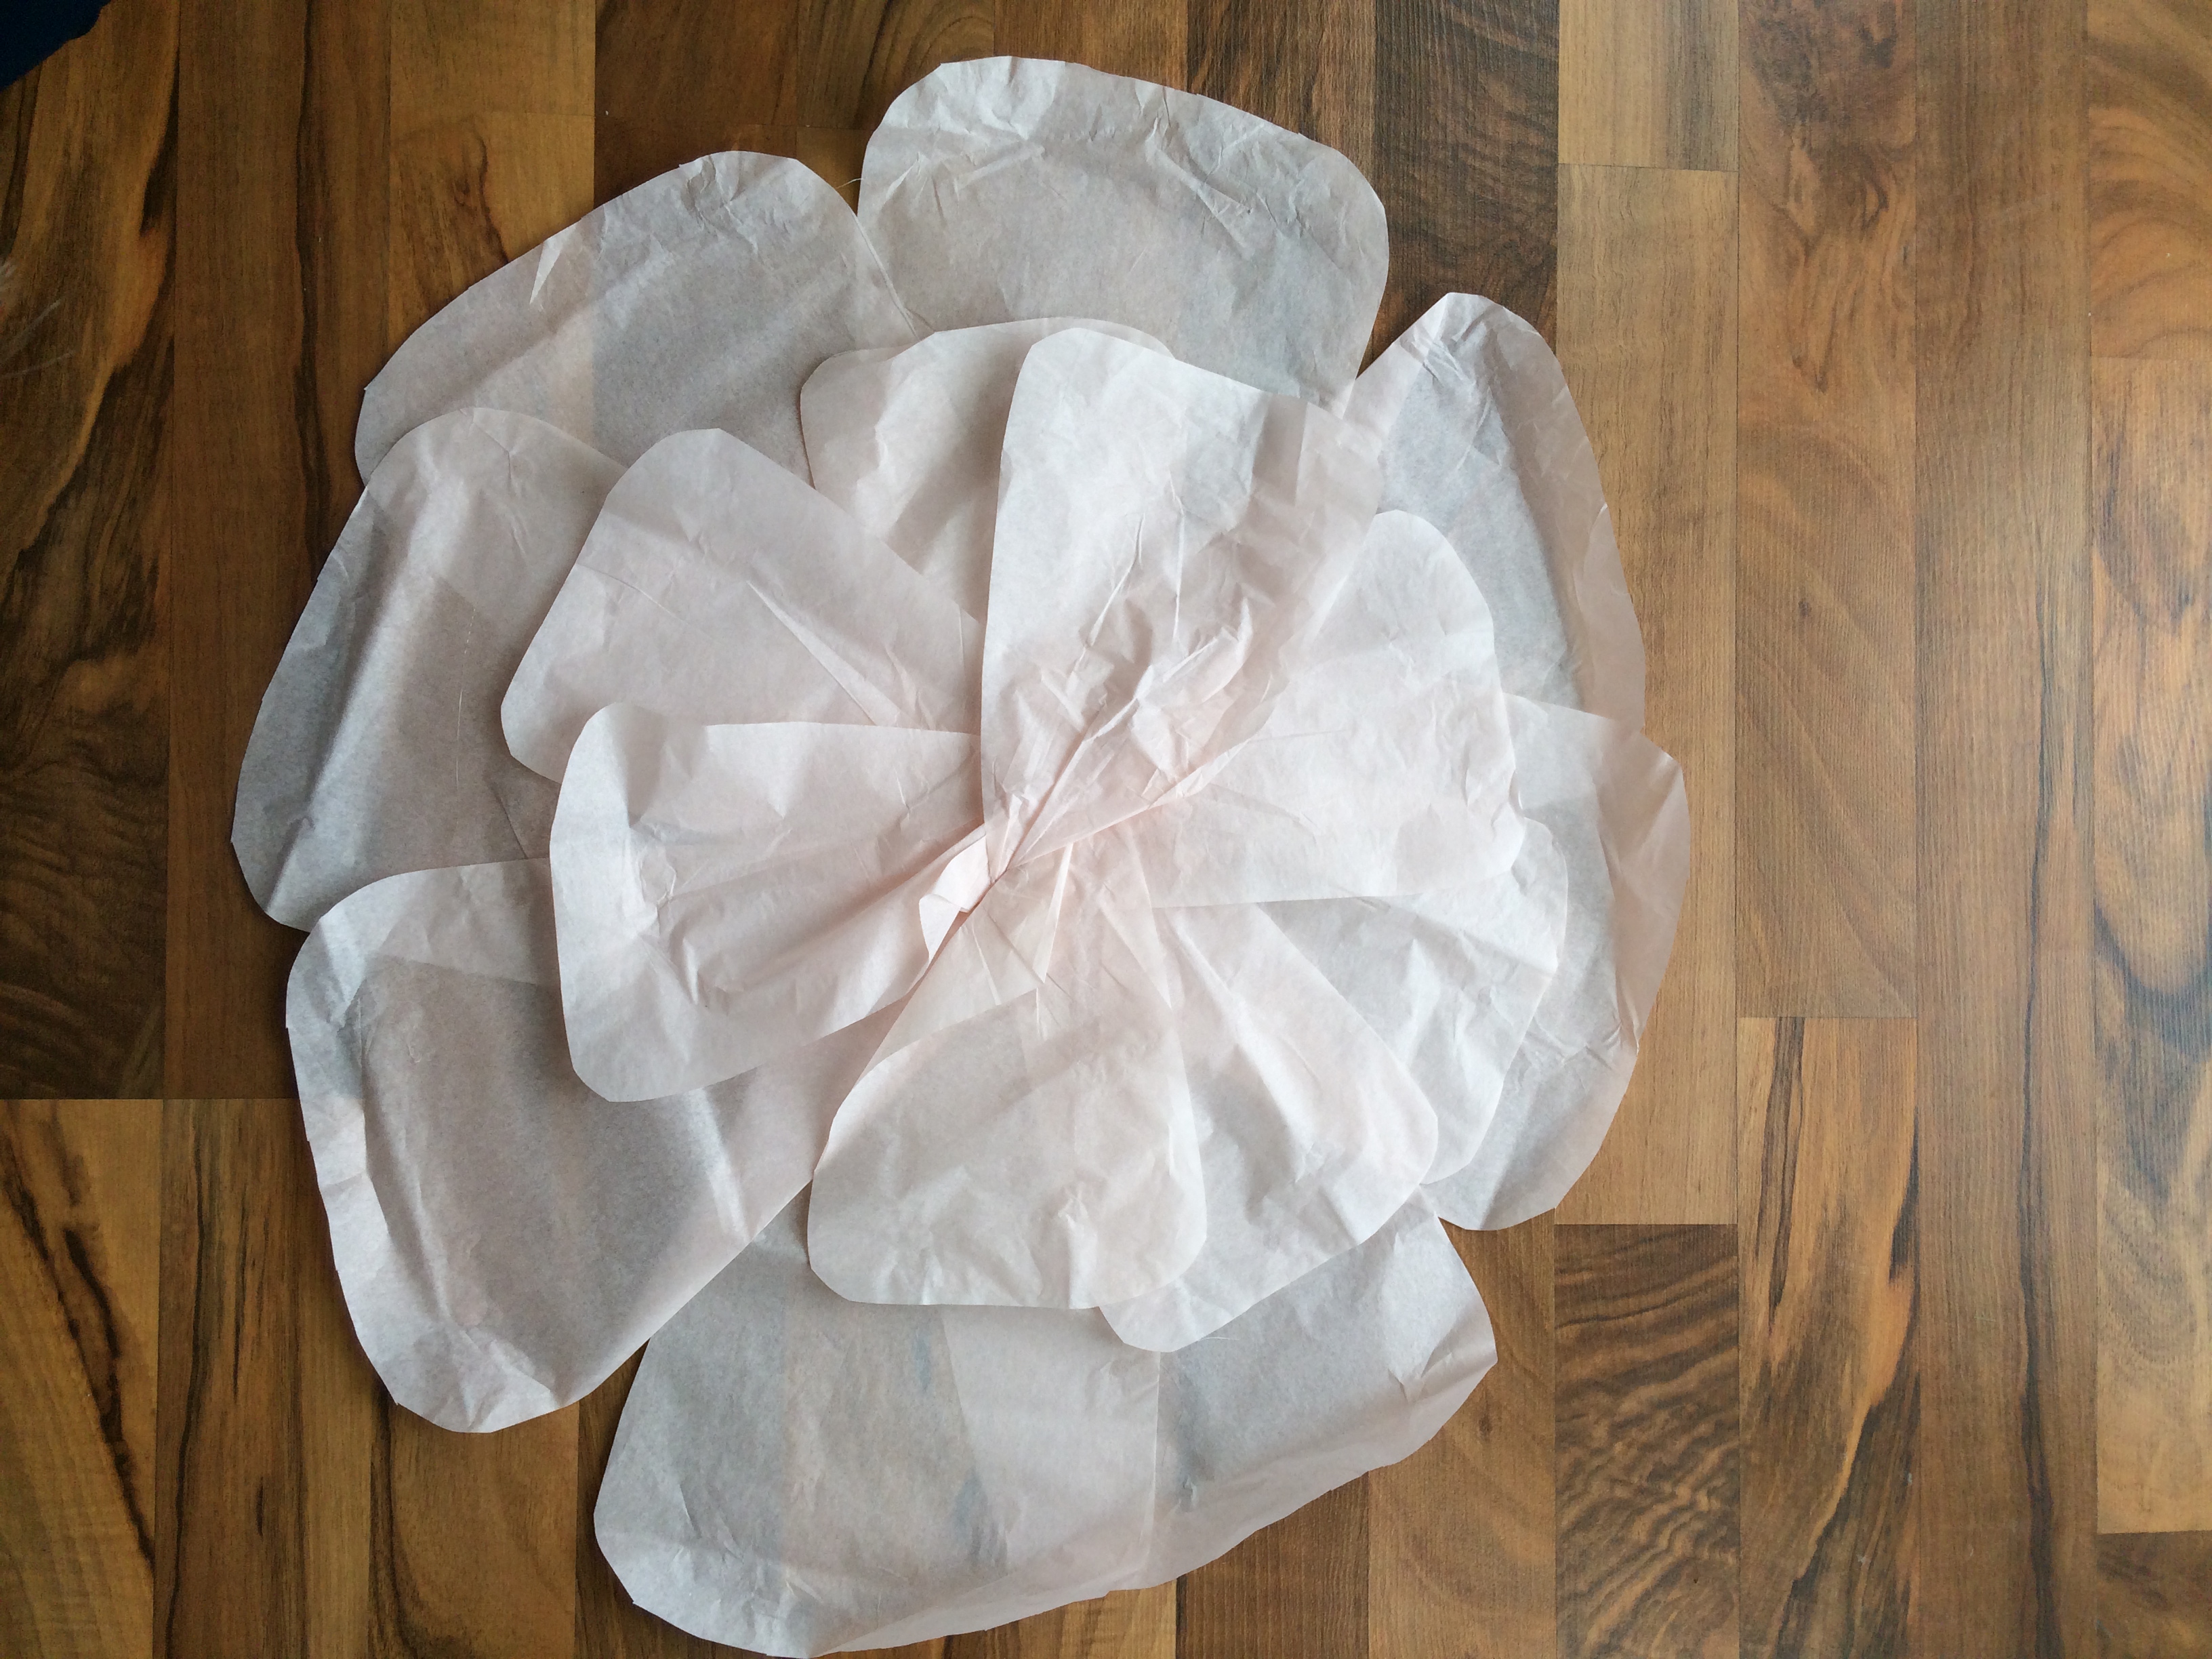
Your flower should now look like this:
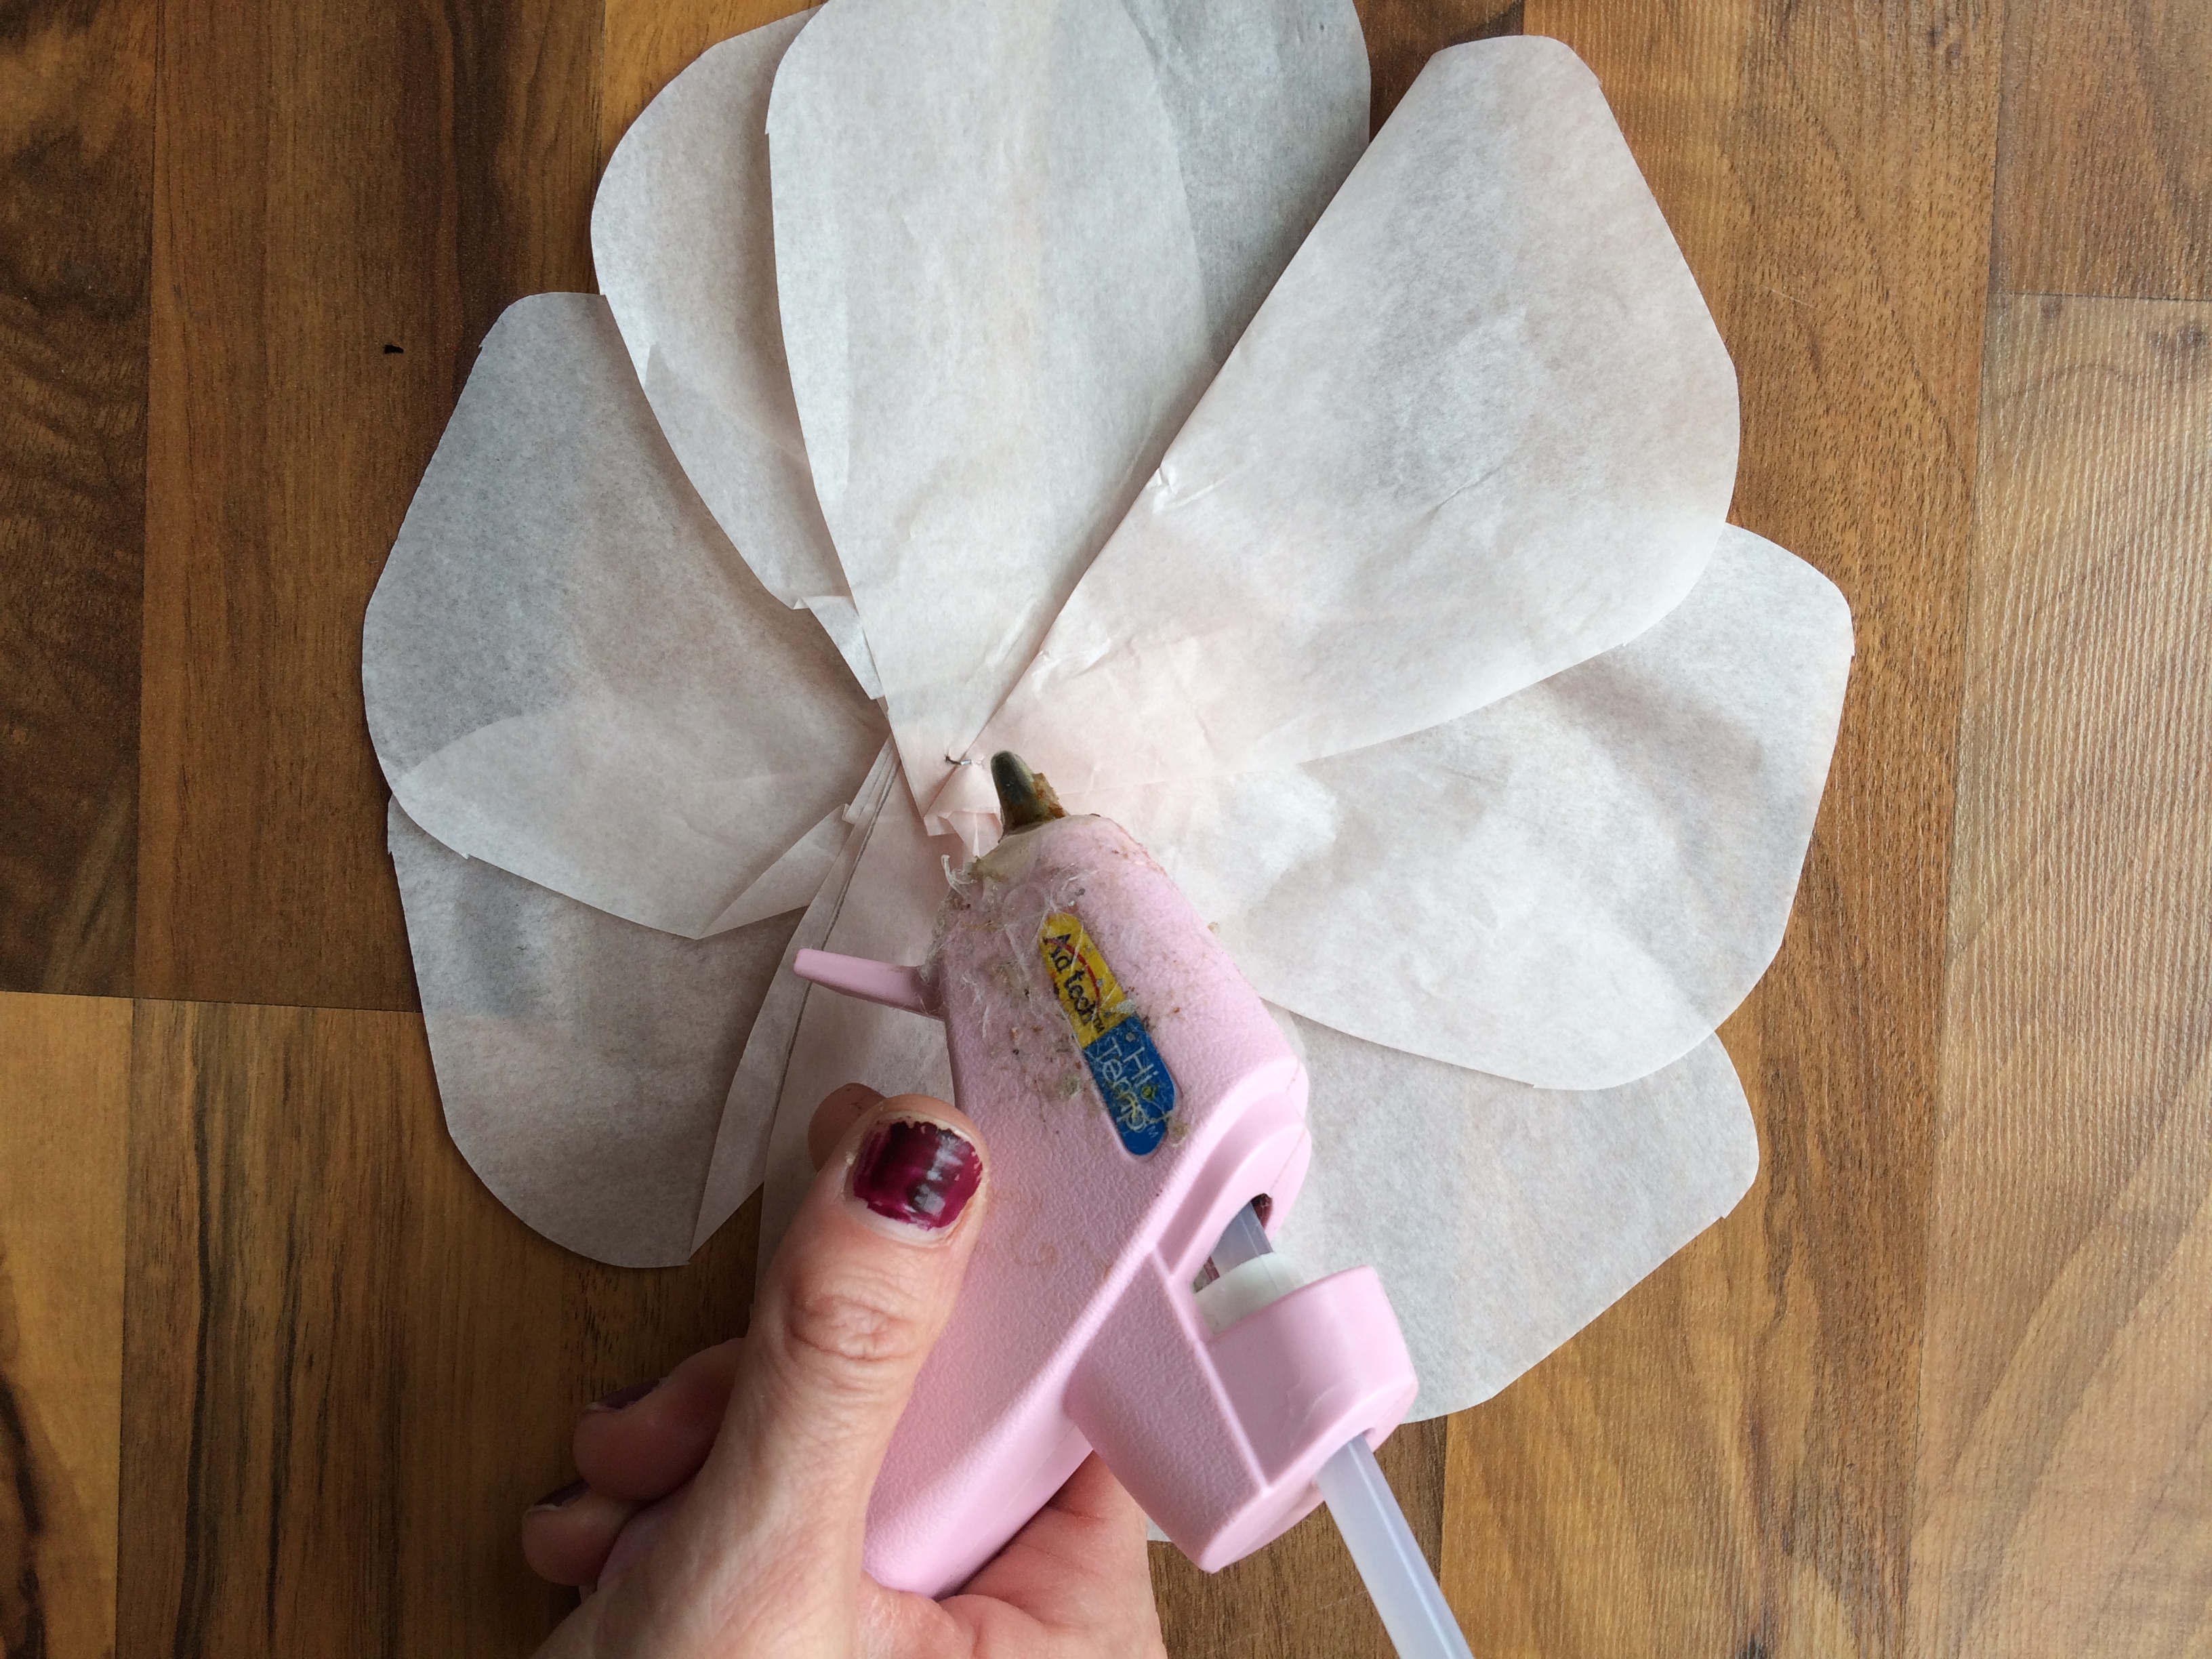

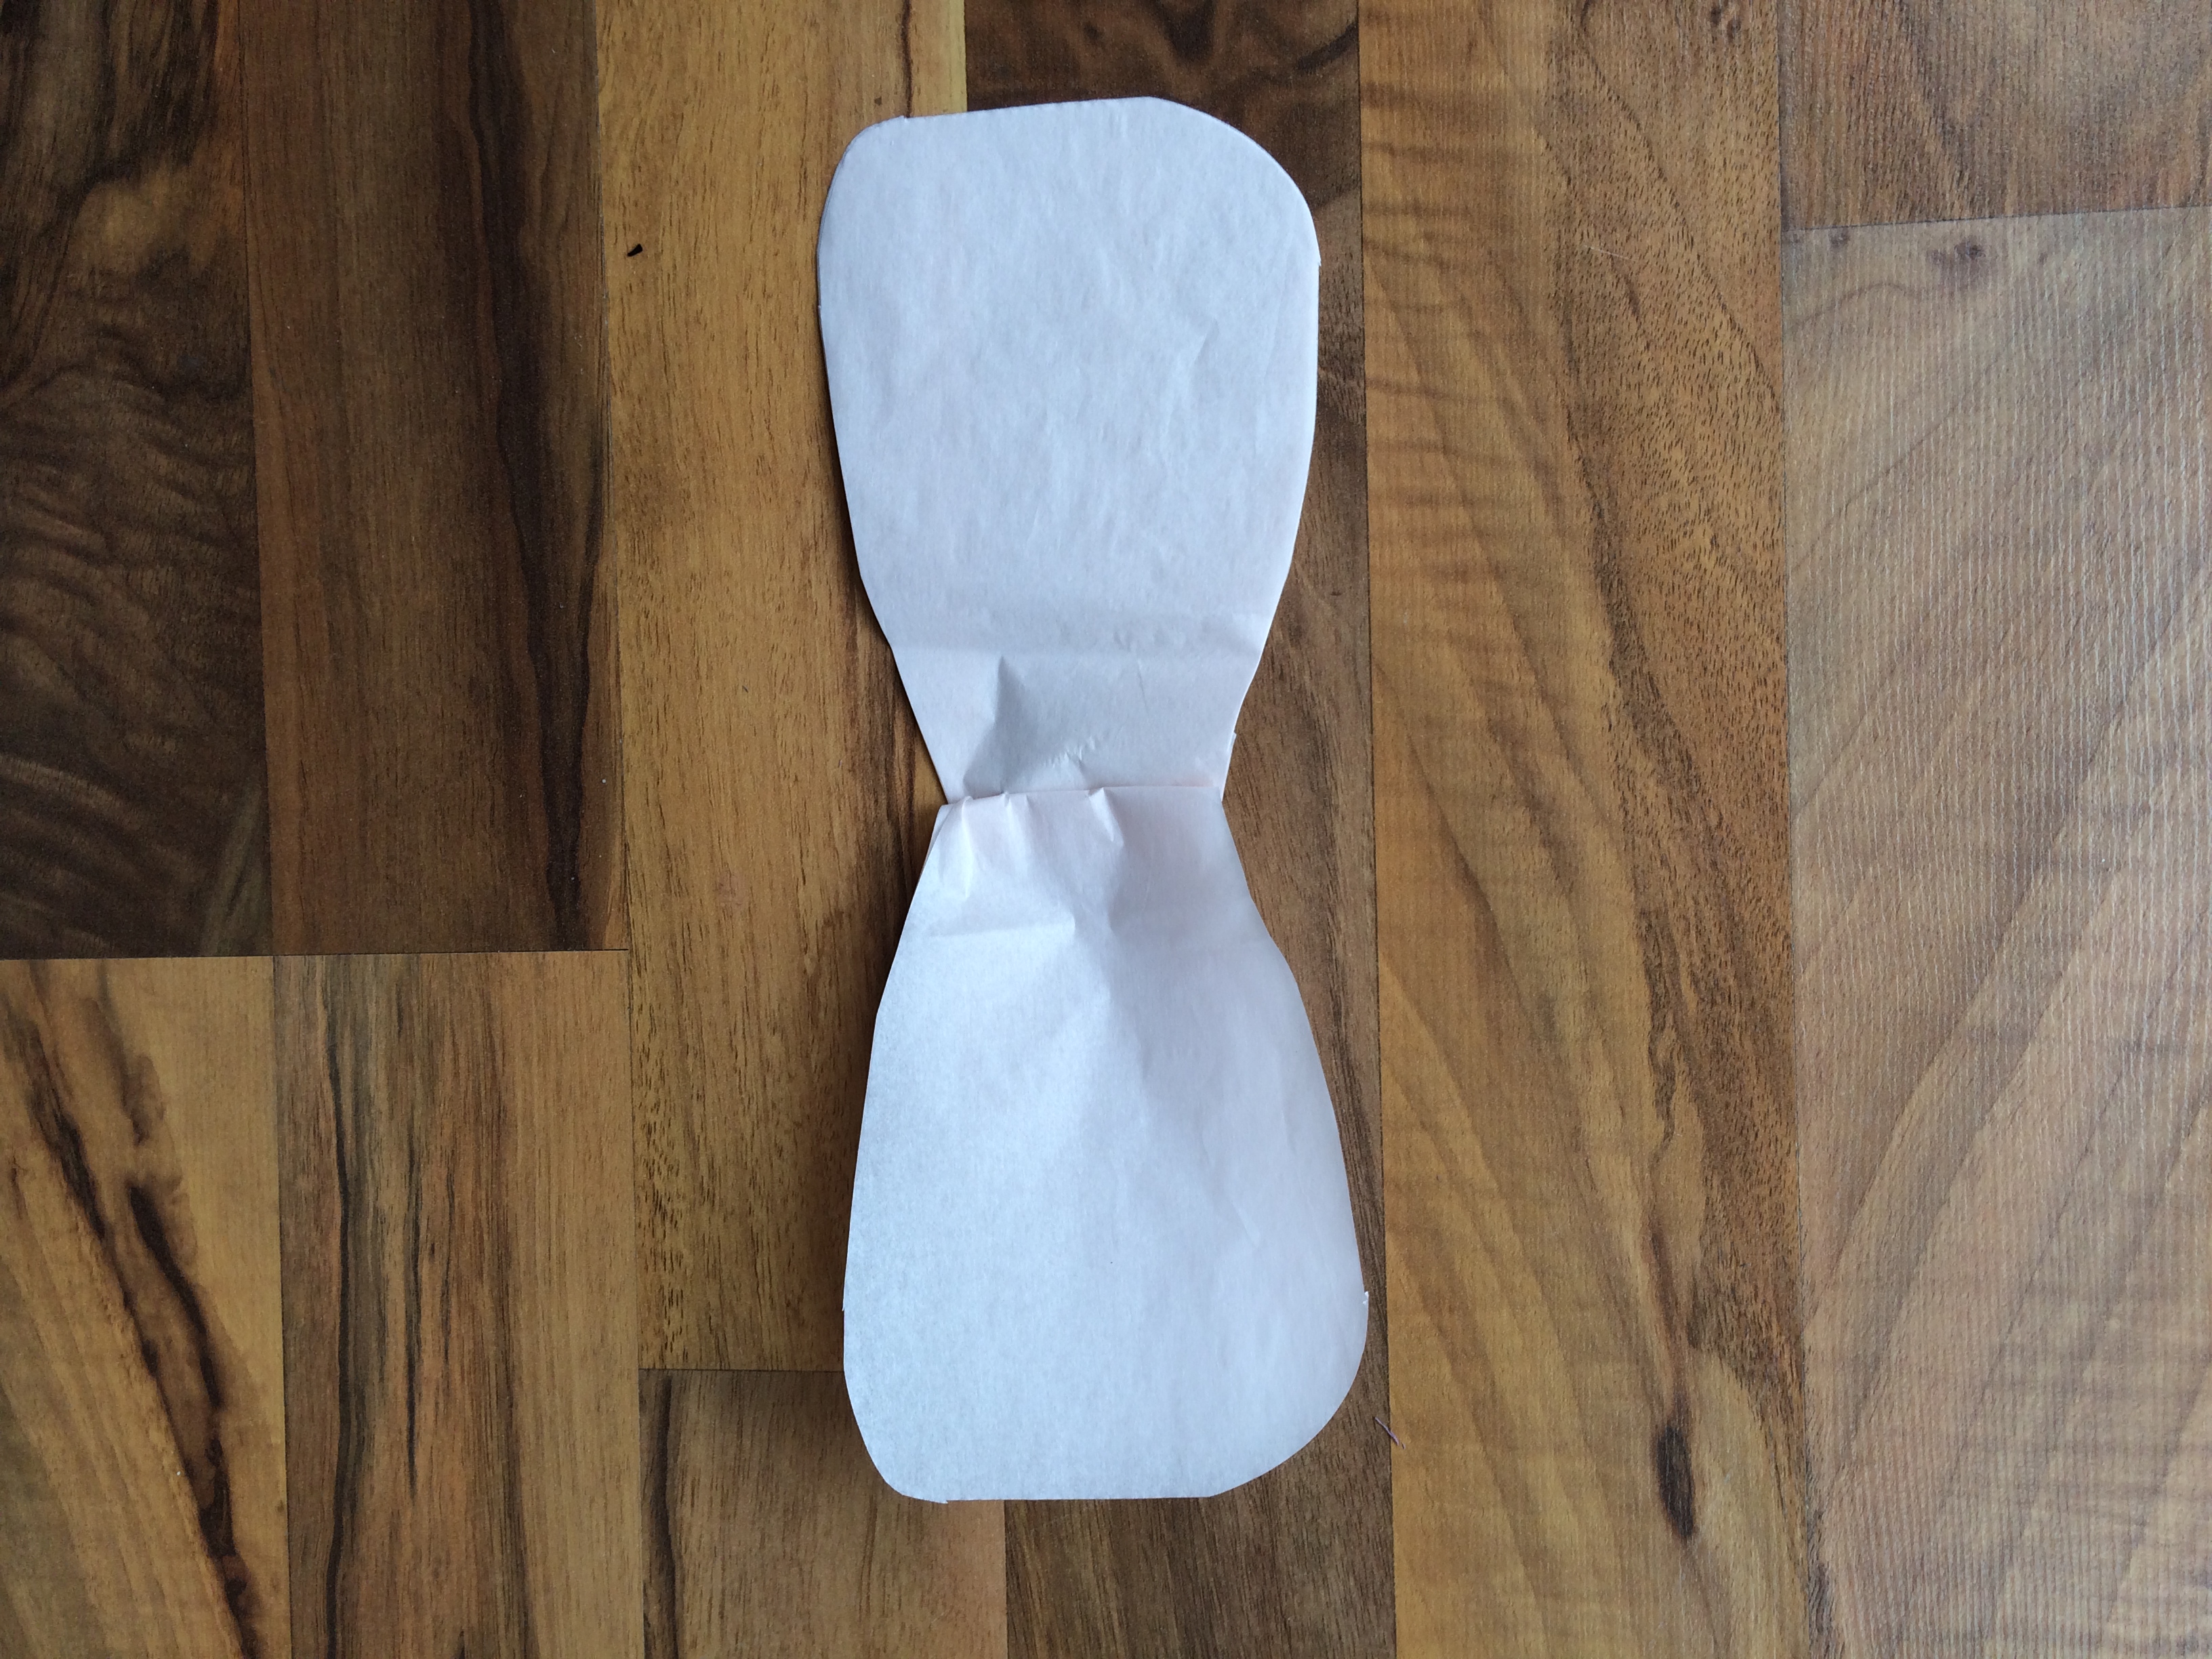
You may need to go back through and hot glue the edges so that when your flower is hung, it doesn’t droop in areas. Pardon my hot glue gun…she has seen better days :)
THE CENTER
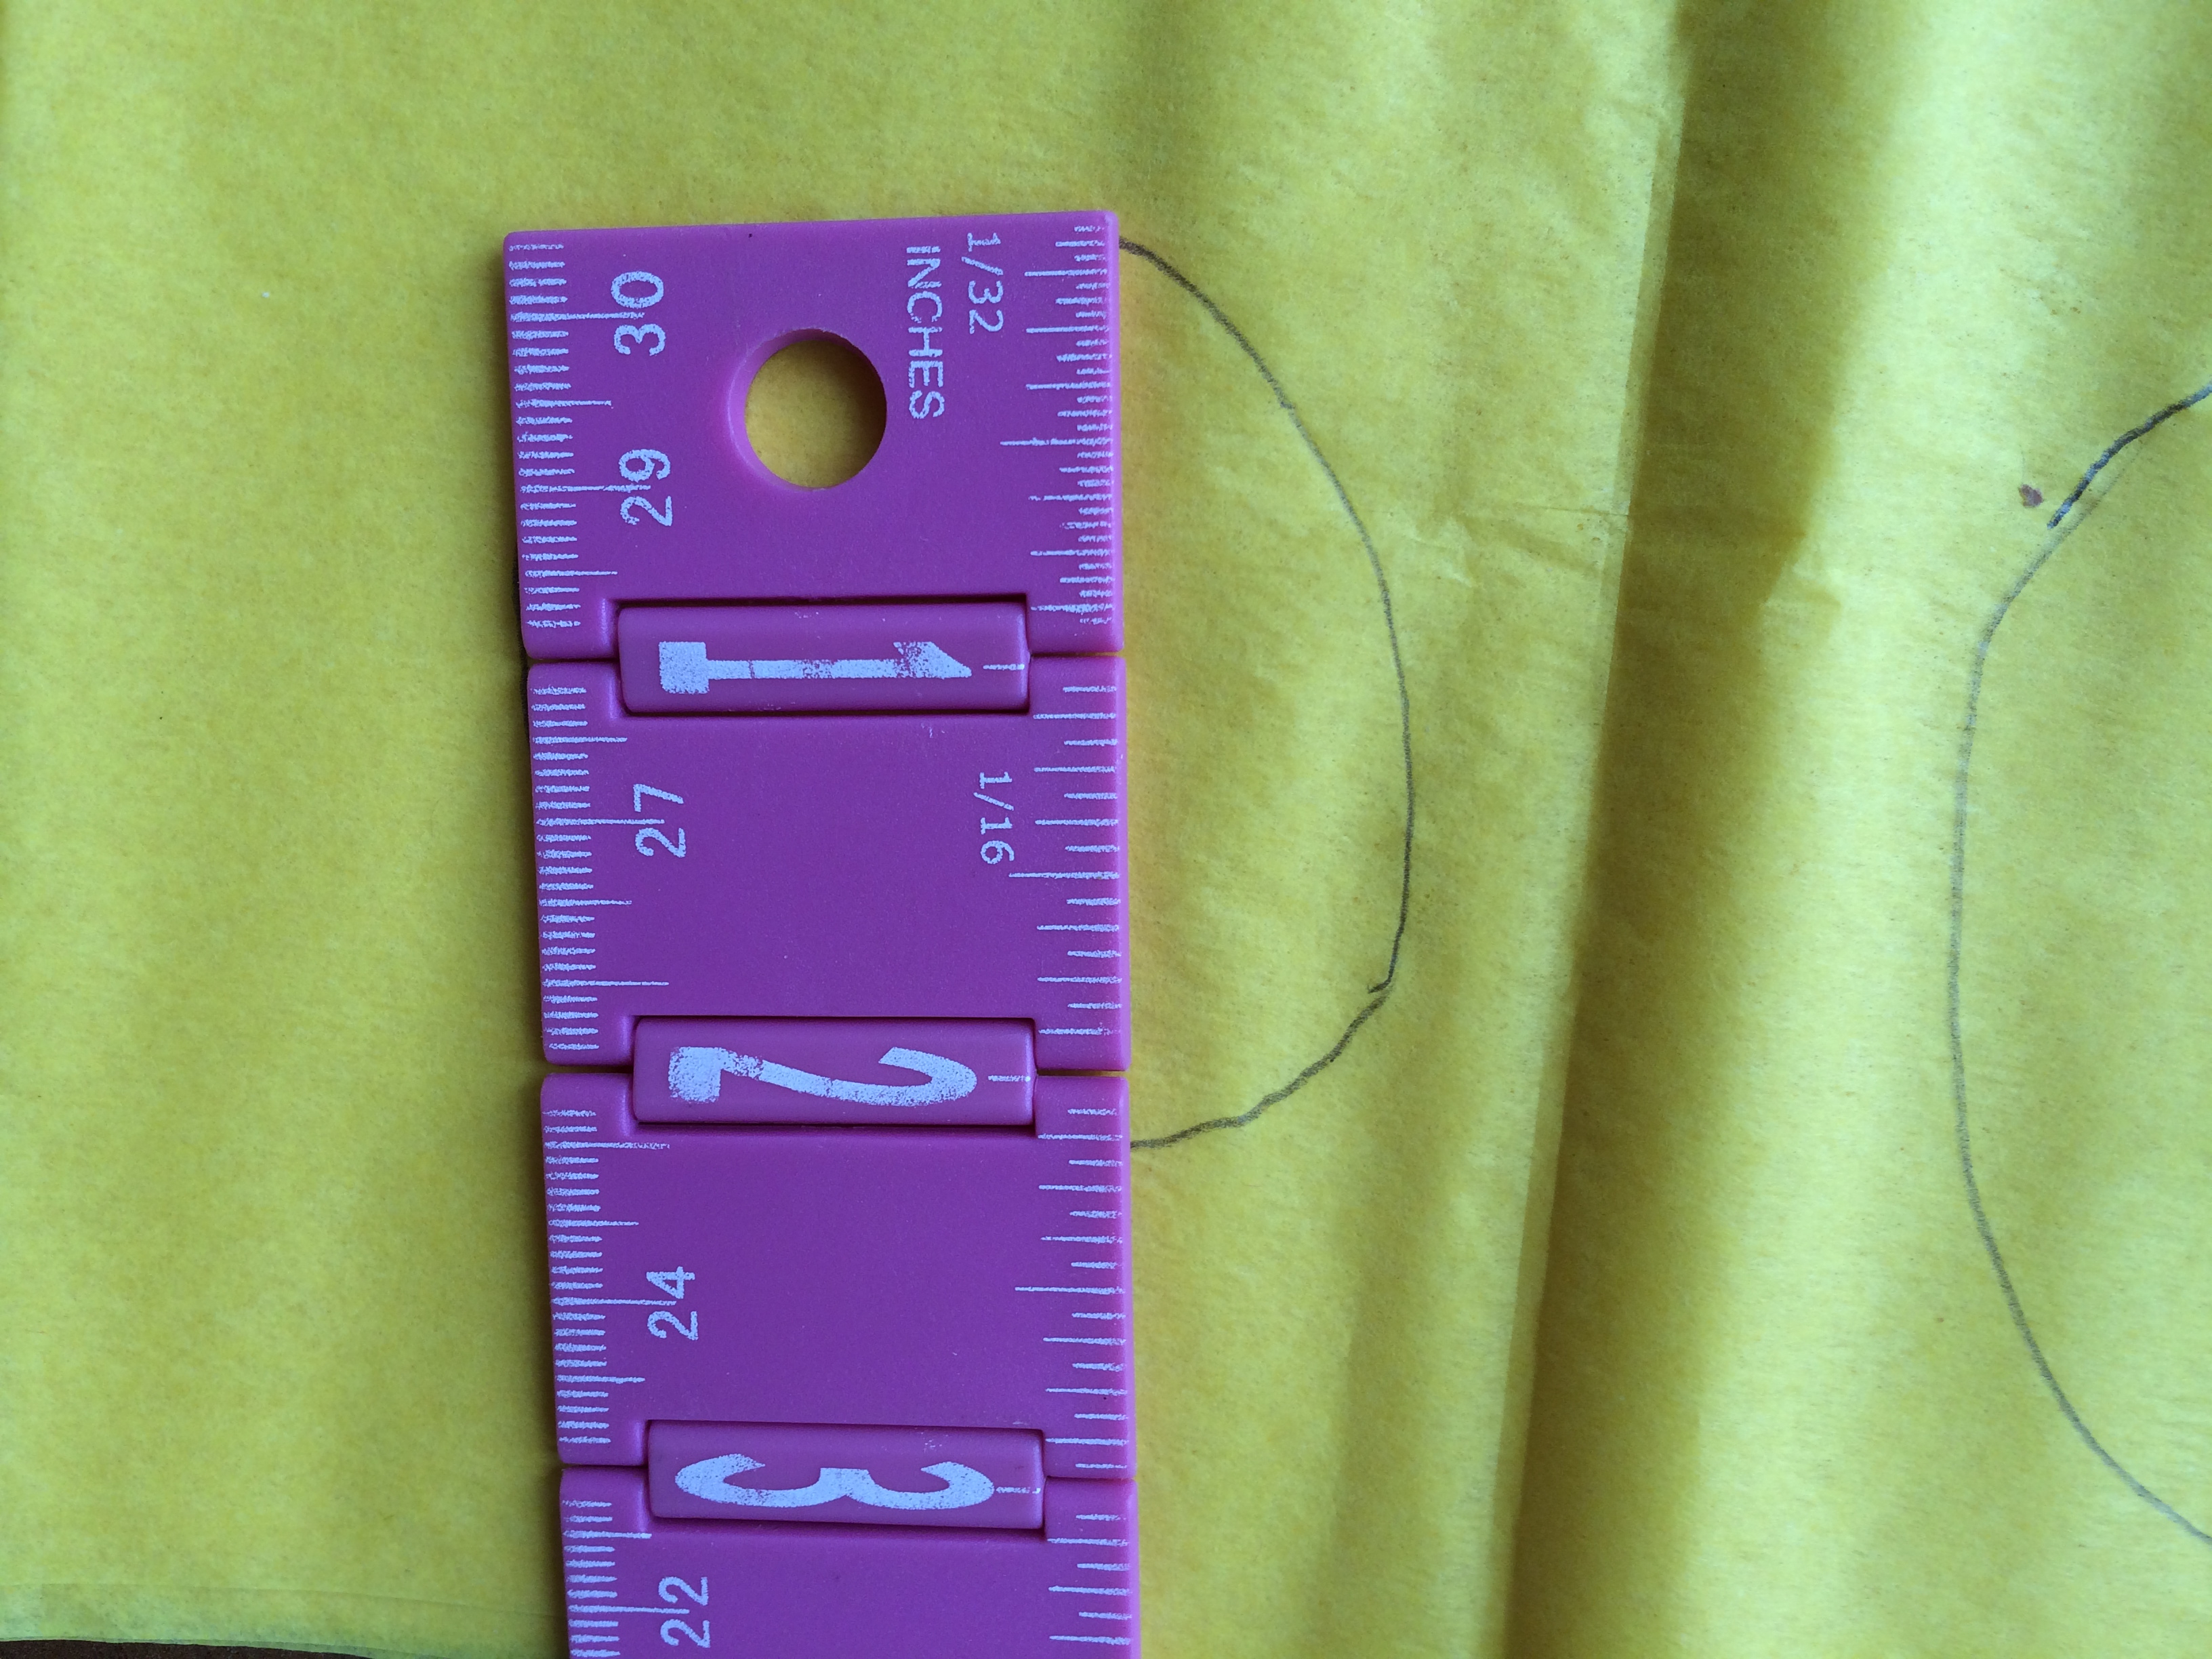
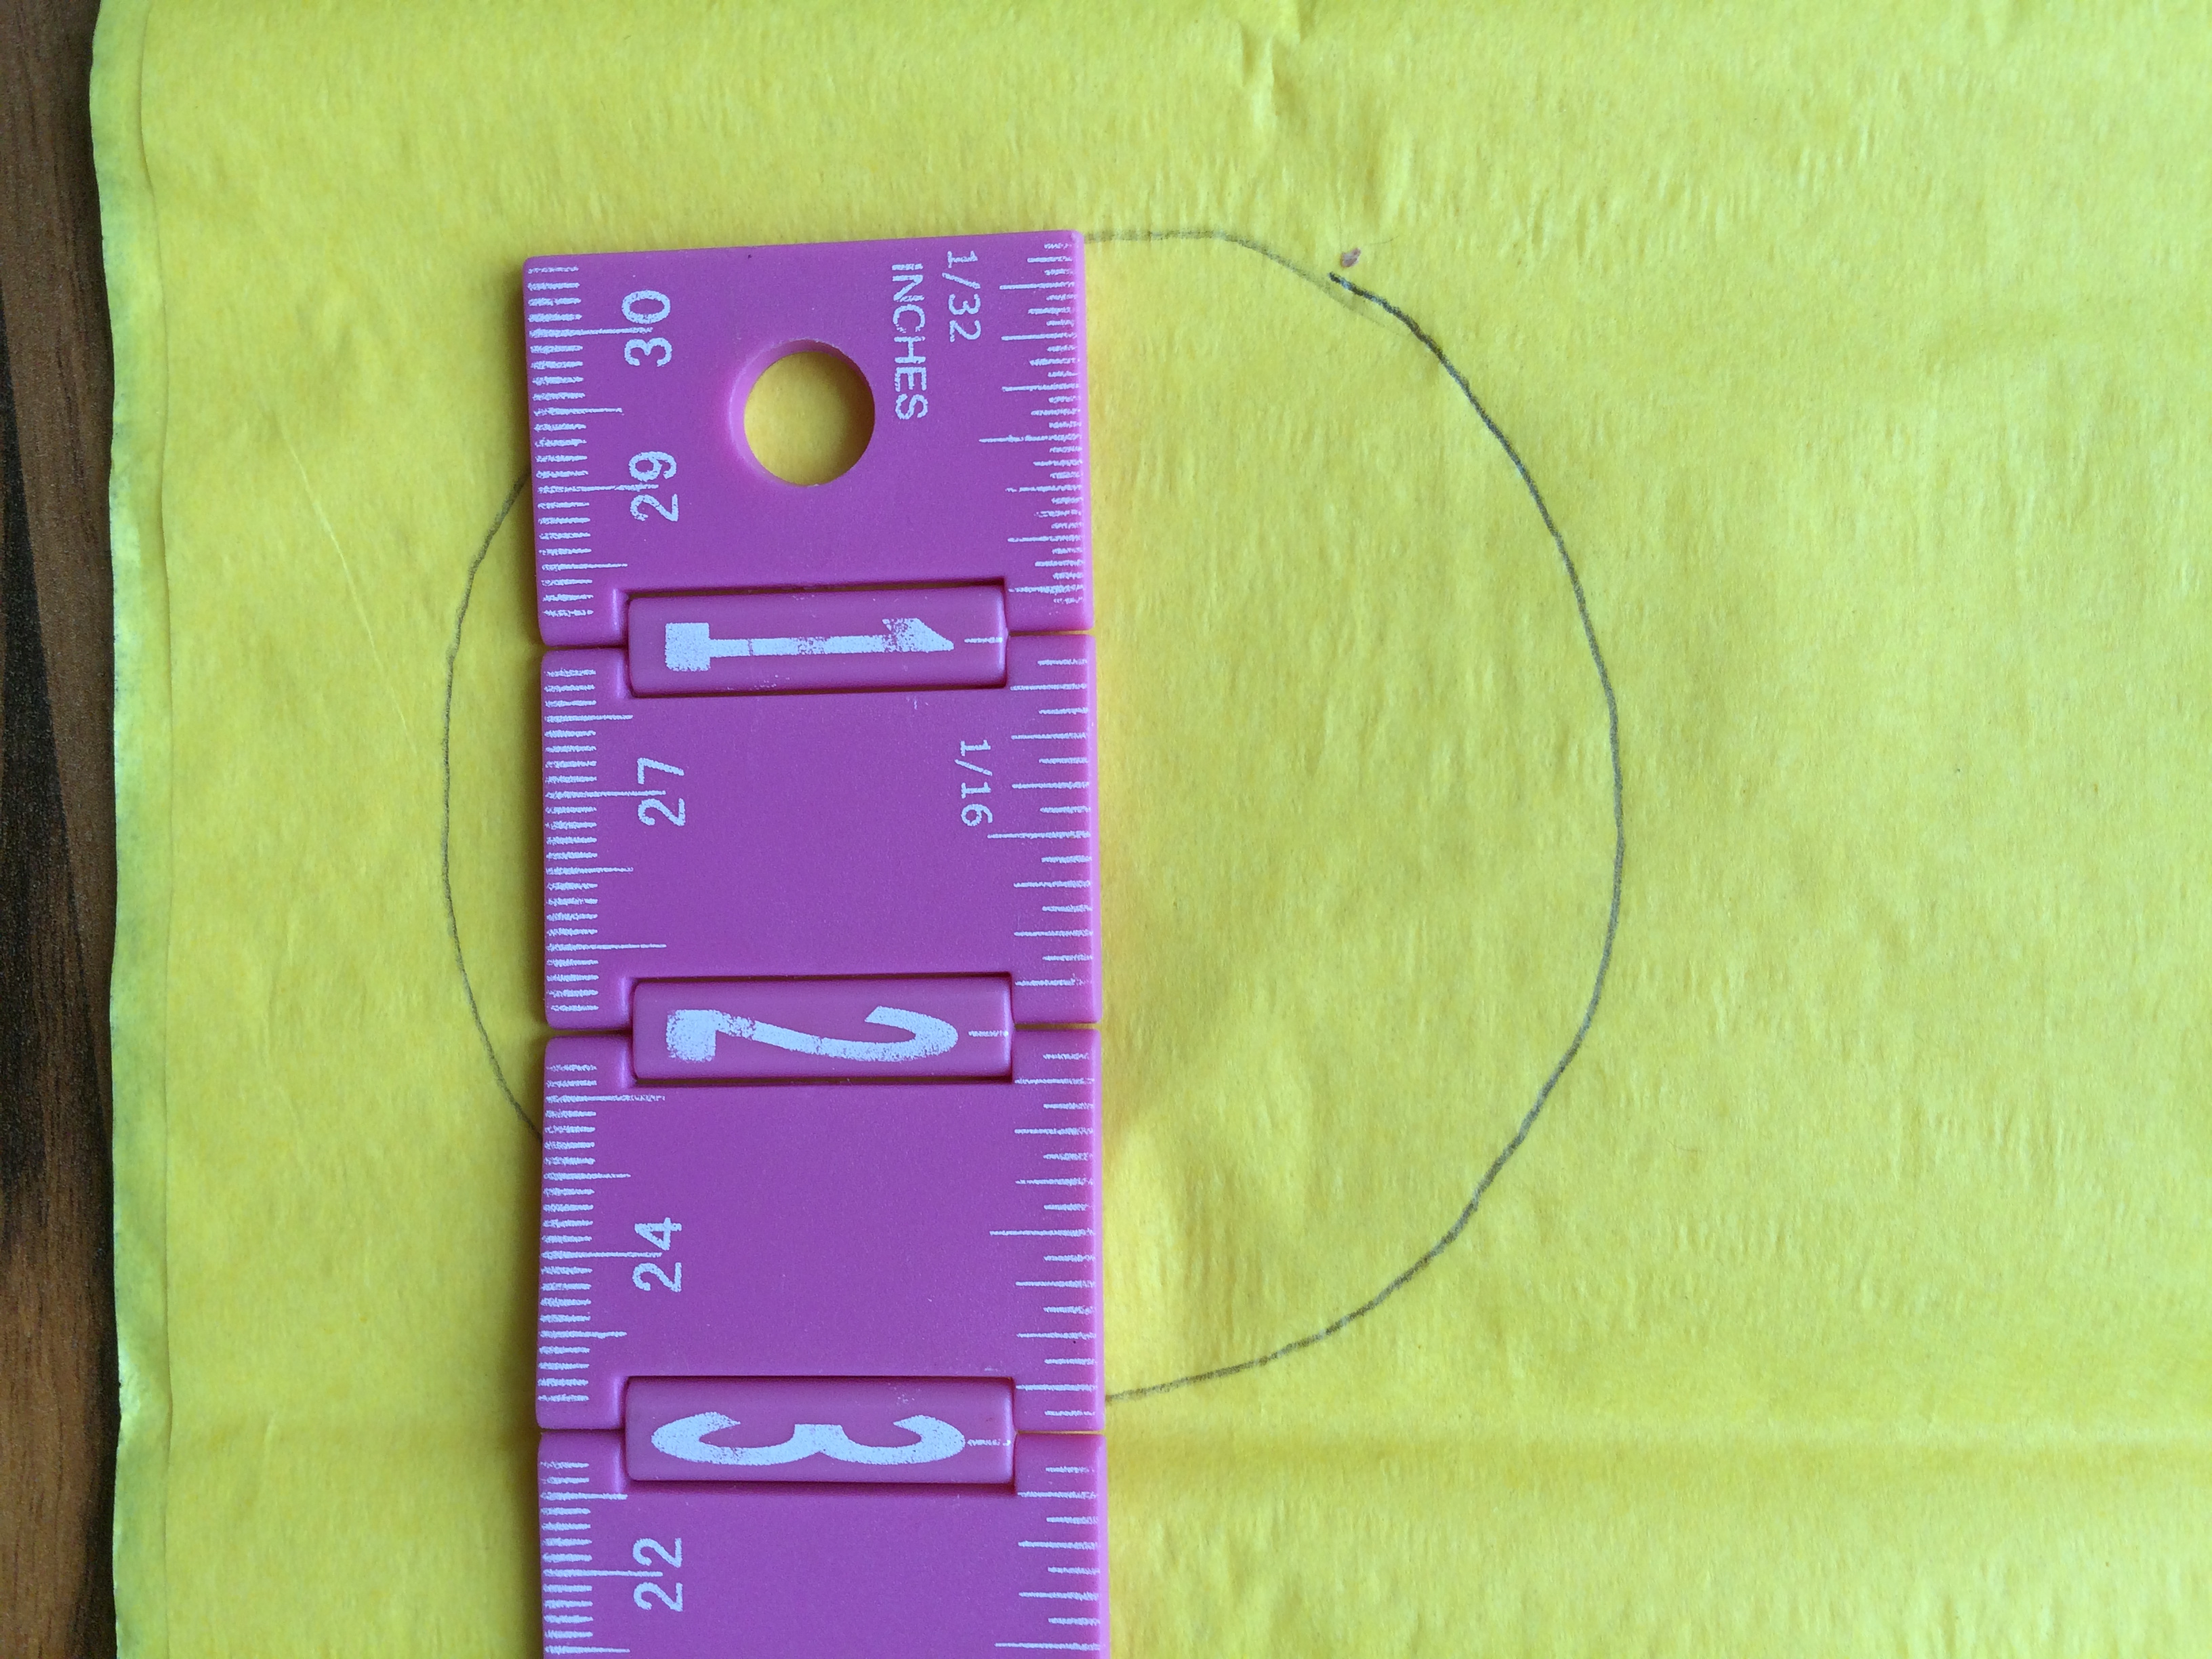
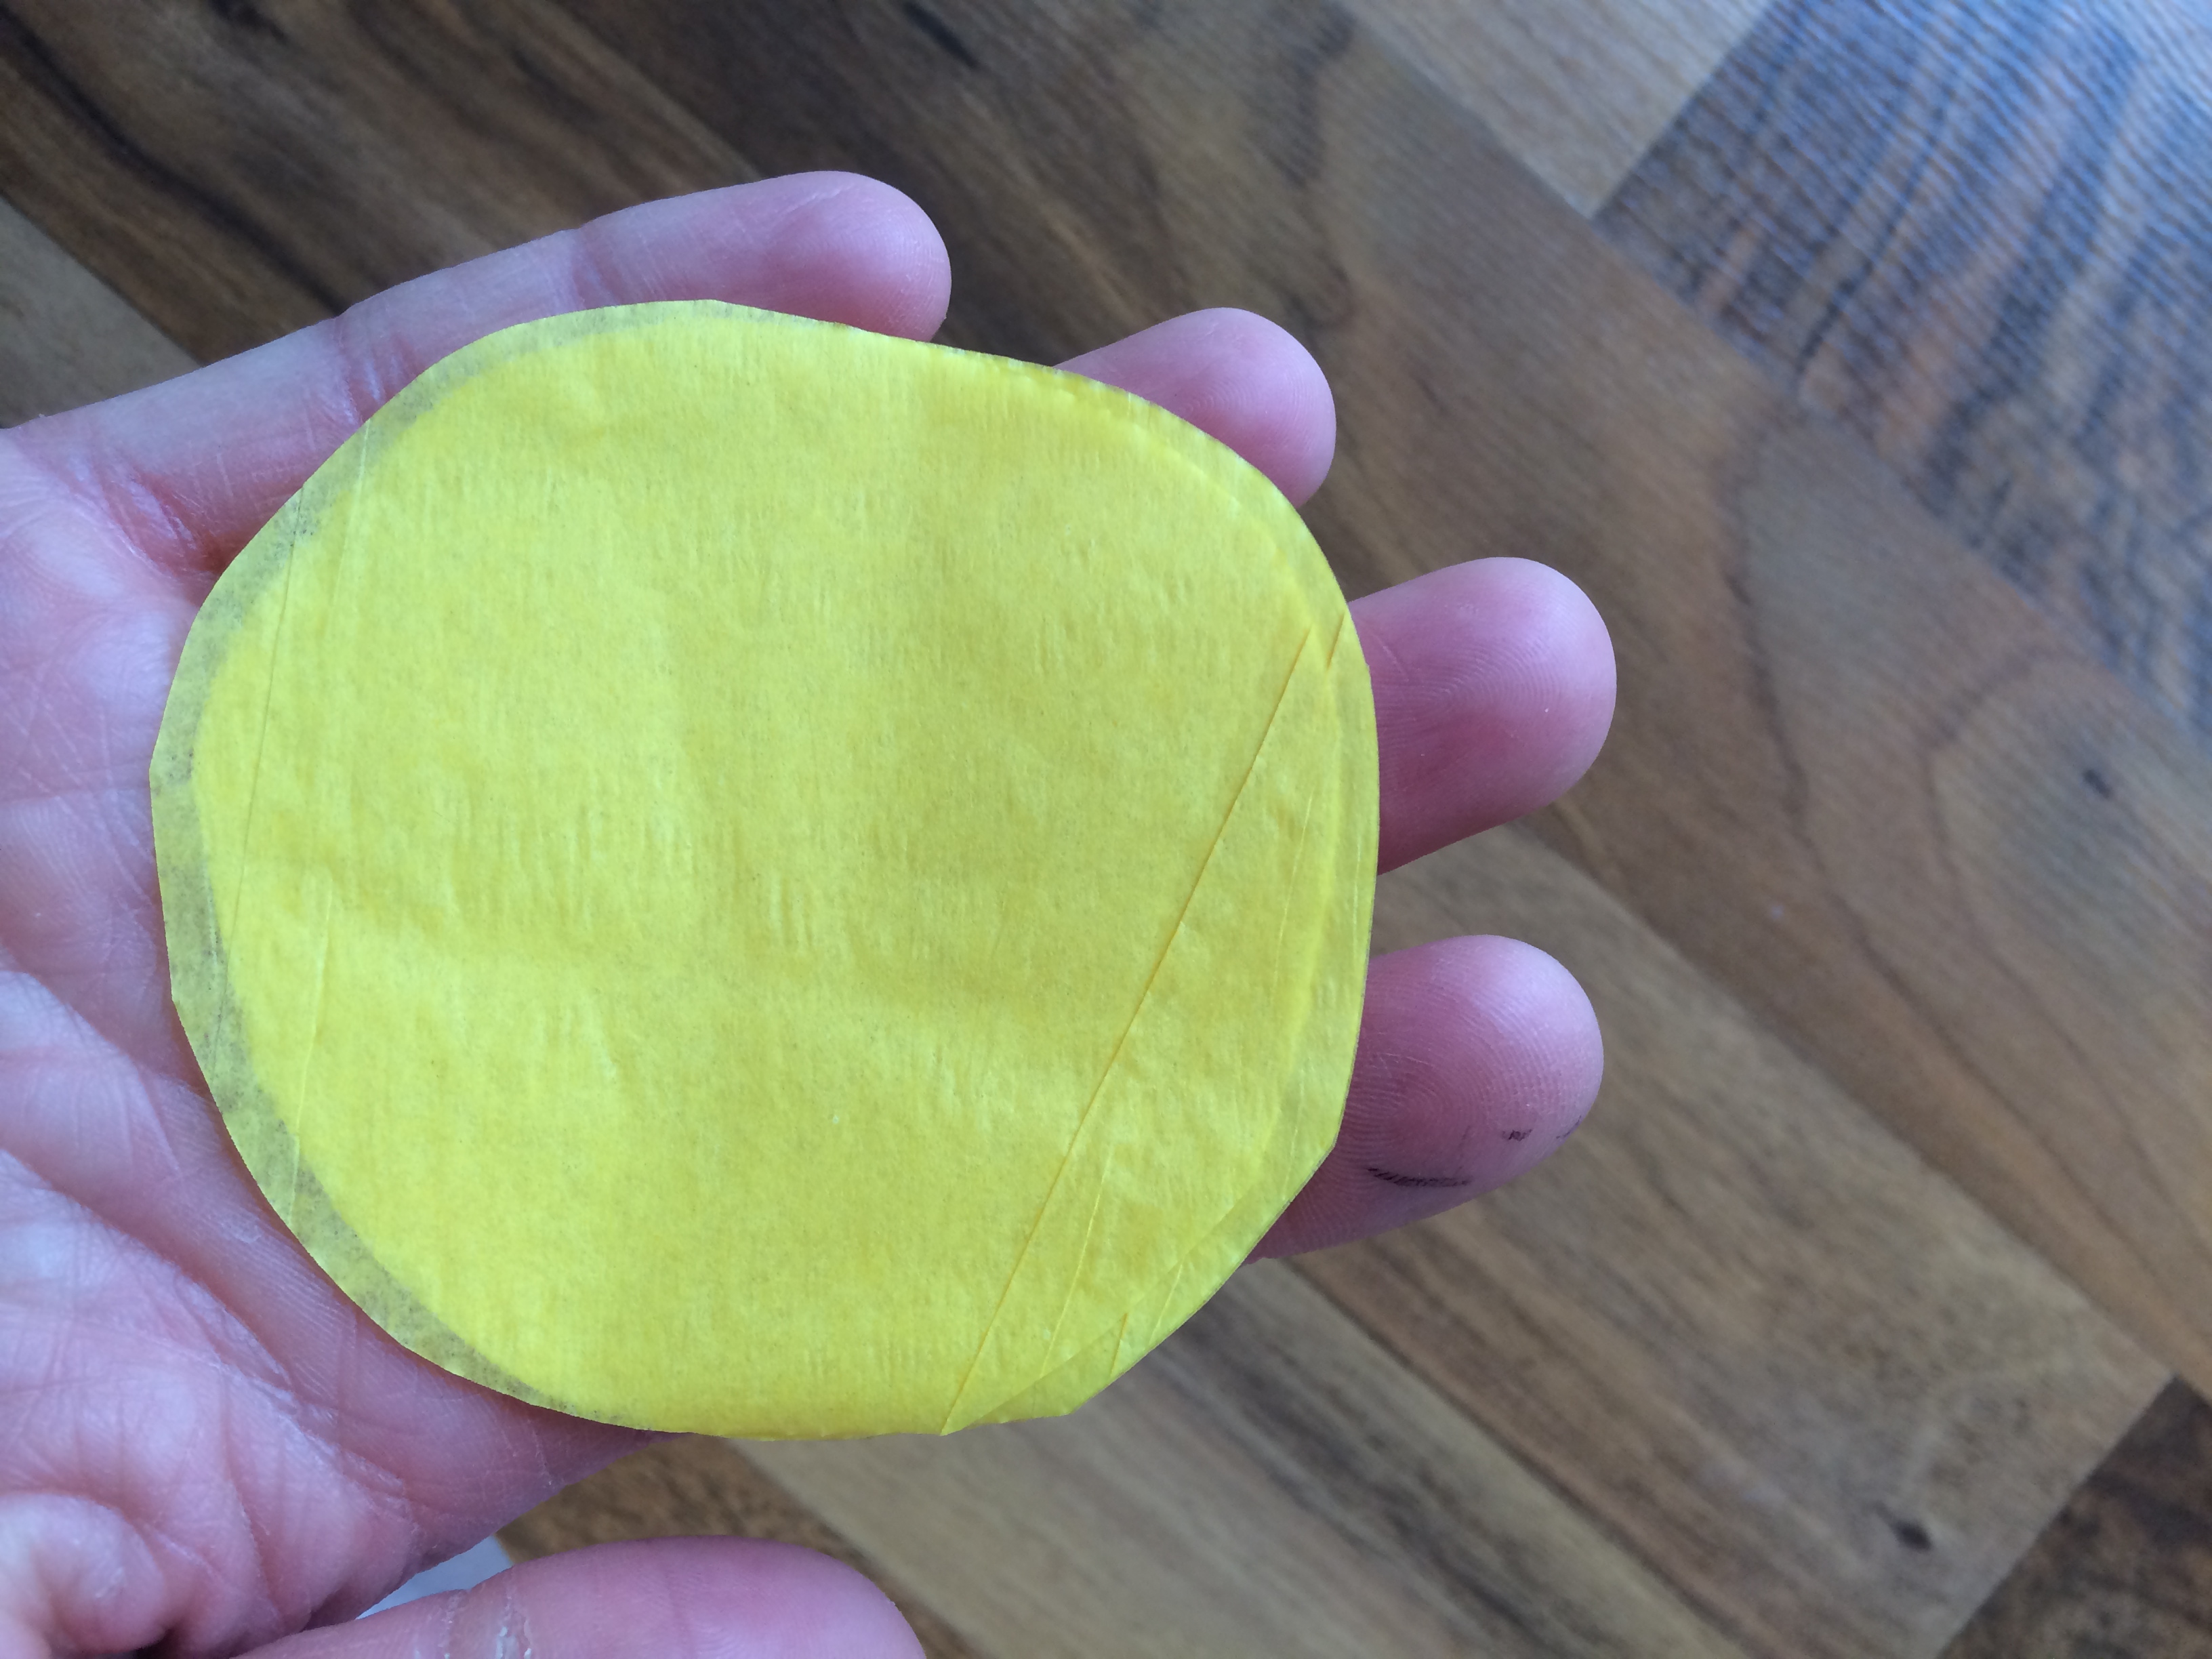
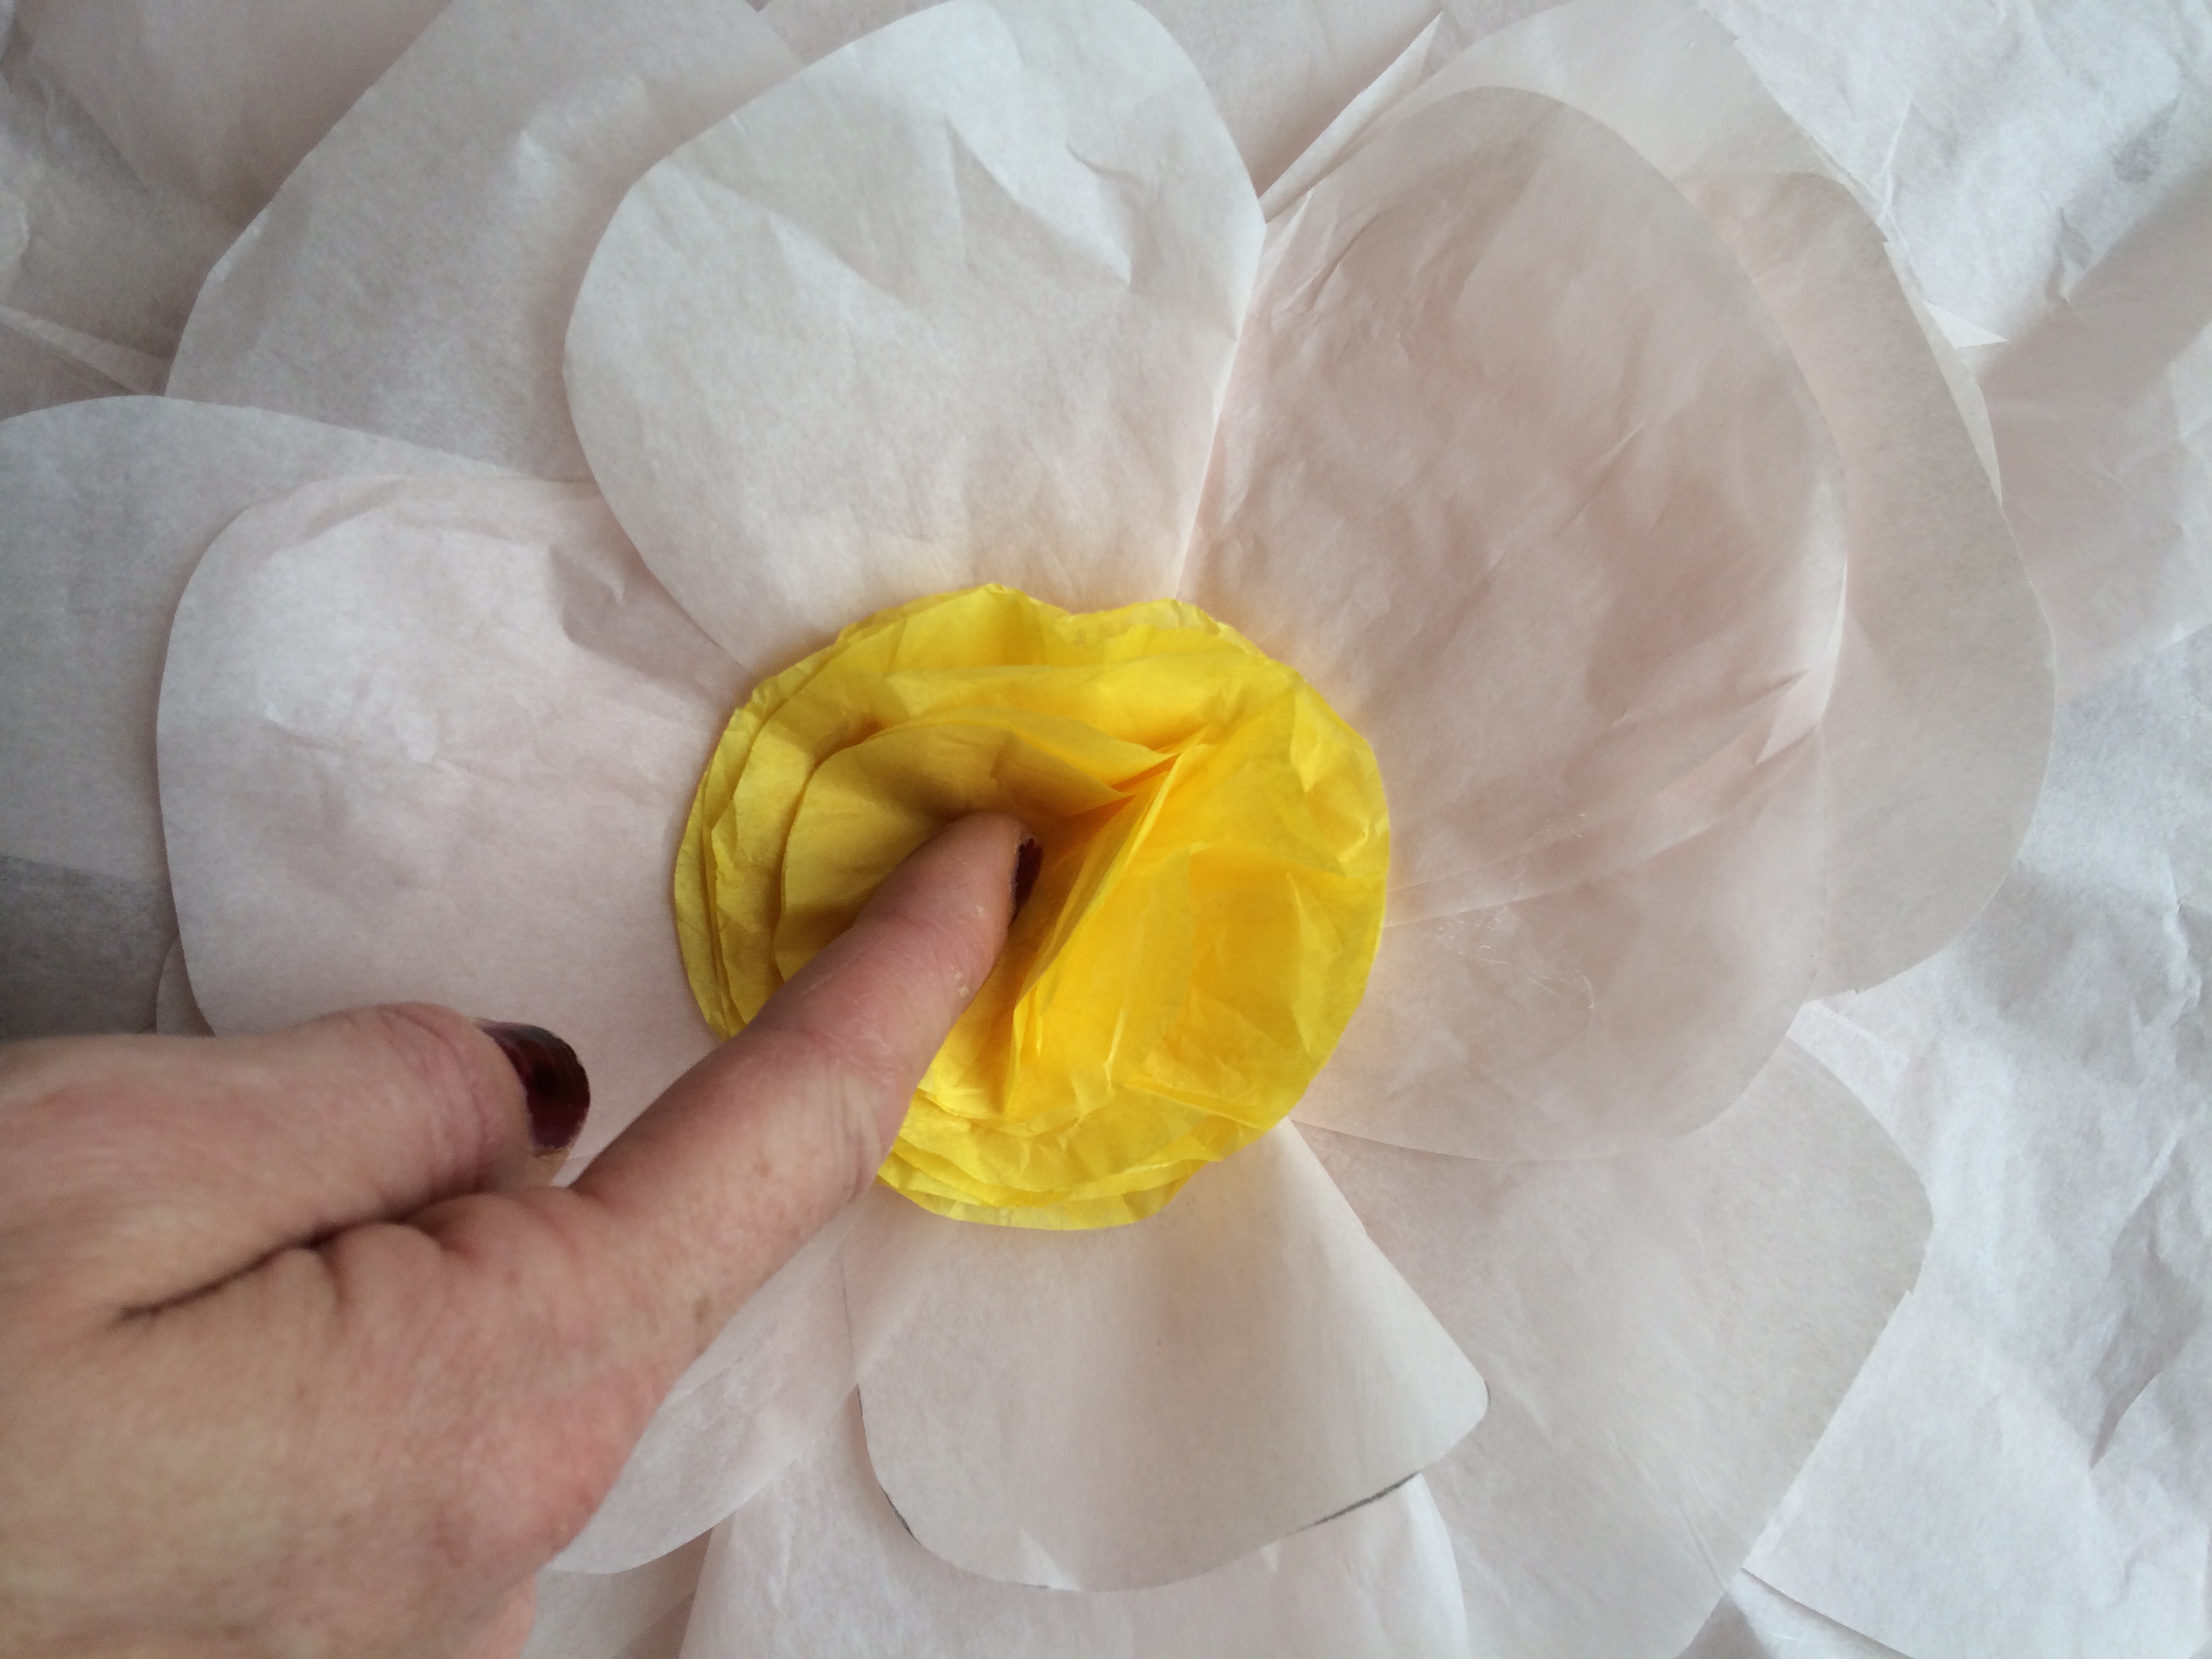
We’re almost finished! To me, the center of this flower is what makes it look natural. For this we are going to start by unfolding 4 sheets of our yellow tissue paper, and drawing a 3′ diameter circle, and a 2′ diameter circle on the top layer. Again, this does not have to be perfect. Drawing it yourself will work perfectly fine:)
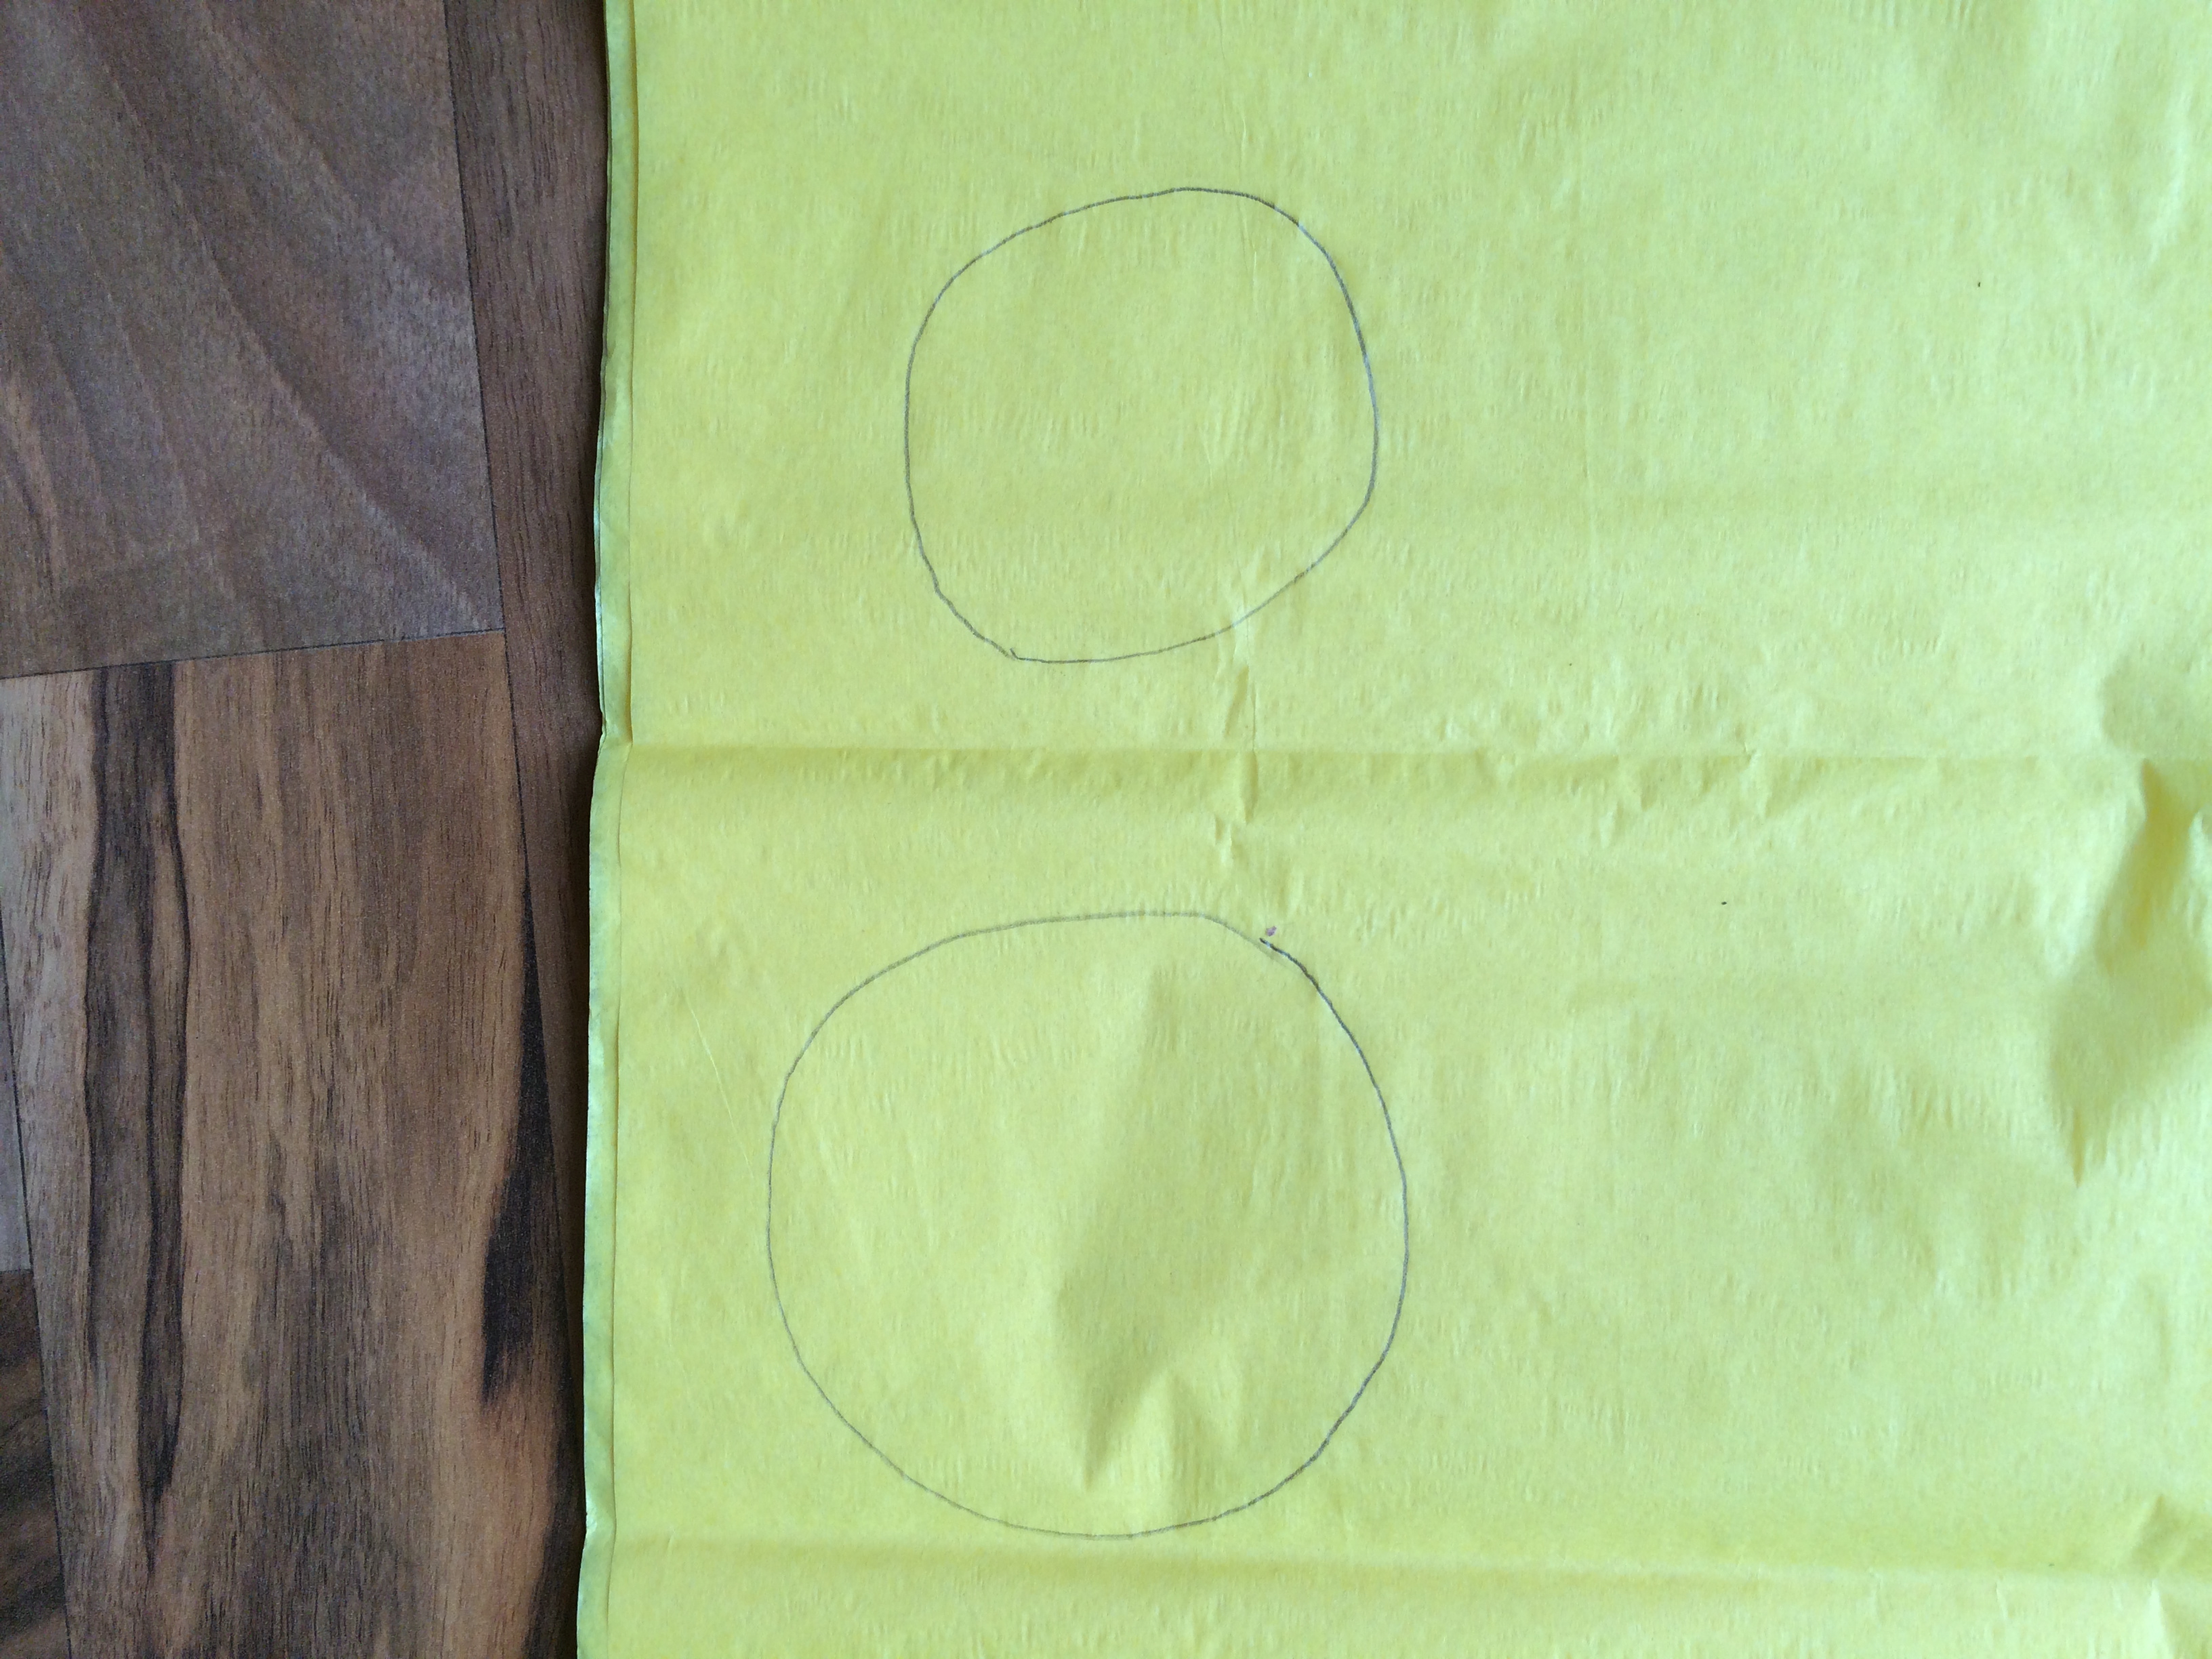
Cut out the circles (you should have 4 of each) and crinkle them up.
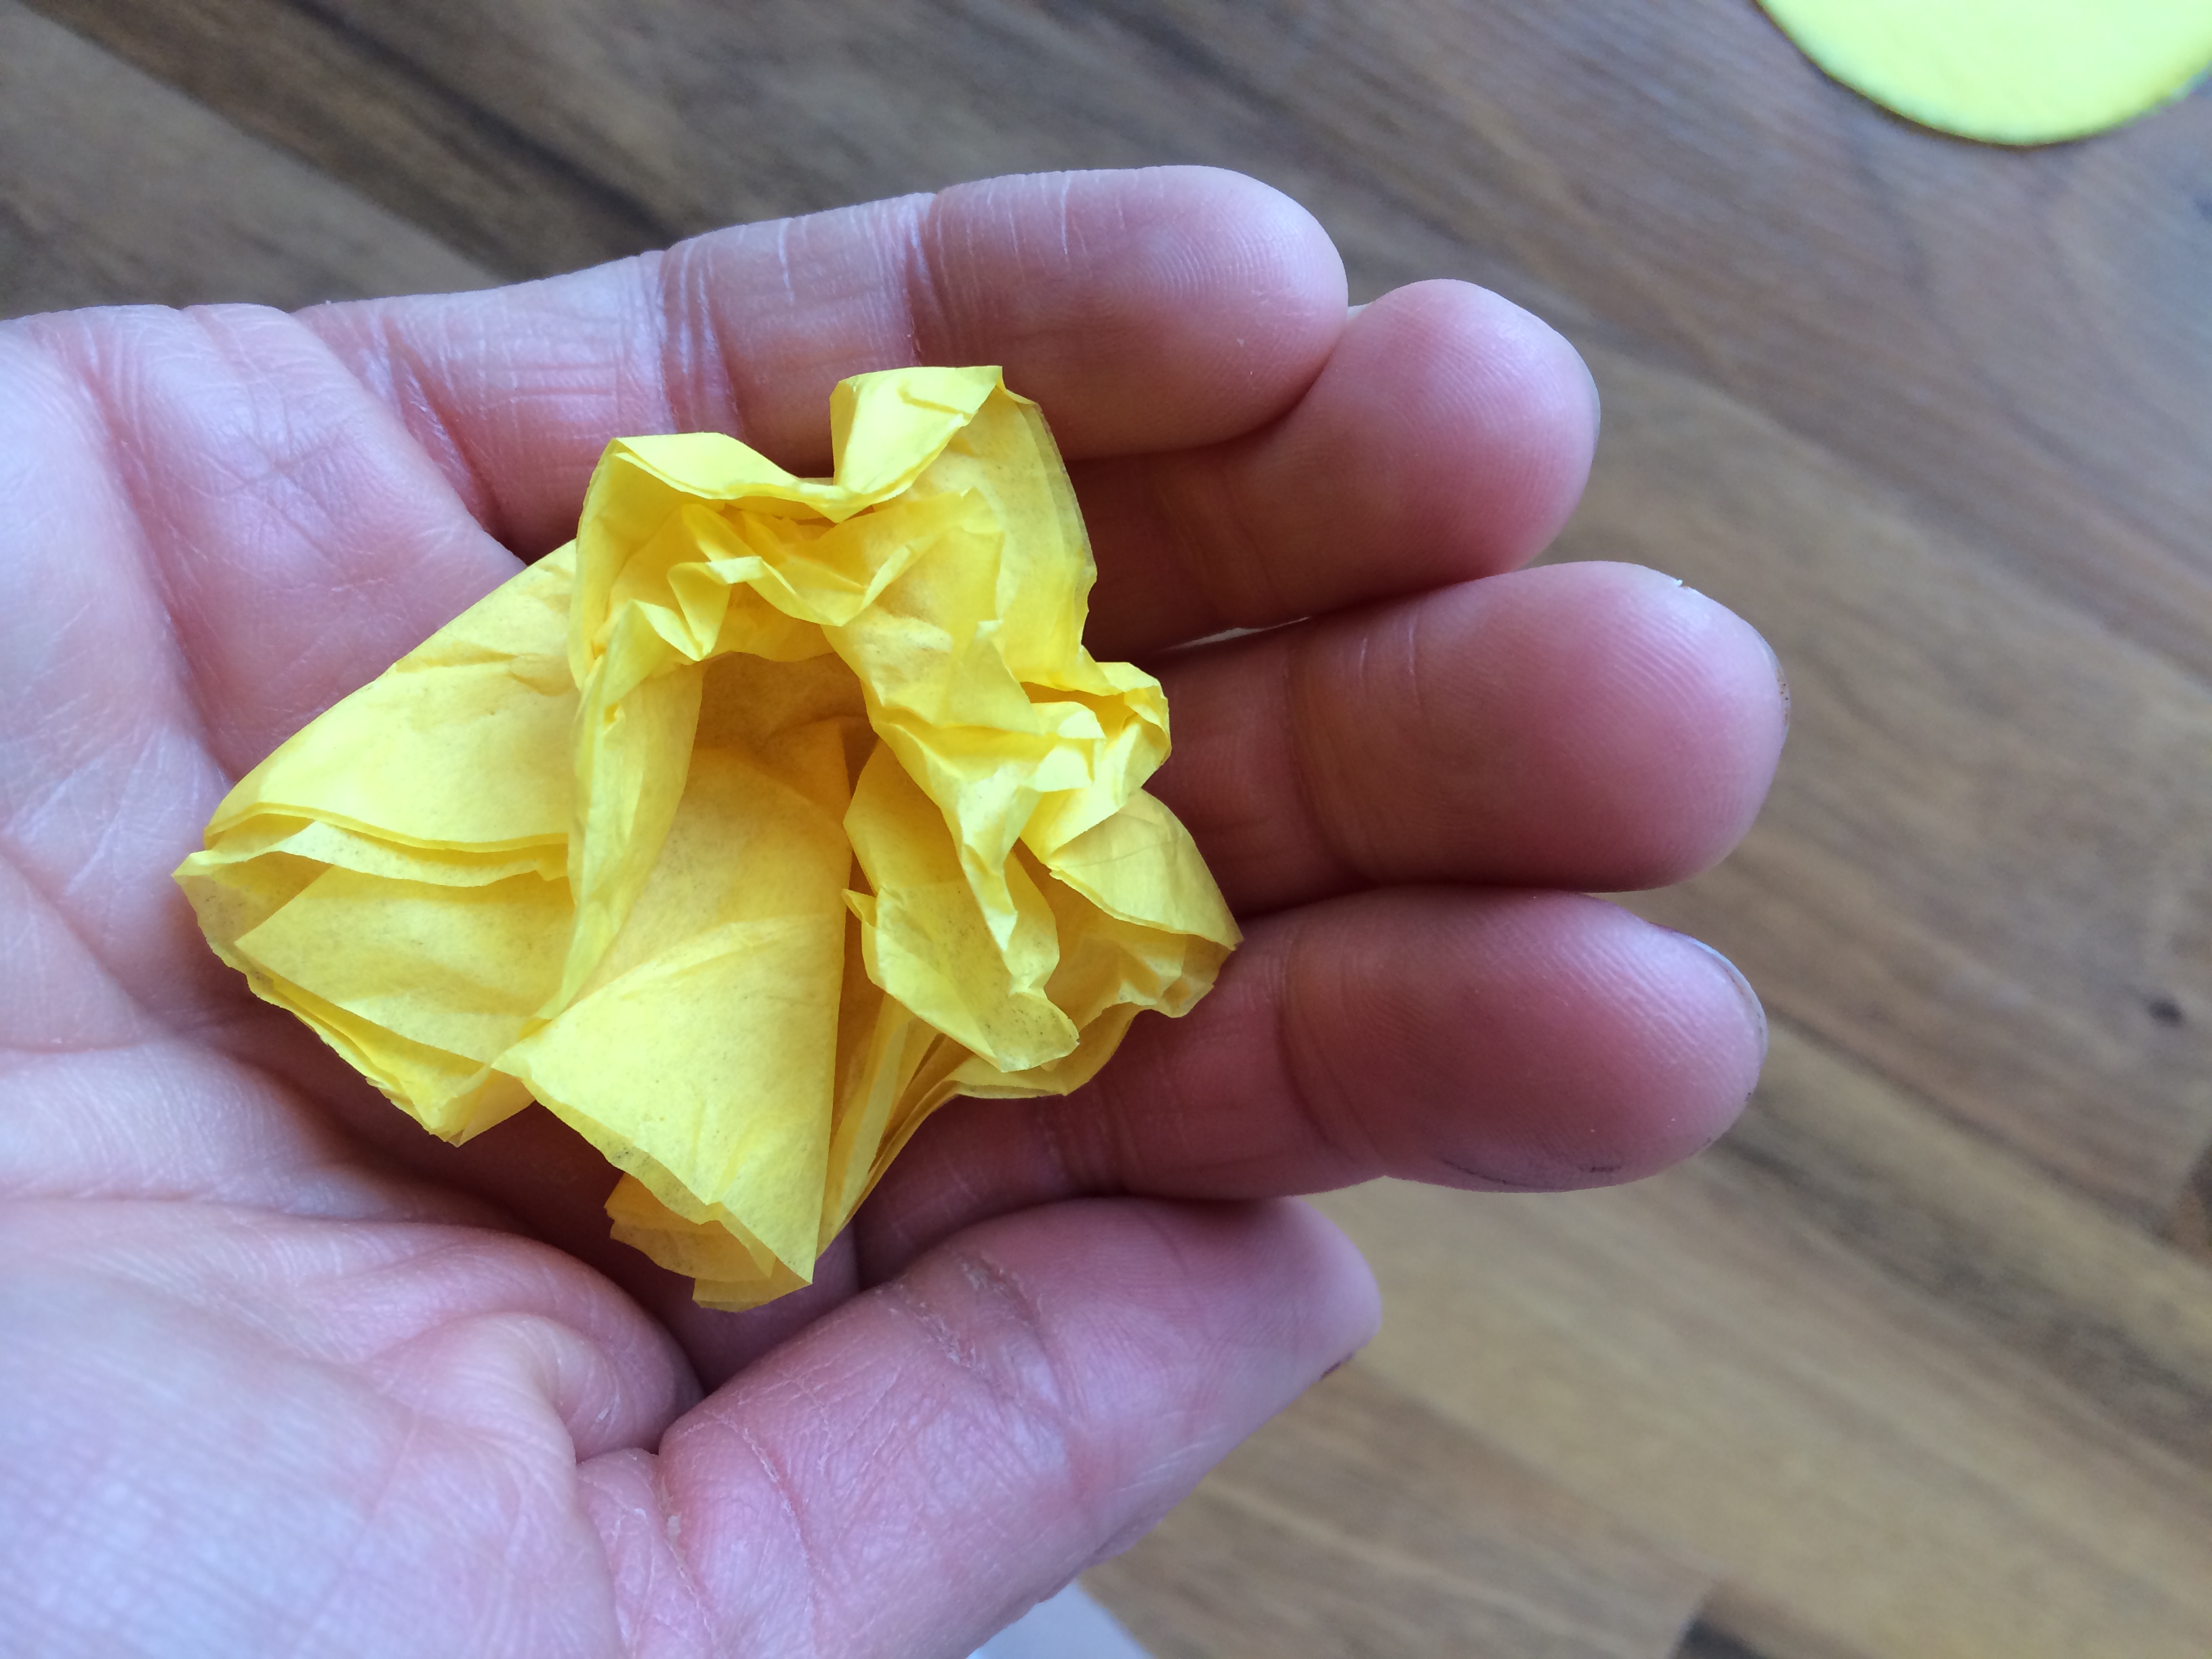
Then, layer and glue the 3′ circles to the center of the flower. After that, do the same with the 2′ circles.
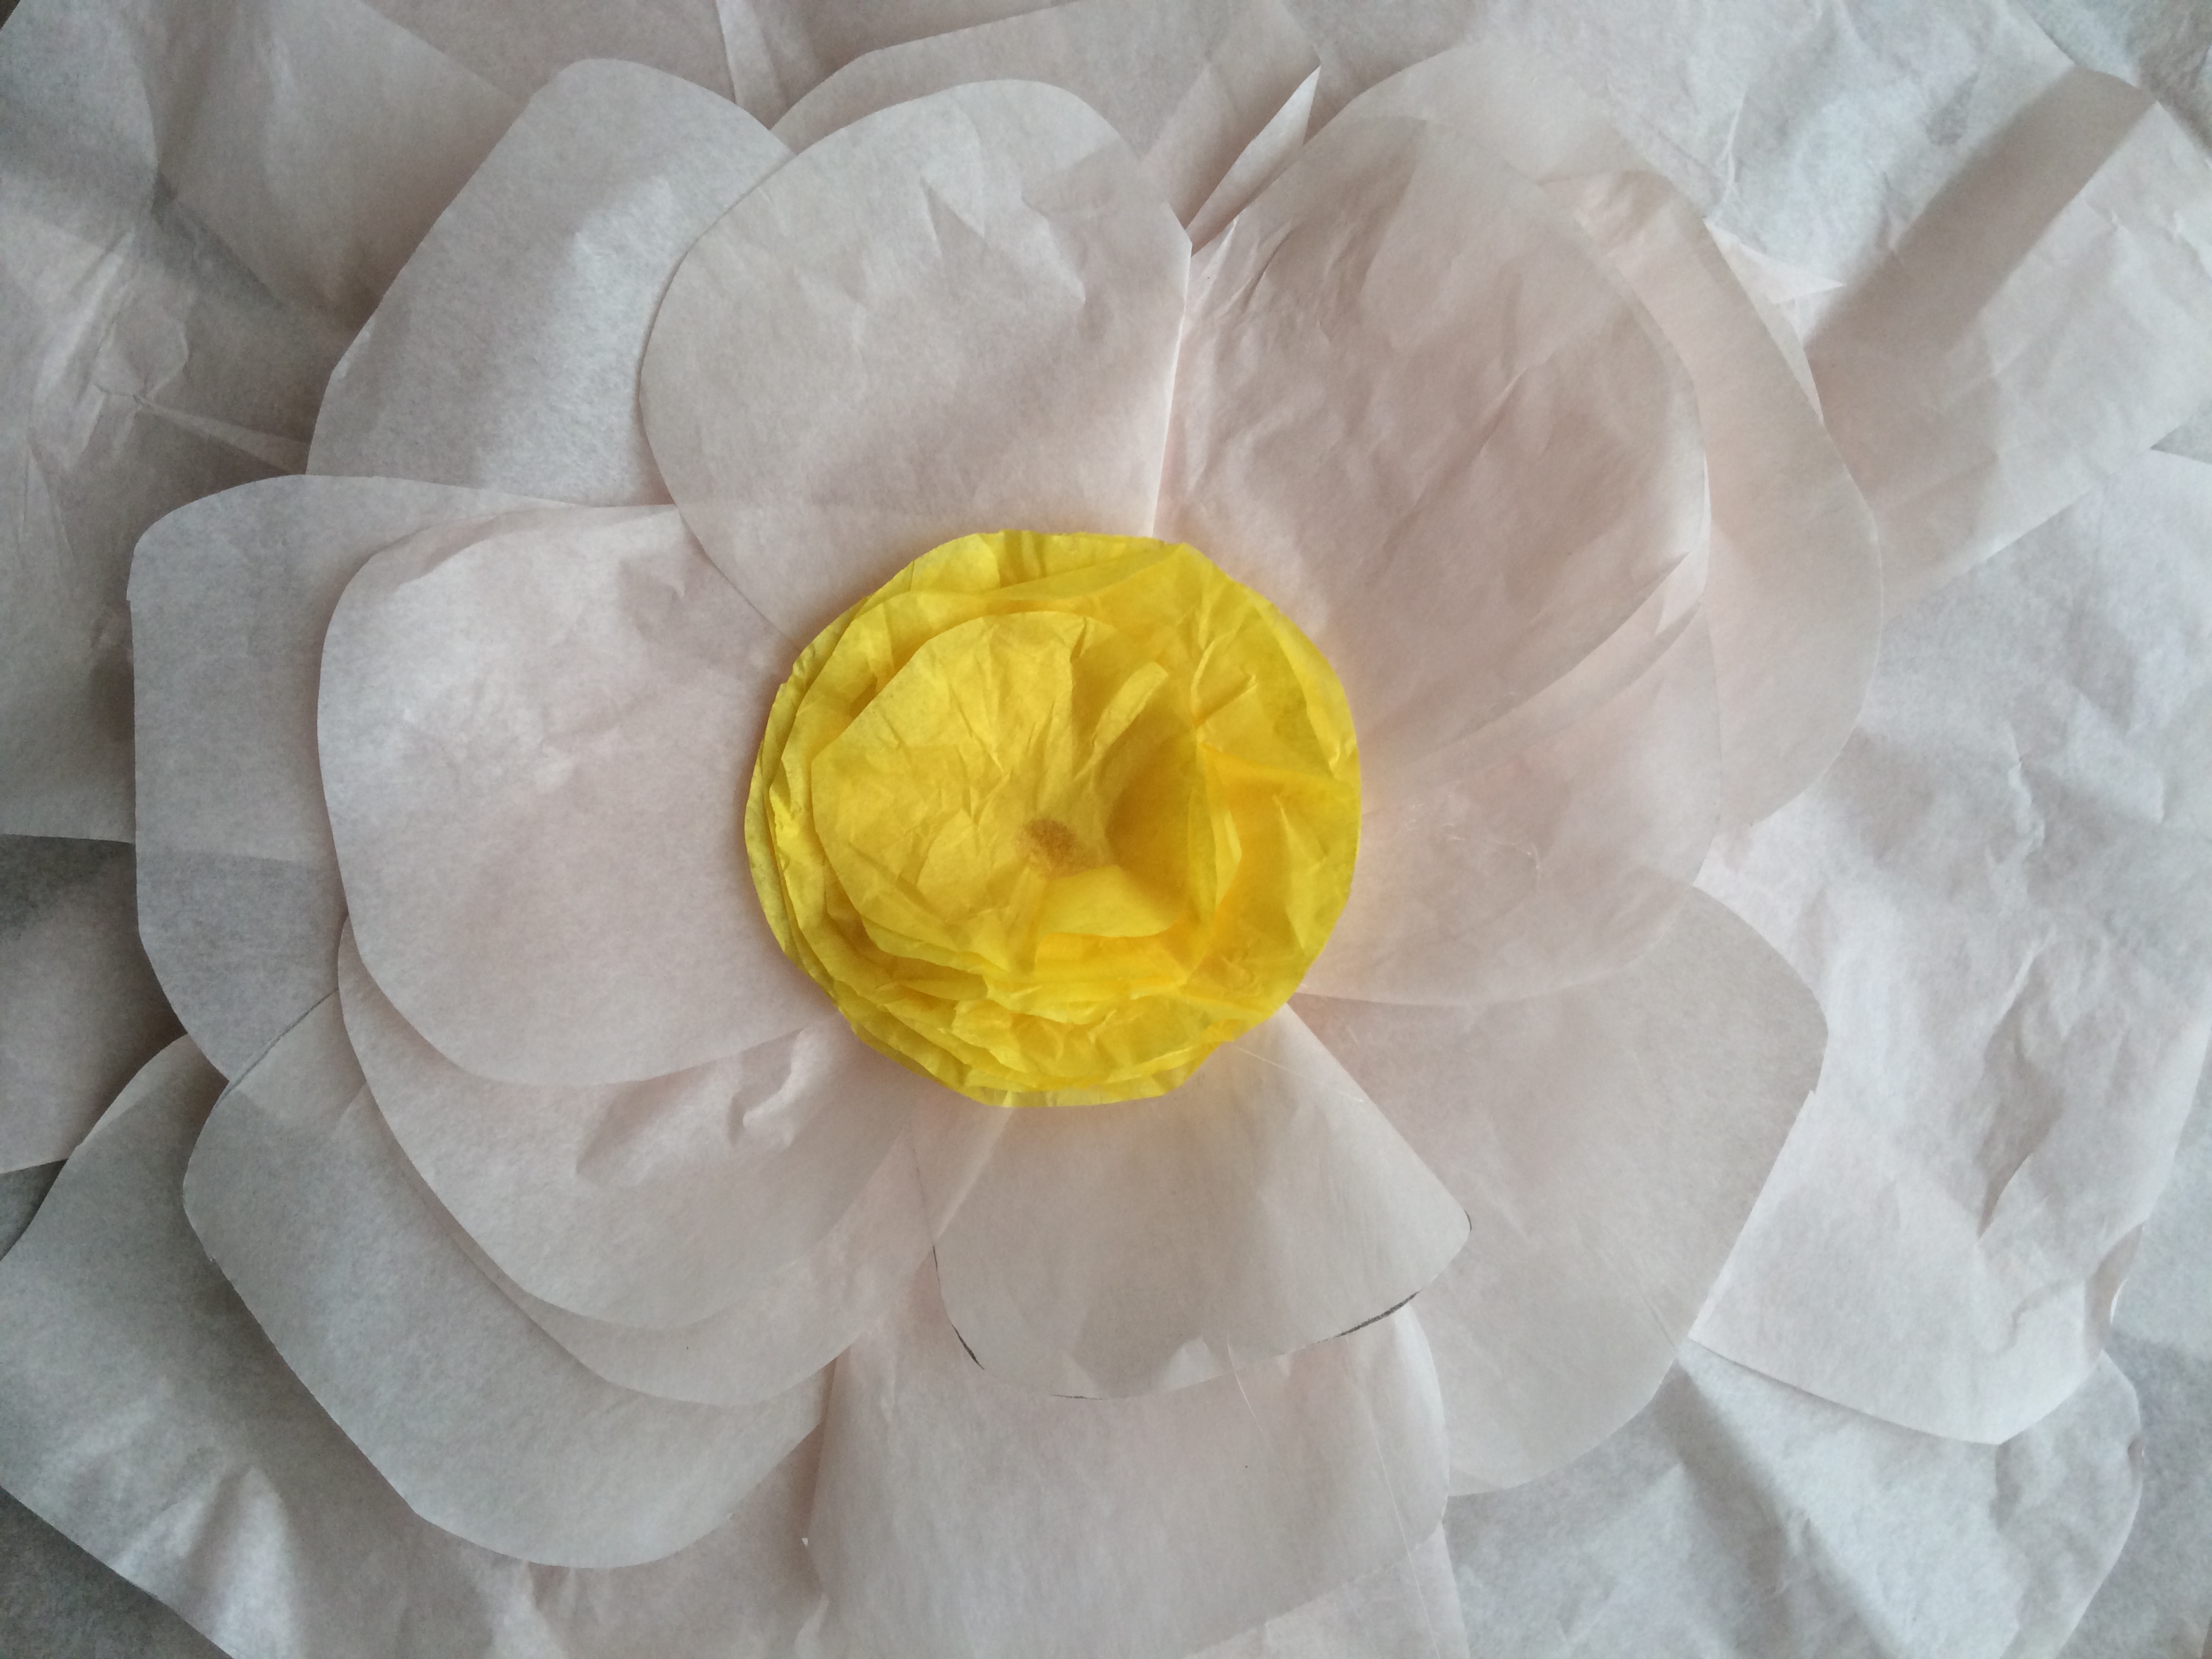
The center of your flower should now look like this:
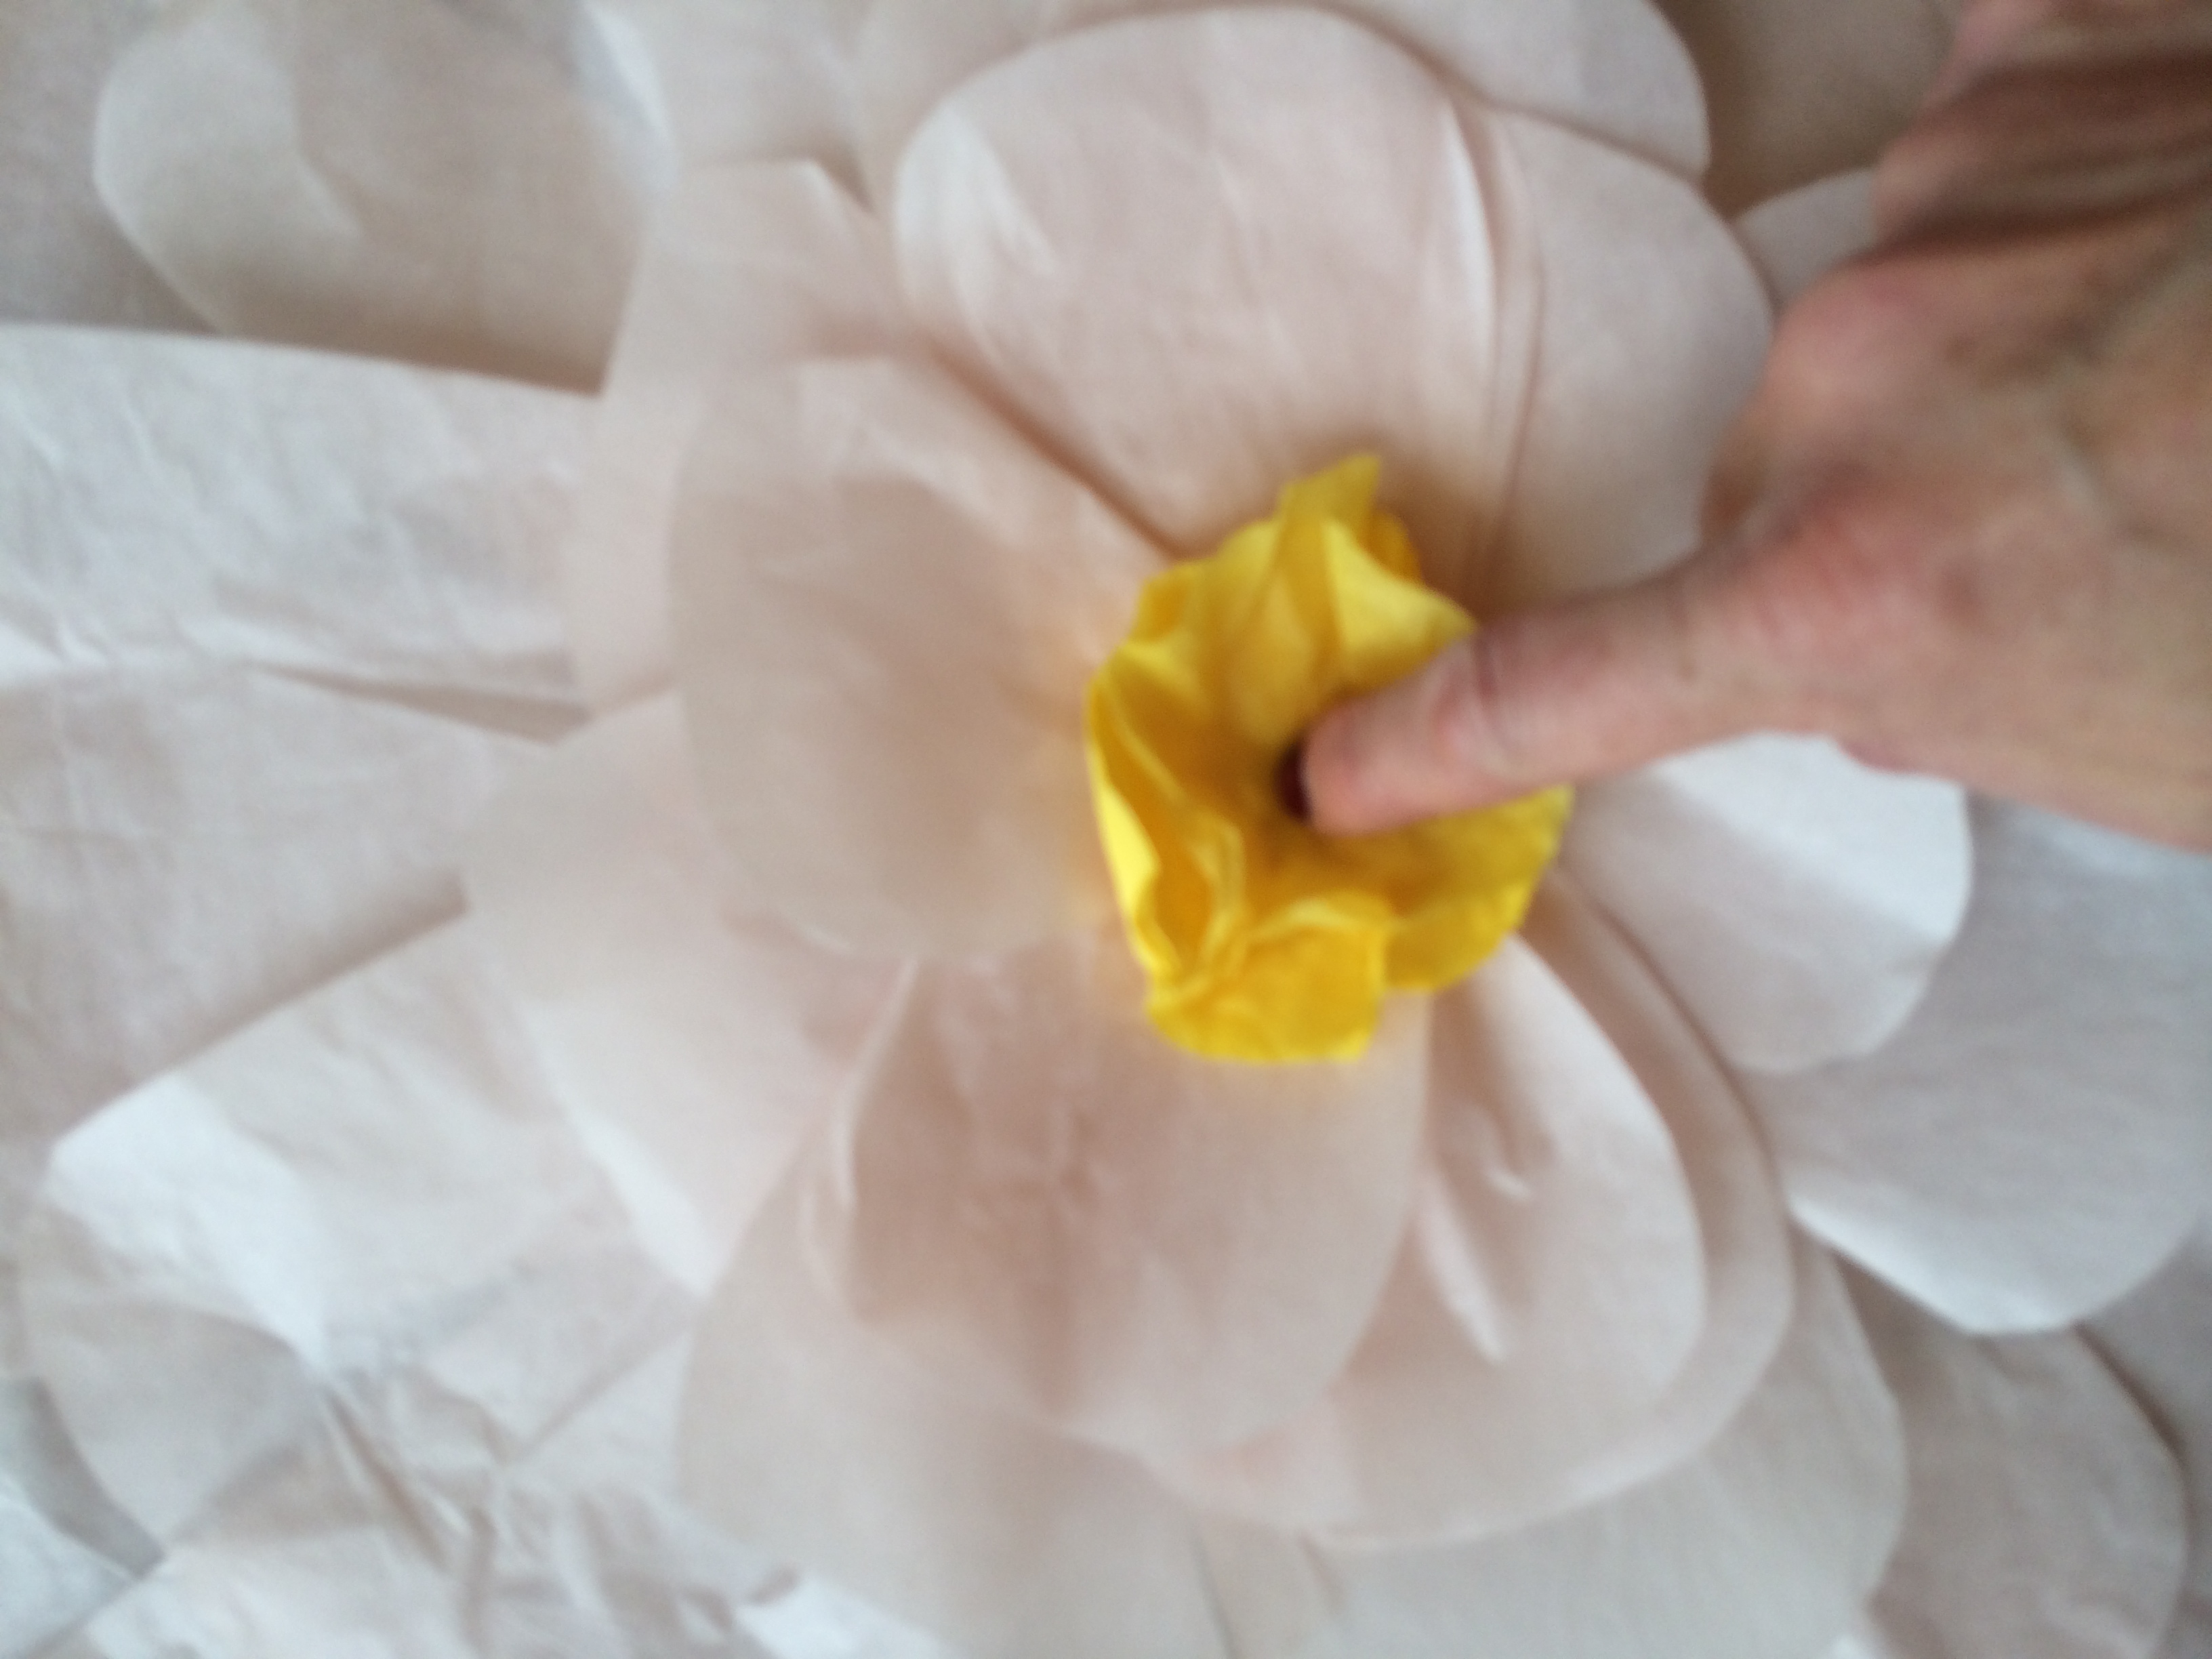
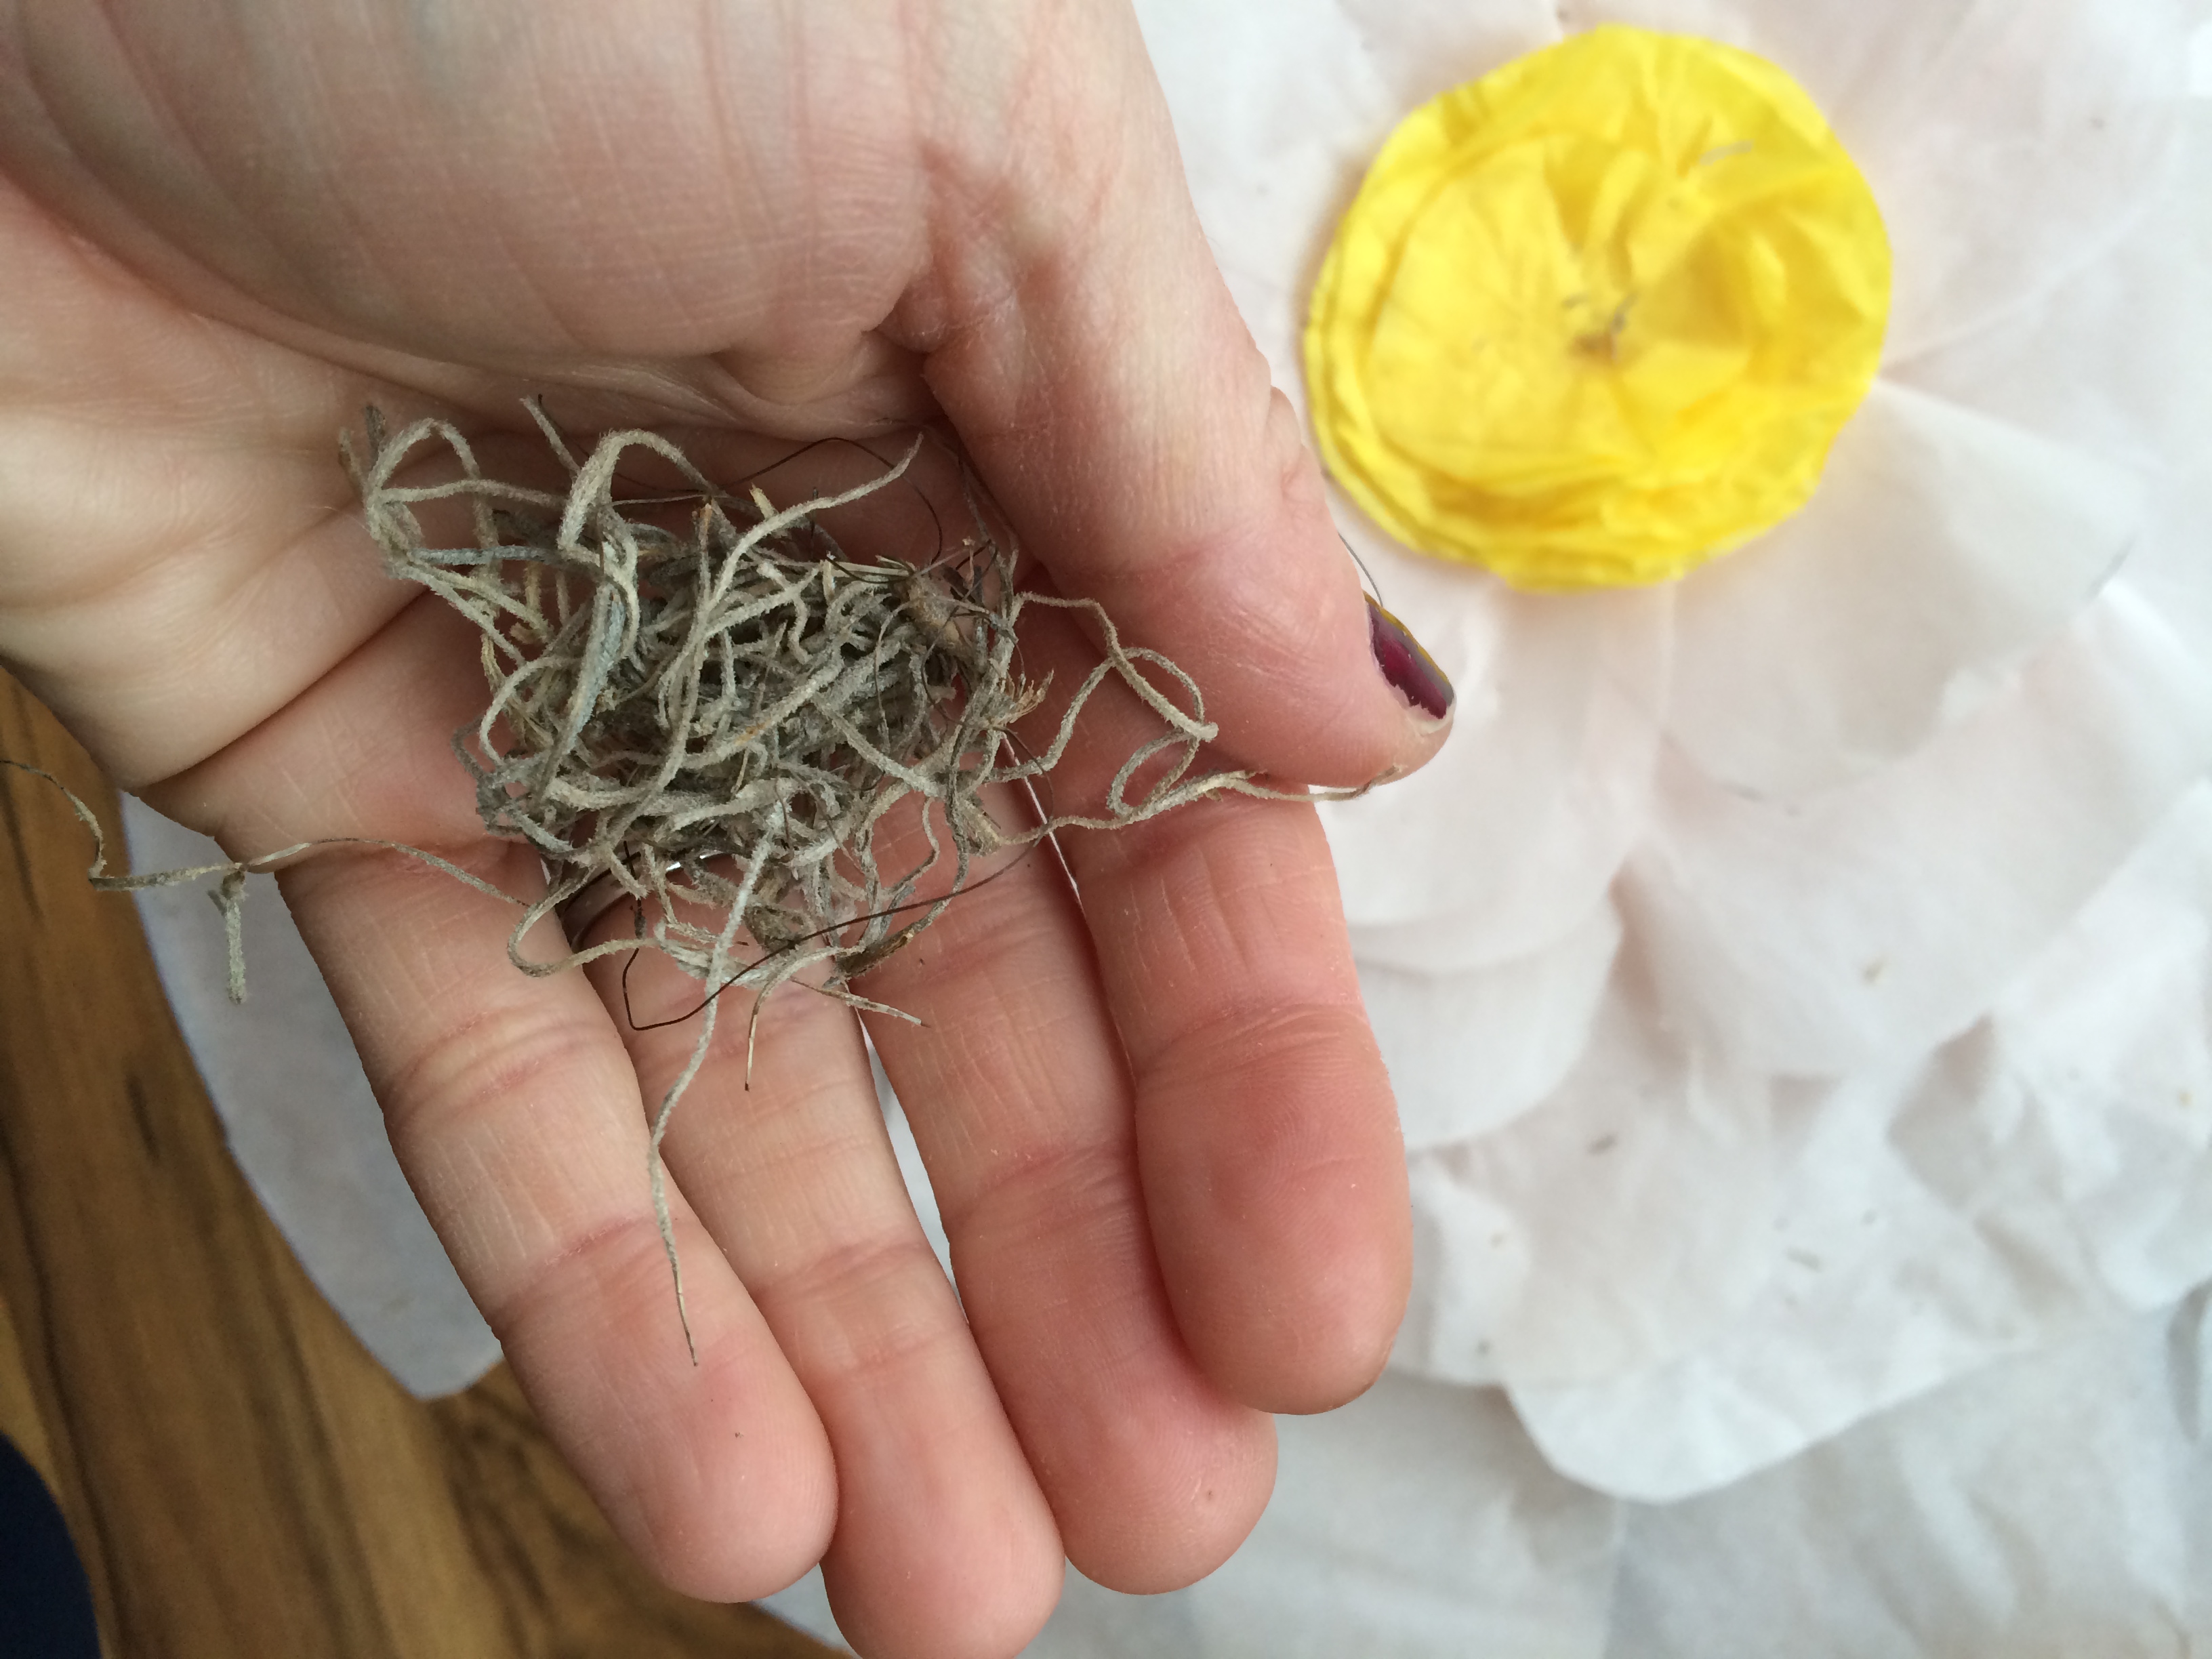
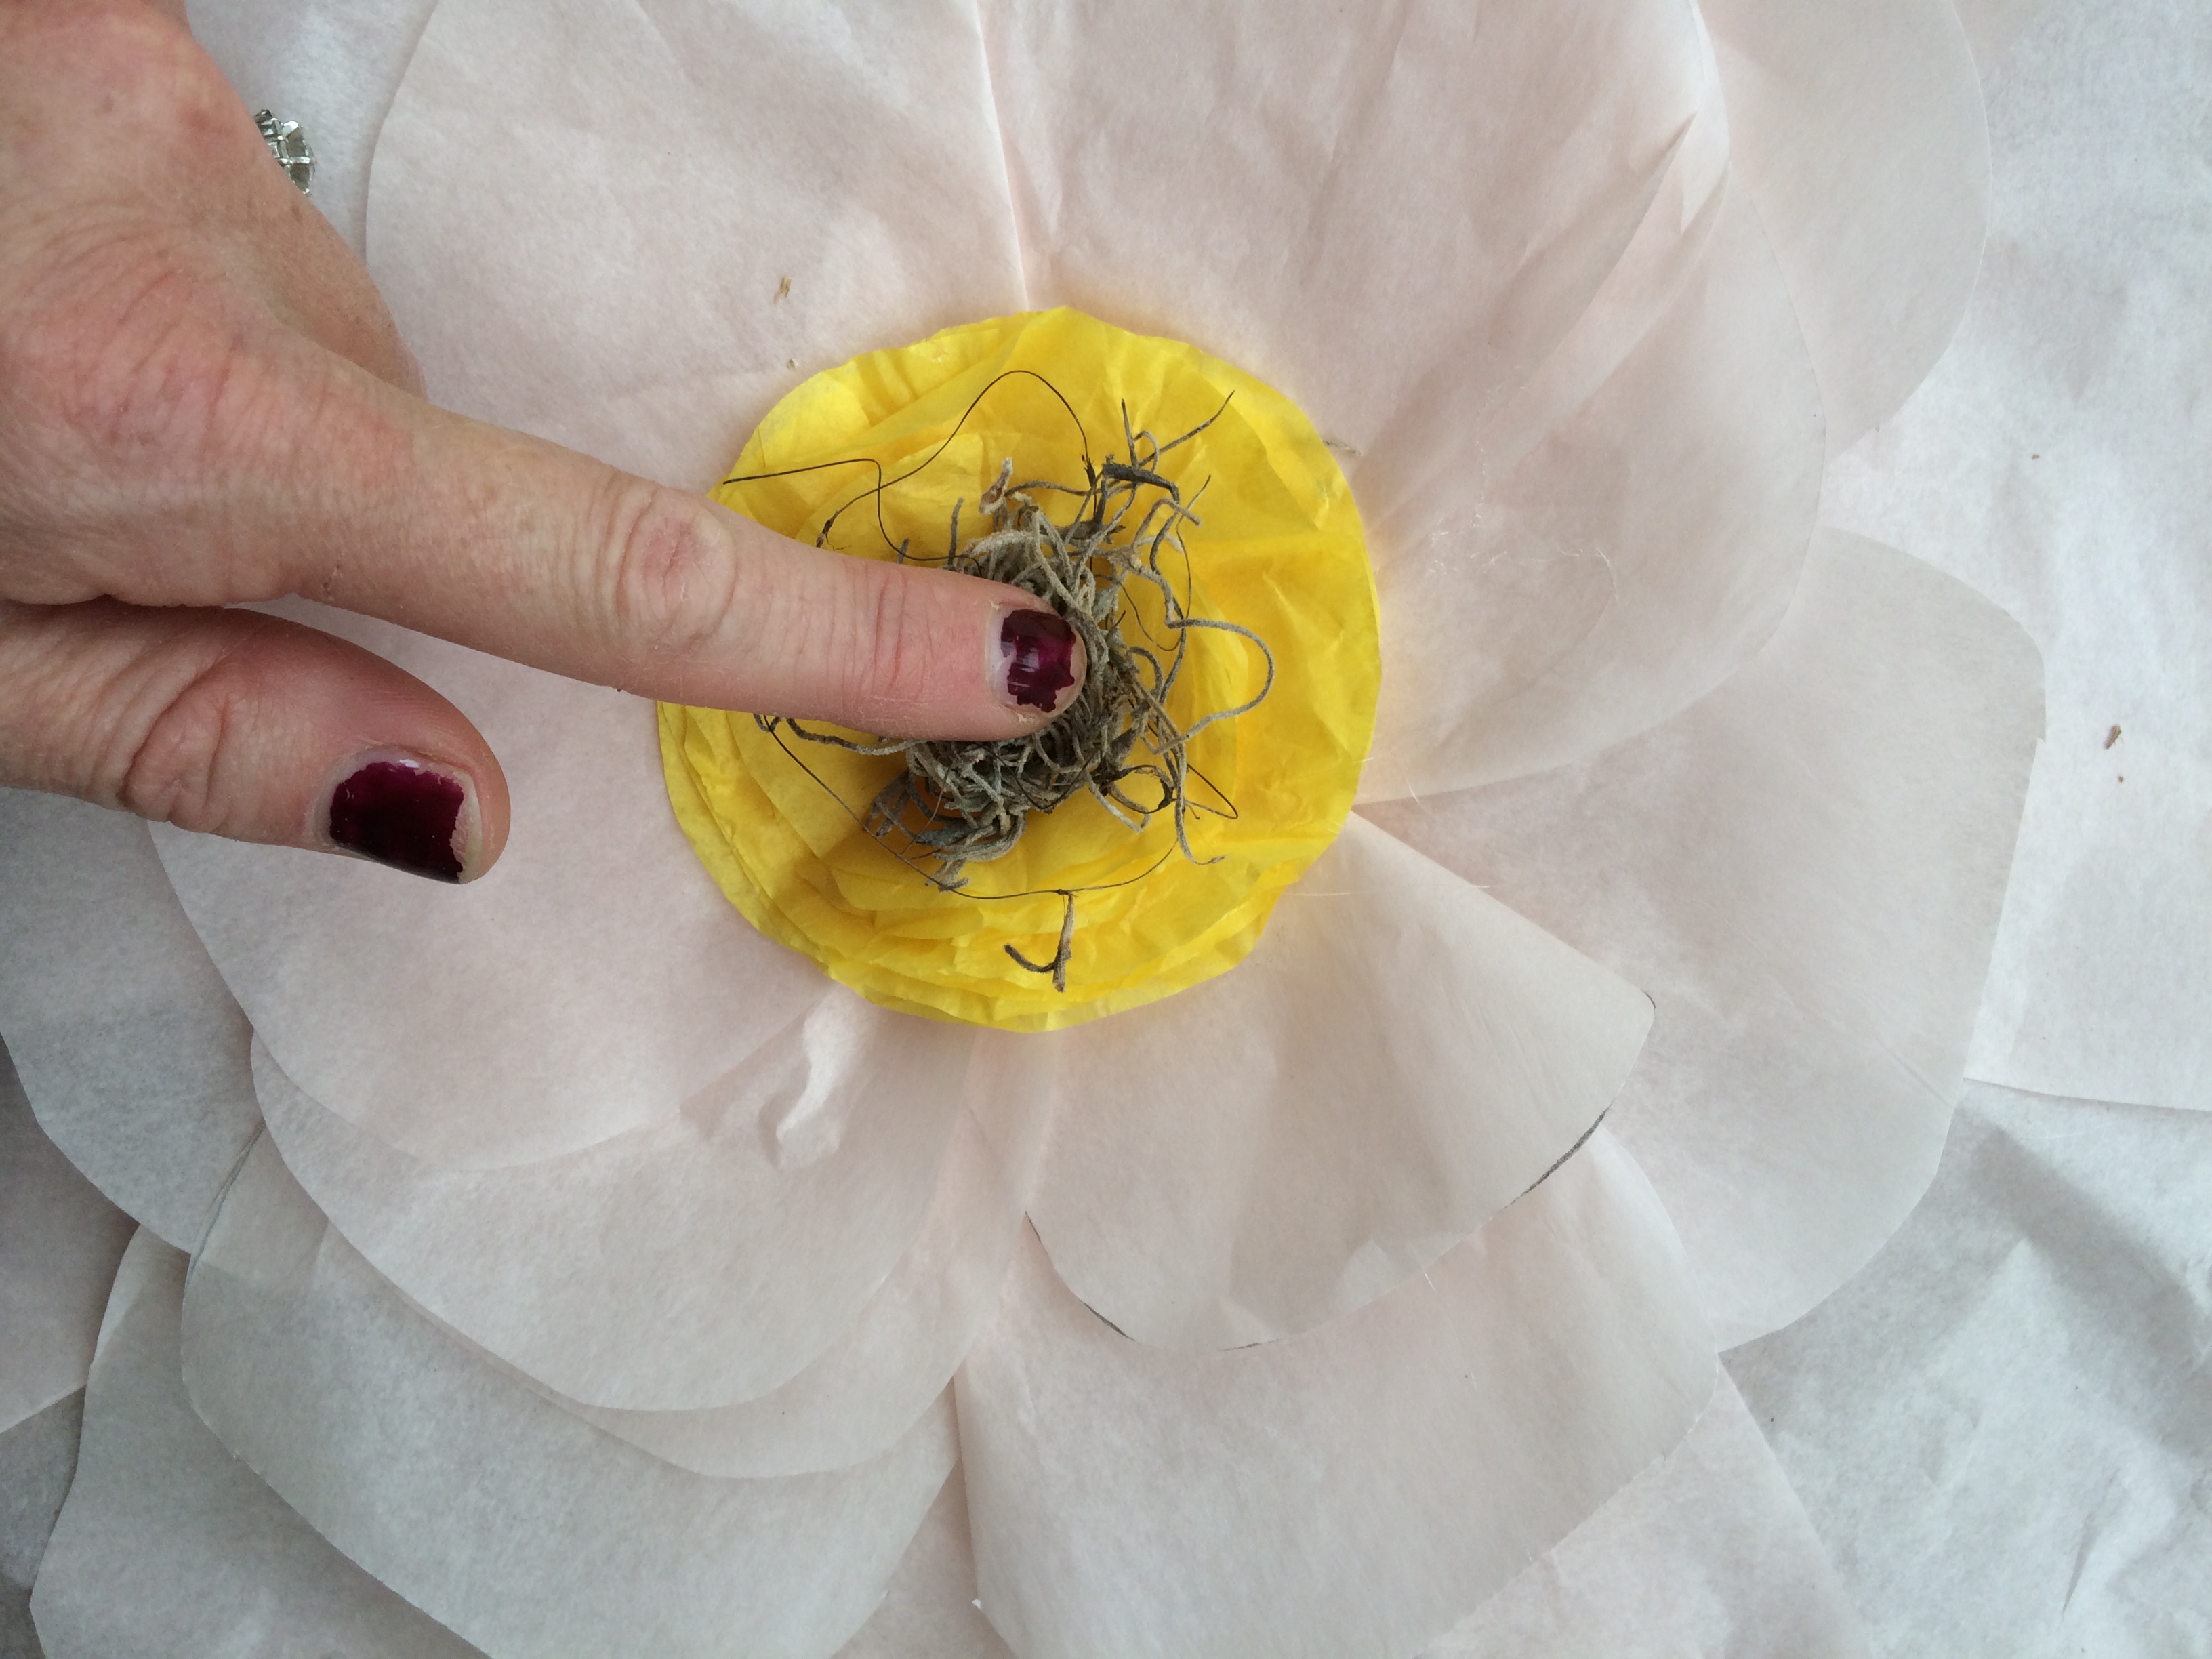
Finally, glue some of your brown grass to the center of the yellow.
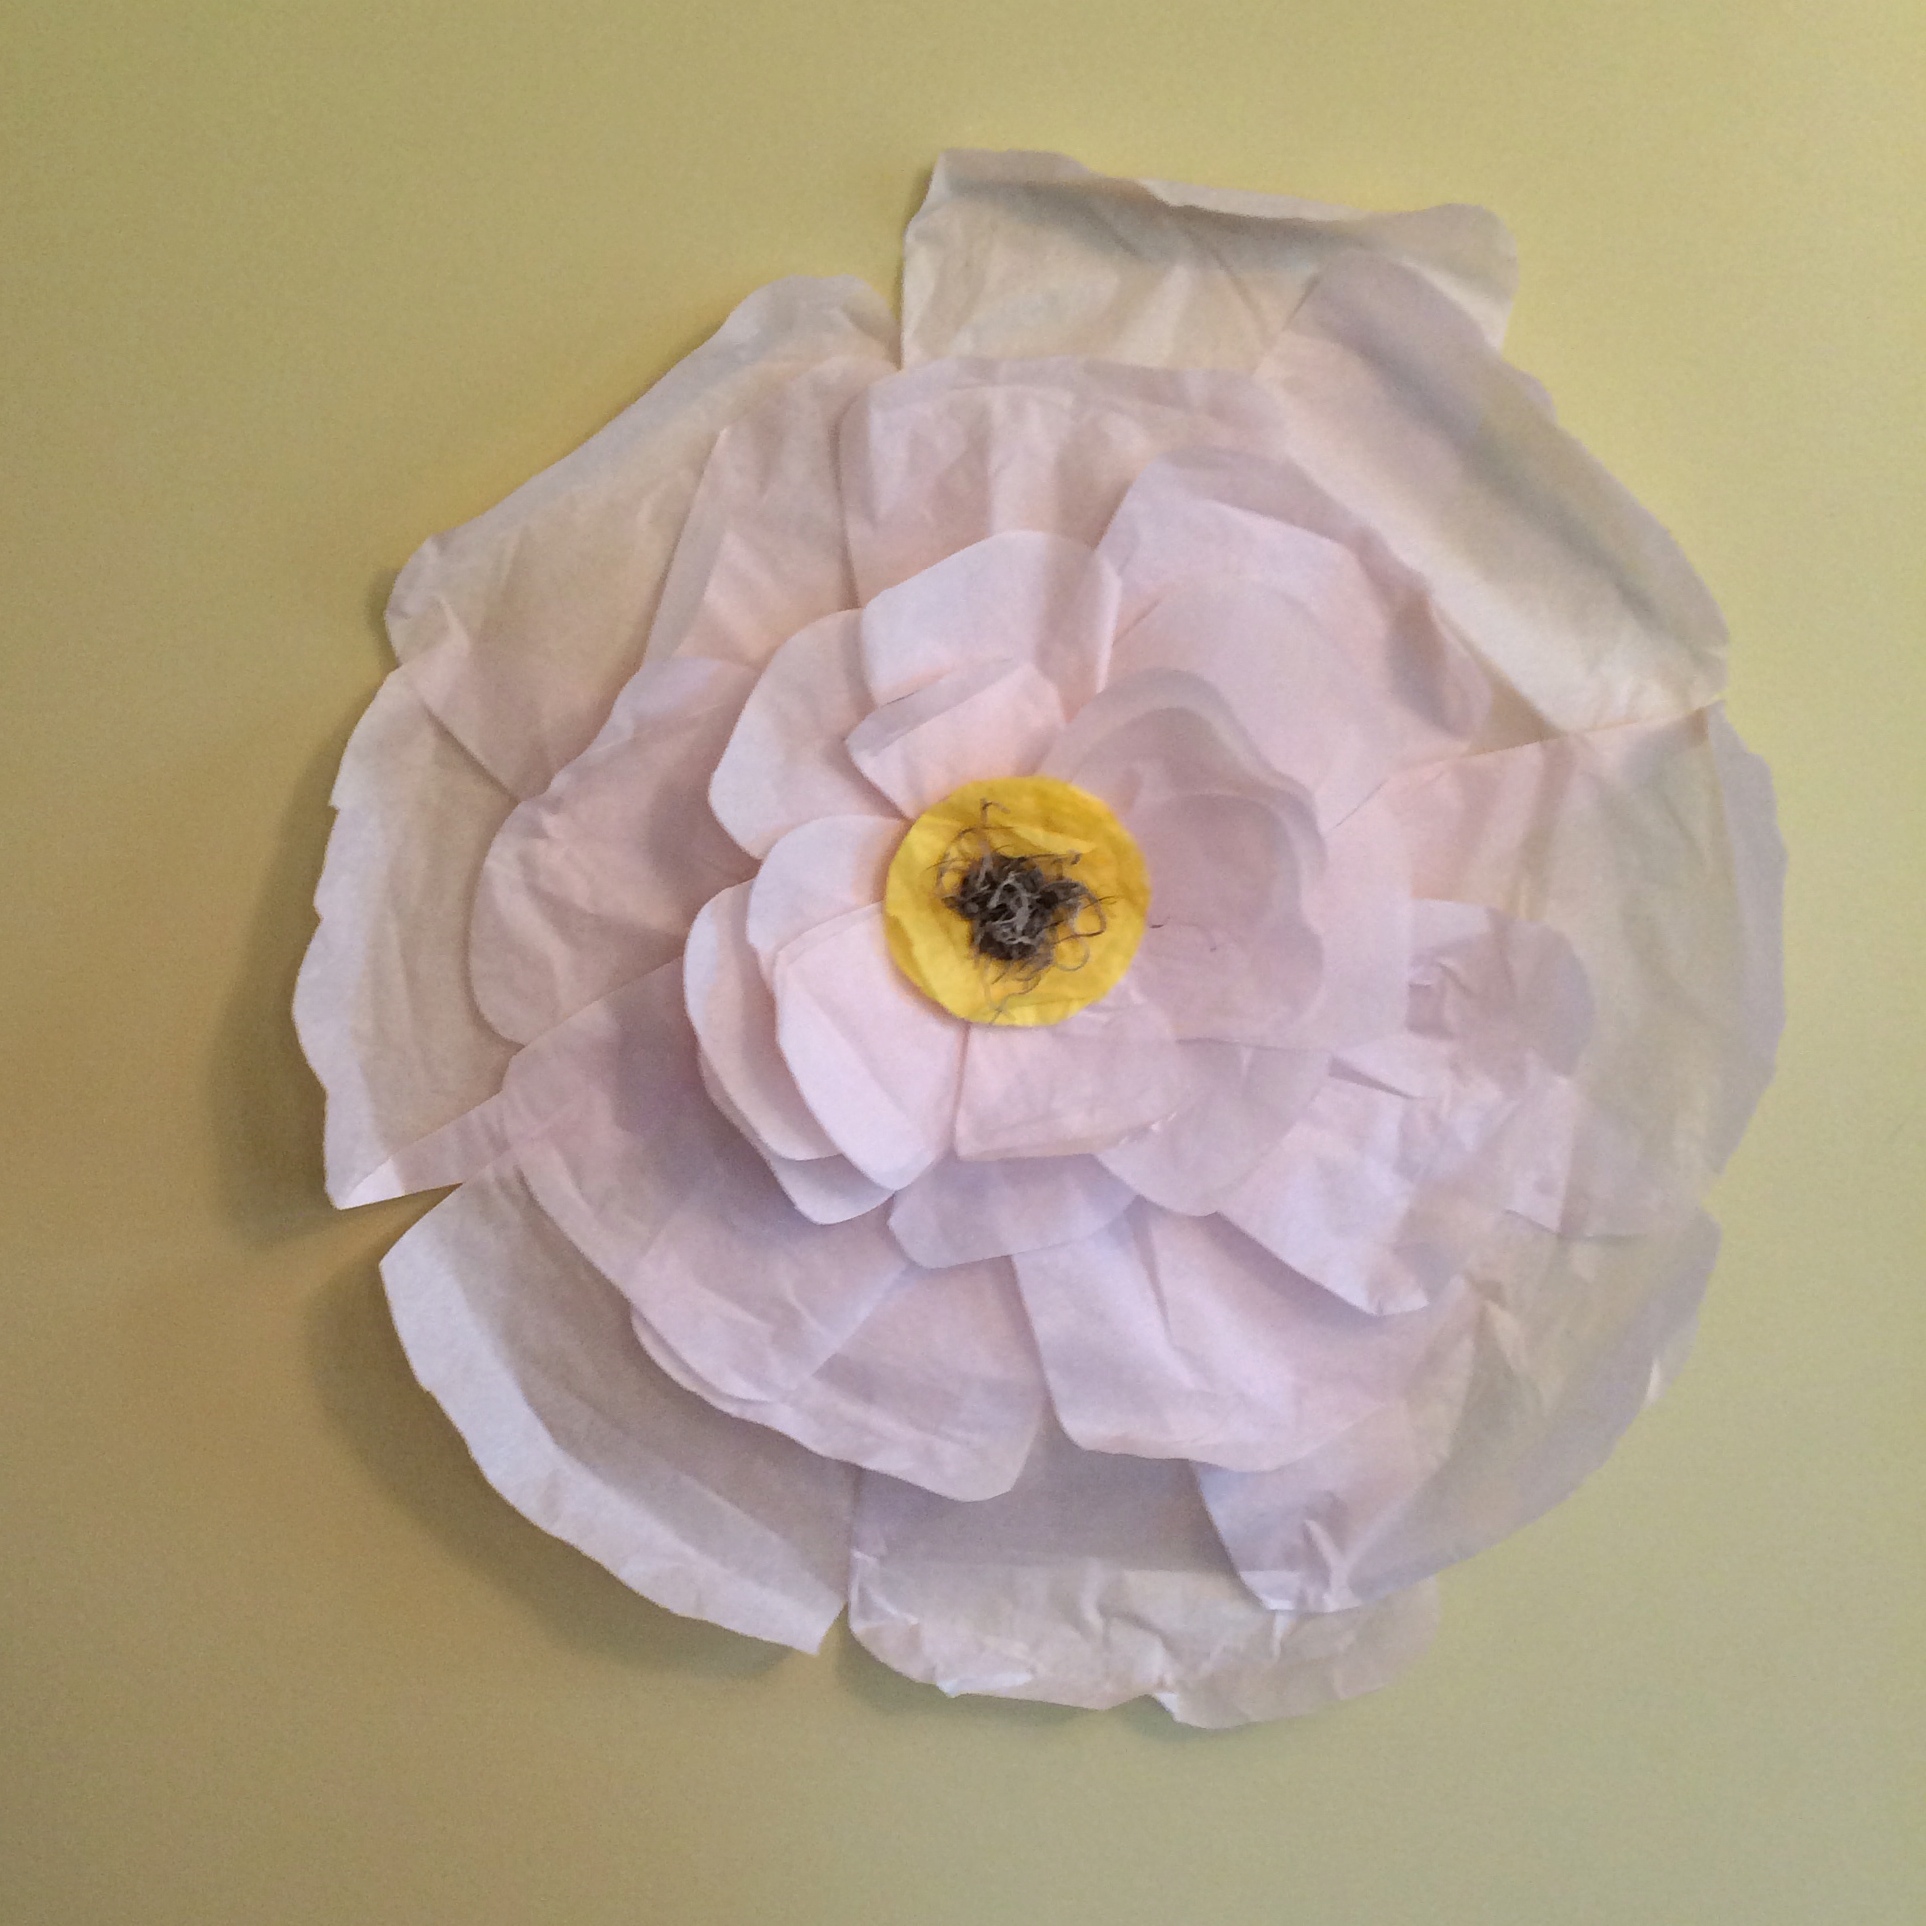
Annnnnd you’re finished! The first flower you make will take a little time. After you figure things out though, they will be very quick and easy for you to make. Another tip: Once I was completely finished with my flower, I curled the edges of the petal layers to avoid it looking so flat. You can use your fingers to or a pencil to do this.
Hope you find this tutorial helpful! If you have any questions please comment below! Also, you can totally pin this into your Pinterest account for future reference, which we think is super cool.
xo, and happy crafting!


All these are looking like real flowers!!! Really eye-catching and standard! Hope the process will be easy for me! Going to start!!! :)